Hammock Camping 101: Gear, Setup & Tips for Beginners
Hammock camping is lighter than tent camping, keeps you off uneven ground, and many people sleep better suspended. But it requires a completely different setup technique. The most common mistake beginners make is hanging their hammock tight and straight like a banana — that guarantees a sore back. The counter-intuitive fix: a relaxed sag and a diagonal lie give you a flatter, more comfortable sleep than any taut setup.
Here’s exactly what gear you need and how to hang it for a good night’s sleep.
What You’ll Actually Need for a Good Night’s Sleep
A hammock camping system has four core parts. Leave one out and you’ll end up cold, wet, or on the ground.
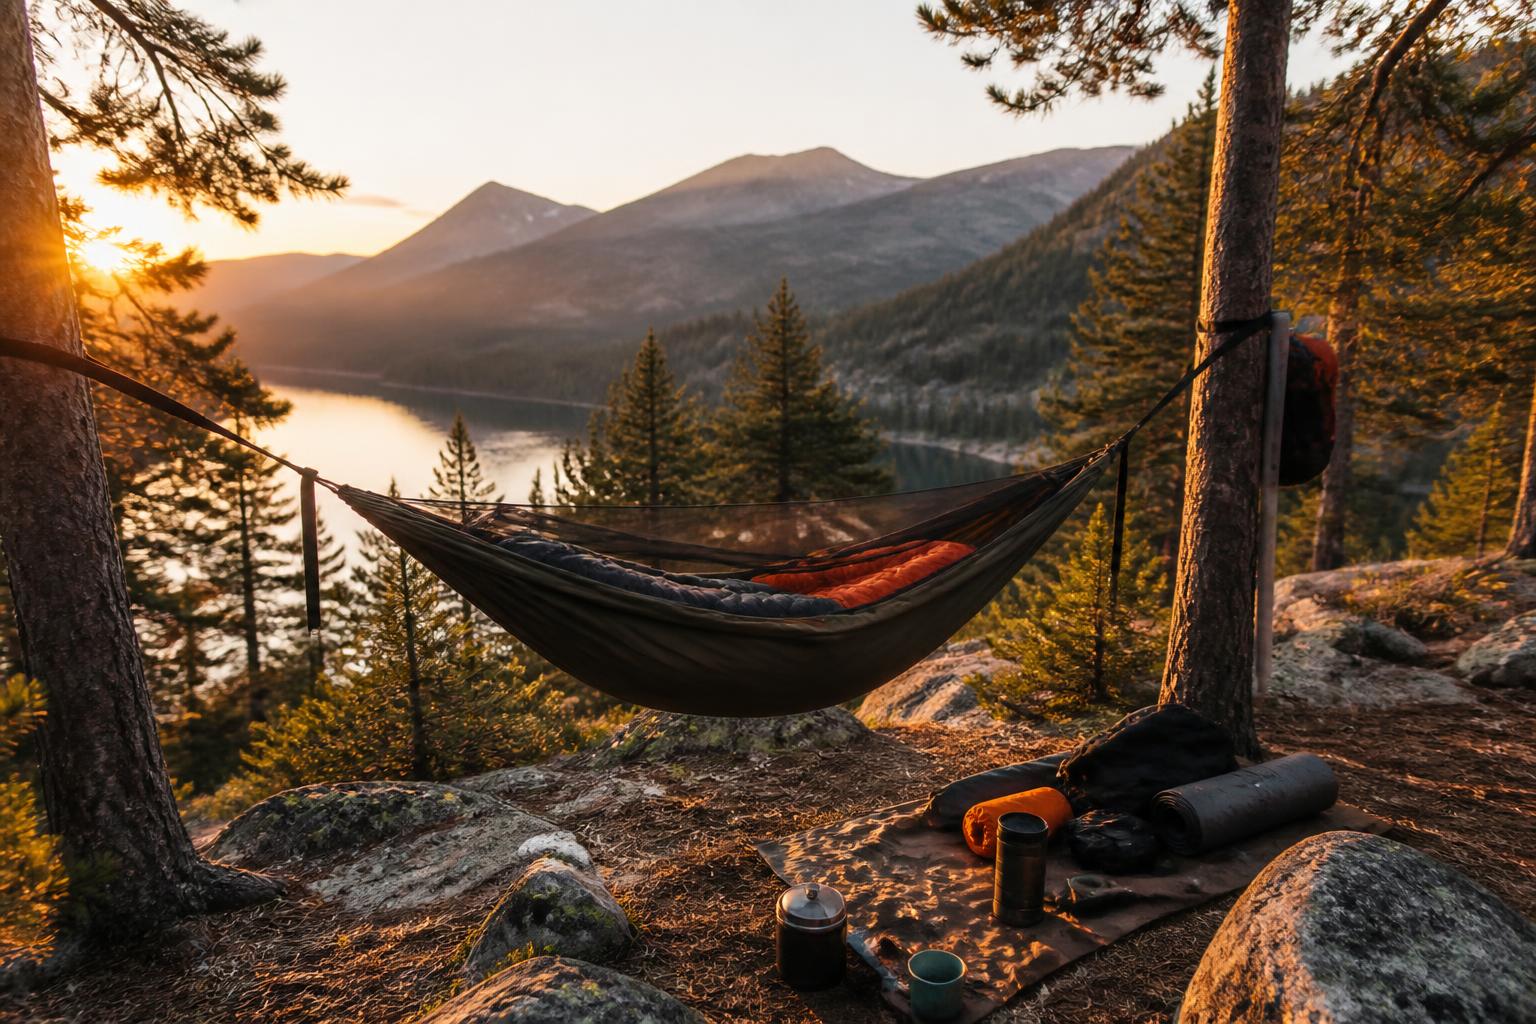
Hammock Body
Length matters far more than width. Most 9-foot hammocks cramp anyone over 5’8”. An 11-foot hammock lets you lie diagonally and get a nearly flat lay. Look for 1.6 oz or 1.9 oz ripstop nylon or polyester — lighter fabrics save weight, heavier fabrics survive rough use.
Suspension System
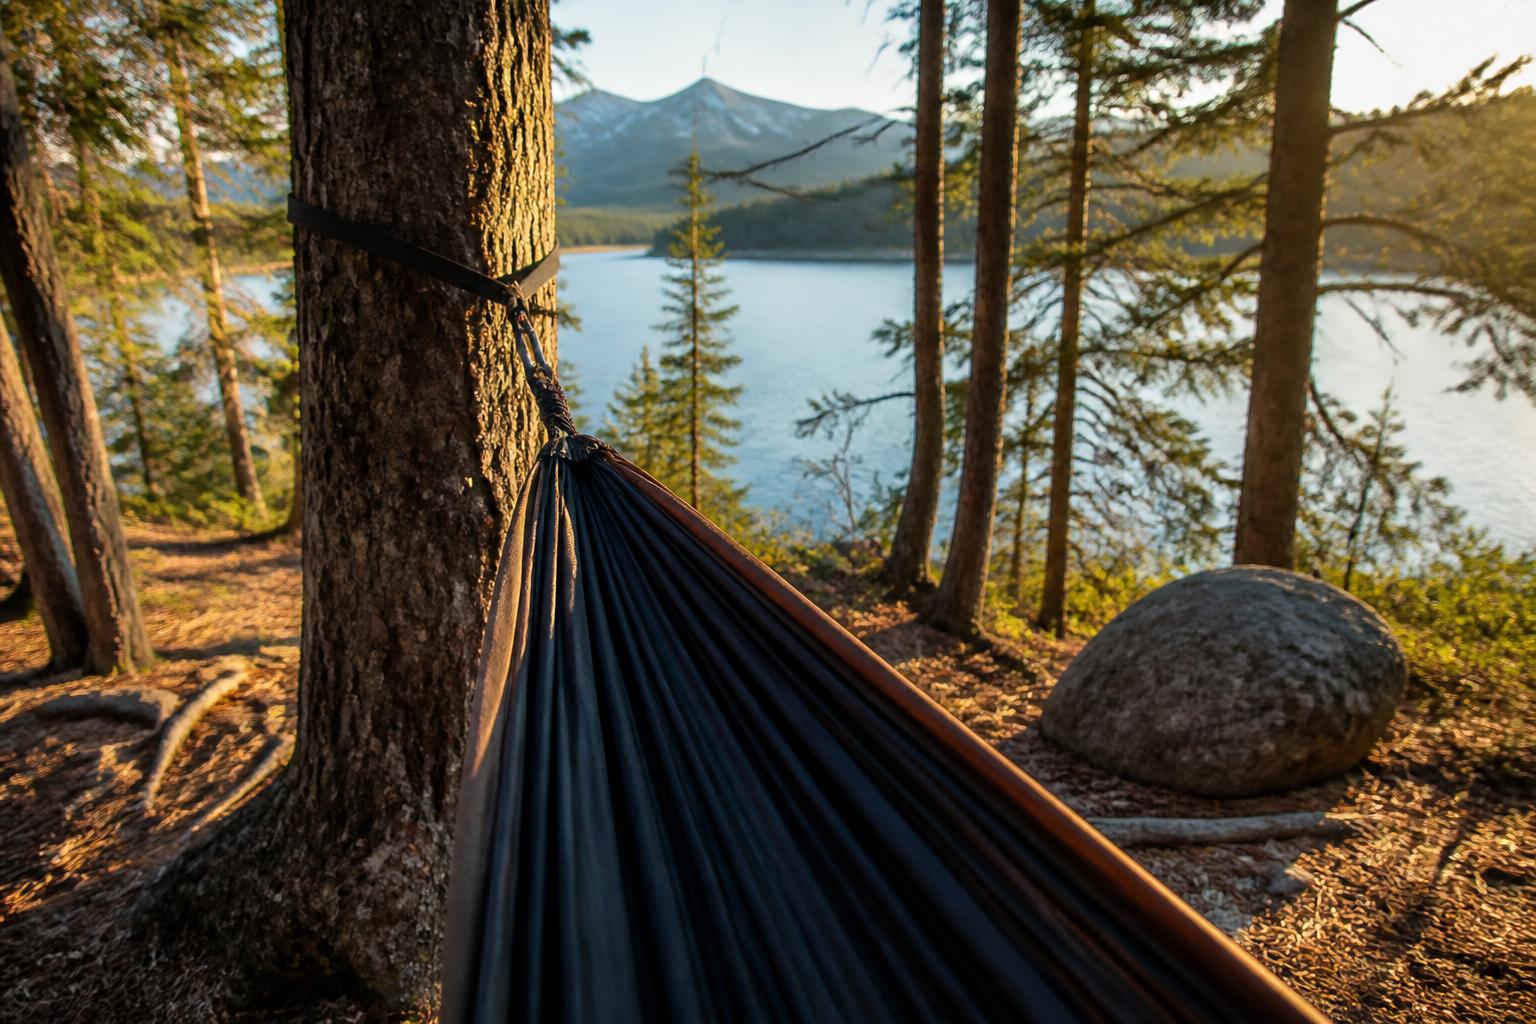
Use tree-friendly polyester straps at least 1 inch wide. Never use paracord as your main suspension — it stretches, saws into bark, and can snap under load. A typical system uses two straps that wrap around the tree and connect to your hammock with buckles or carabiners.
| Suspension Type | Weight | Adjustability | Best For |
|---|---|---|---|
| Buckle/strap | Moderate | Easy step adjustment | Beginners |
| Whoopie sling | Light | Continuous adjustment | Backpackers |
| Cinch buckle | Moderate | Tool-free adjustment | Most setups |
Insulation (The Beginner Trap)
A sleeping bag compresses underneath you in a hammock, losing all its loft. You need something below you:
- Underquilt: Suspended under the hammock. Best warmth-to-weight ratio. Budget $100–200 for a 3‑season model.
- Sleeping pad: Works but slides around. Use a pad at least 2.5 inches thick and slightly wider than your hammock. A pad with side wings or a pad cradling system helps keep it in place.
A top quilt or sleeping bag goes on top. Many hammock campers eventually switch to a top quilt (no zipper, less weight) paired with an underquilt.
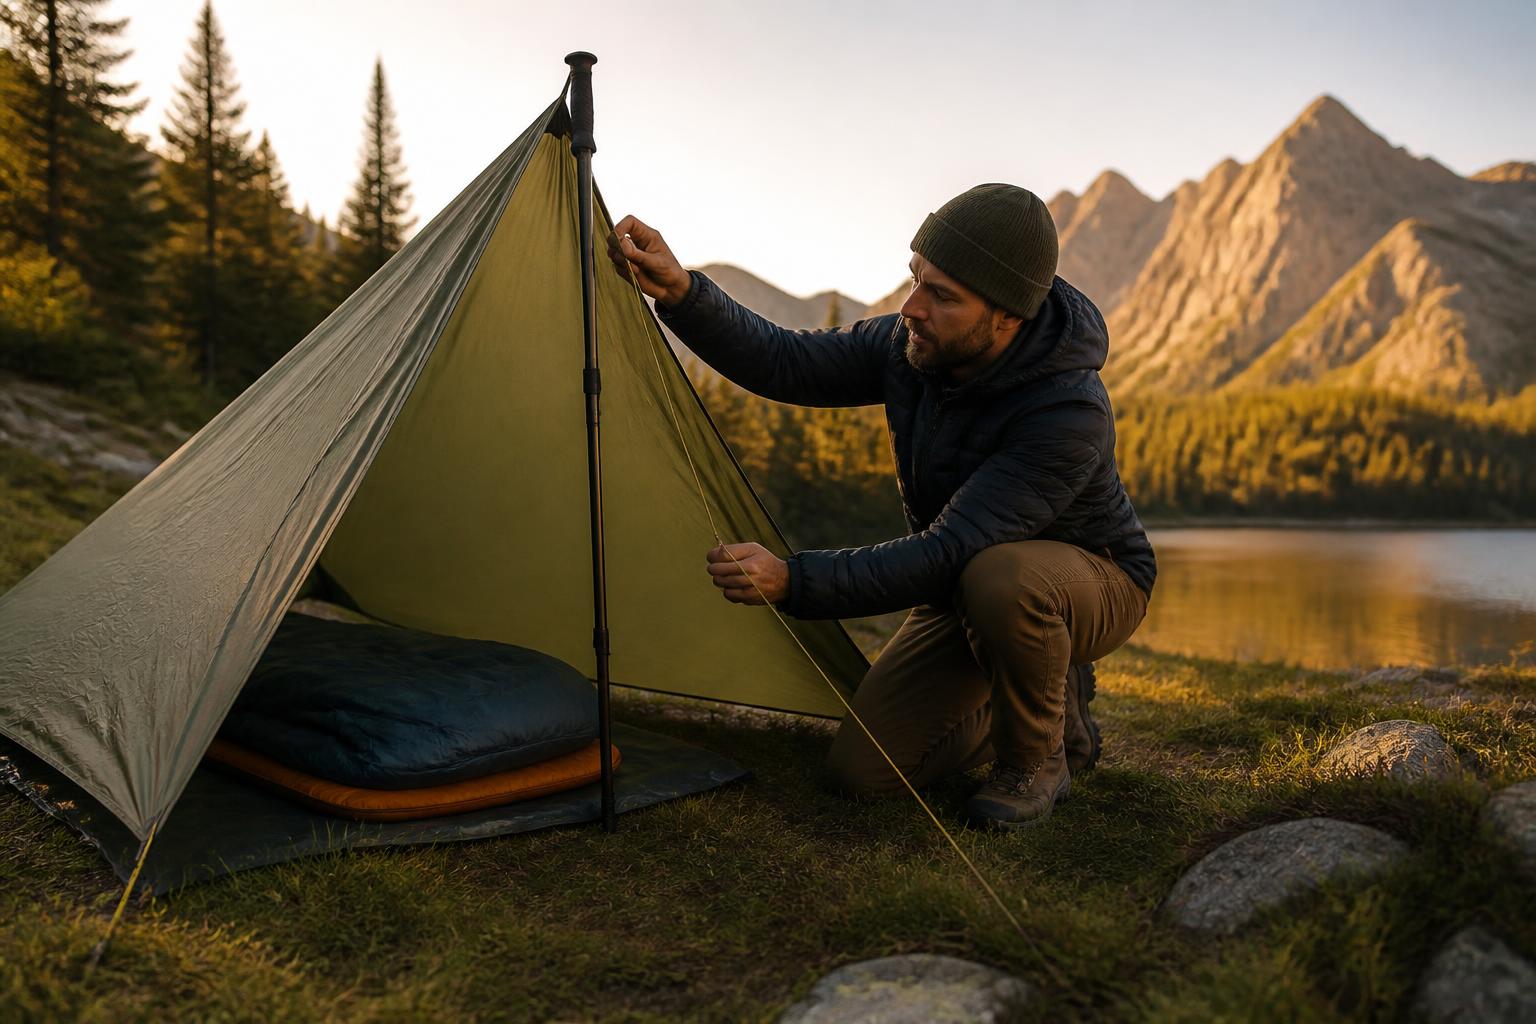
Rain Fly (Tarp)
You need coverage overhead, not just a rain jacket. A hex-shaped tarp around 10 x 8 feet works for most conditions. In winter or heavy rain, a larger rectangular tarp with doors protects better. Look for a tarp with ridgeline tie-outs and at least six stake points for a taught pitch.
Picking Your Hang Spot
The trees you choose determine success or failure. Use this quick decision aid:
- [ ] Trees are 12–18 feet apart
- [ ] Both trees are healthy (not dead, cracked, or rotting)
- [ ] No branches or widow-makers overhead
- [ ] Ground underneath is clear of sharp rocks or standing water
- [ ] Trees are at least 6 inches in diameter at chest height
If any item fails, move to a different site. Don’t try to force a hang on dead or thin trees. A single tree less than 6 inches in diameter can snap under your weight.
Step-by-Step Setup
1. Attach the Straps
Wrap each tree strap around its tree at roughly chest height. Clip the loop back through itself. Keep the strap flat against the bark — twisted straps can damage the tree and shift under load.
2. Adjust the Height
Your hang point should be about 18 inches below the wrap point on the tree. The strap-to-tree angle should be about 30 degrees.
Early checkpoint: Stand back and look at the angle. Make a finger gun — the angle between your pointer finger and your thumb (with thumb straight up) is roughly 30 degrees. Hold it next to your strap to confirm. If the strap looks almost straight across (too tight), lower the attachment point. If it hangs nearly vertical (too loose), raise it.
3. Hang the Hammock
Clip your hammock’s carabiners or continuous loops to the strap buckles. The hammock should sag naturally — don’t pull it tight like a guitar string. A straight-line hang will force your body into a curved C-shape.
4. Set the Sag
Sit in the center. The lowest point of the hammock should be about 18 inches off the ground when you’re sitting. If you bottom out, raise the straps. If you have to climb in, lower them. A good rule of thumb: when you sit, your butt should be roughly at knee height.
5. Get In at a Diagonal
This is the most important step. Don’t lie straight down the center line. Shift your butt toward the head end and your feet toward the opposite corner. You should end up lying at about a 15–30 degree angle across the hammock. You should feel flat, not curved.
Success check: Lie in the hammock for one minute. If you can fully extend your legs without pressure in your knees or lower back, your setup is good. If you feel tightness, adjust your diagonal position or loosen the suspension.
Likely Causes of Setup Problems
| Problem | Likely Cause | Quick Fix |
|---|---|---|
| Back pain or curved spine | Lying straight, not diagonal | Shift butt 6 inches toward head end |
| Hammock feels too tight | Suspension too tight | Lower straps or use a longer strap loop |
| Hammock sags too low | Straps too low or trees too far apart | Raise straps or shorten suspension length |
| Can’t get a flat lay | Hammock too short (9 ft) | Switch to 11-to-12-foot hammock |
| Cold backside | No underquilt or pad | Add insulation underneath |
When to Rethink Your Setup
If after two minutes of adjusting you still feel pronounced hip pressure or your knees are locked straight, start over from the tree straps. The issue is usually suspension height or tree spread. If you’re consistently cold below 60°F, your under-insulation needs an upgrade — a cheap foam pad won’t cut it for night temperatures below 50°F.
Getting the Hang Angle Right
A 30-degree suspension angle gives the best compromise between comfort and strap tension. Too steep (straps nearly horizontal) makes the hammock lie flat like a board. Too shallow (straps hanging almost straight down) creates a tight U‑shape that forces your knees up.
Quick field test: The finger‑gun trick works every time. If you can’t hit 30 degrees because trees are too close, raise the straps. If trees are too far apart, lower them. In extreme cases — trees less than 10 feet apart — you may need a hammock with shorter suspension or use a ridge line to maintain sag.
Tips for a Restful Night
- Sleep warm: Below 70°F you need insulation underneath. Even summer nights can drop into the 50s in many regions. Don’t trust “it’s warm enough” without testing. Bring a lightweight underquilt or pad even if the forecast says warm.
- Stay dry: Condensation forms under the hammock if the tarp is pitched too low. Leave at least 6 inches of air gap between the tarp edge and the ground. Pitch your tarp in an A-frame or diamond configuration, depending on wind direction.
- Keep gear off the ground: Attach a gear hanger or stuff sack to your suspension. Wet boots and damp tents are the biggest motivation killers on day two. A simple carabiner clips your pack straps together to keep everything off the dirt.
- Pitch the tarp first: If rain is forecast, set up your tarp before dark. Everything is harder by headlamp in the rain. Practice your tarp configuration at home so you know which guylines go where.
When to Go Back to the Ground
Hammock camping isn’t right for every trip.
- No suitable trees (above treeline, canyon floors, desert). In these environments, a tent or bivy is your only option.
- Extreme cold below 0°F. Underquilt and top quilt systems get heavy and expensive at that range. A 4-season tent with a winter sleeping bag is simpler.
- Group trips with uneven gear. If someone always brings a tent and you’re in a site with limited tree pairs, site selection becomes a fight. Agree on the shelter plan before you leave.
If your first hang leaves you on the ground at 2 a.m. shivering, don’t give up. Adjust your insulation, check your hang angle (30 degrees, diagonal lay), and try again. Most hammock campers learn between their second and fourth trip that proper under-insulation and the diagonal lie are non-negotiable. The system works — you just have to get the basics right.
Camping Bob has spent over 20 years camping across the US — from BLM dispersed sites in the Southwest to KOA campgrounds in the Pacific Northwest. He writes practical, no-nonsense guides to help fellow campers get outdoors with confidence.