Camping First Aid Kit: Essential Items & How to Build Your Own
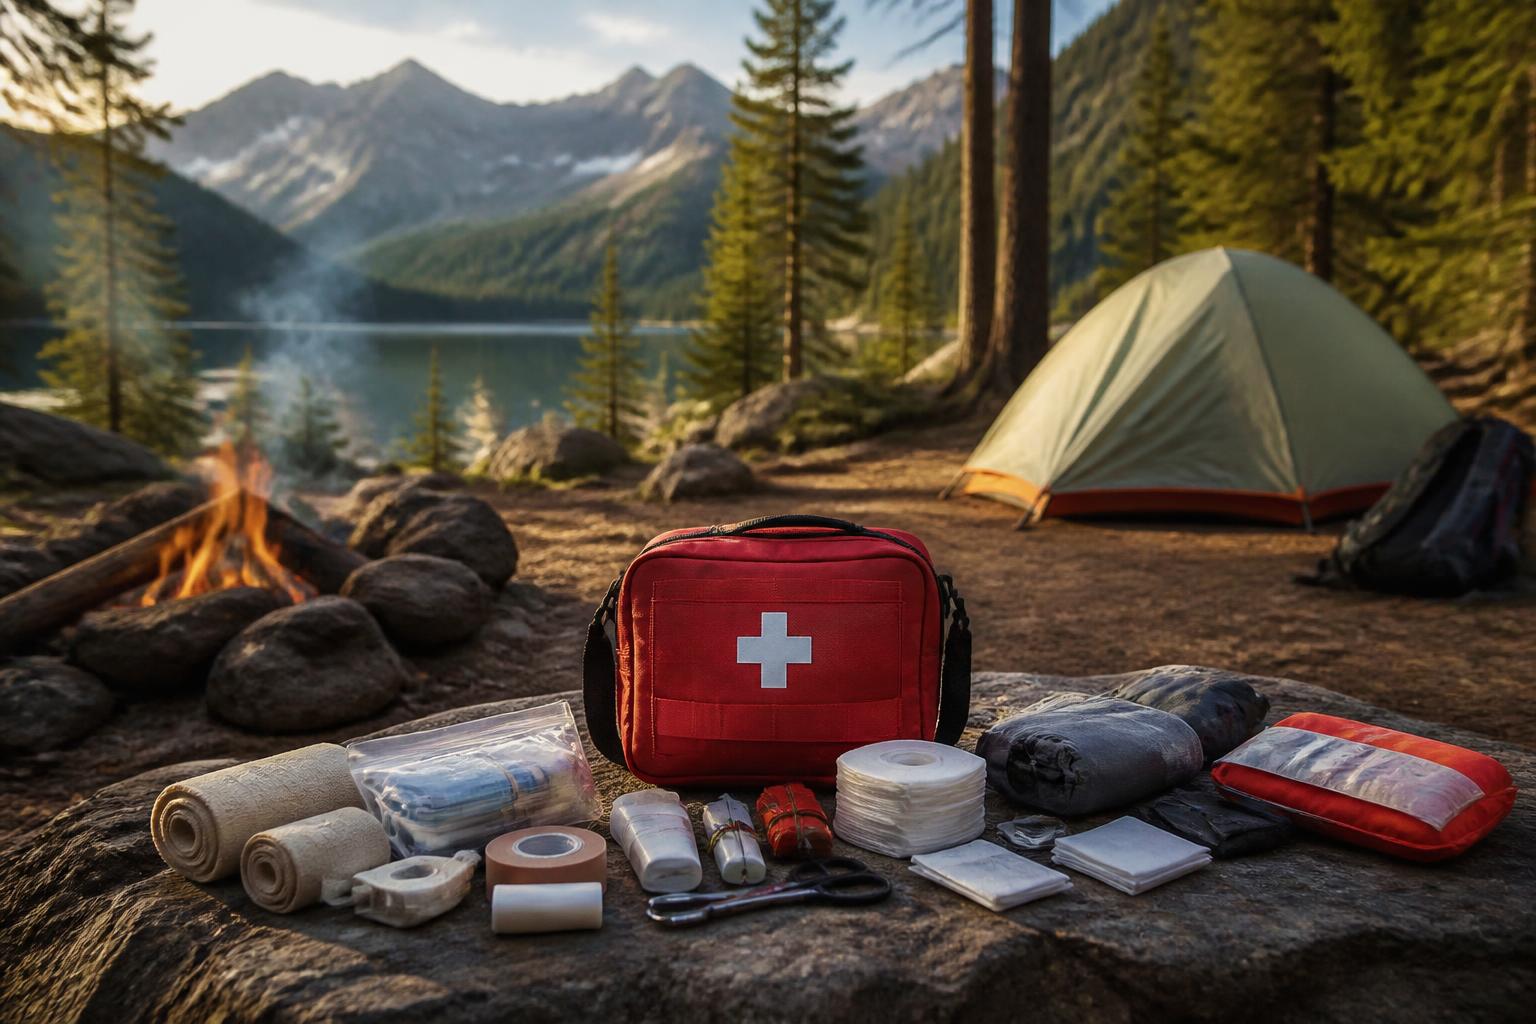
A camping first aid kit needs to handle blisters, cuts, burns, and sprains—but the exact contents shift depending on whether you’re car camping or heading into the backcountry. Below is a focused checklist to build a kit that fits your trip, followed by the steps to assemble it yourself, plus a clear stop threshold so you know when to buy a pre-made kit or seek medical help.
The 7-Point Pass/Fail Kit Checklist
Use this pass/fail decision aid when packing your kit. If any category is missing or understocked for your trip type, add before you leave.
- Wound closure & cleaning – At least 10 adhesive bandages (assorted sizes), 2 sterile gauze pads (4×4), medical tape, antiseptic wipes, and antibiotic ointment. Pass if you can cover a 2-inch cut without running out. Fail if you have fewer than 10 bandages or only one gauze pad.
- Blister management – Moleskin or blister-specific pads, plus a small pair of scissors. Fail if you have no dedicated blister protection—blisters are the most common camping injury and ignoring them leads to infection.
- Pain & inflammation – Ibuprofen (or equivalent) and acetaminophen, packed separately with dose instructions. Fail if you rely only on ibuprofen for both pain and swelling—carry both options for flexibility (e.g., ibuprofen for muscle strain, acetaminophen for headache).
- Burn treatment – Aloe vera gel or burn cream, plus non-stick sterile pads. Fail if you only have regular gauze—sticking to a burn causes more damage and pain when removed.
- Splinter & tick tools – Fine-tipped tweezers, a tick removal tool (or the tweezers with a twisting motion), and a small magnifying glass. Pass if you can remove a splinter or tick without digging or leaving fragments.
- Emergency & trauma (add only for backcountry or solo trips) – One Israeli bandage, a North American Rescue C-A-T Combat Application Tourniquet (Black) NAR Genuine Gen 7 CAT Gray Time-Stamped Military Issued (30-0001), and an emergency space blanket. Fail for remote trips if any of these are absent.
- Personal medications – At least a 3-day oversupply of prescription meds, antihistamines (for allergies or anaphylaxis), and any EpiPen. Pass if you can extend your trip by two days without running out.
Decision criterion: For car camping within an hour of a pharmacy, skip the tourniquet and Israeli bandage—your base wound supplies plus a good phone signal are enough. For backcountry trips more than two hours from help, those trauma items become mandatory. If your total DIY cost to meet this checklist exceeds $50 (excluding container and personal meds), consider a pre-assembled kit as a base and customize from there.
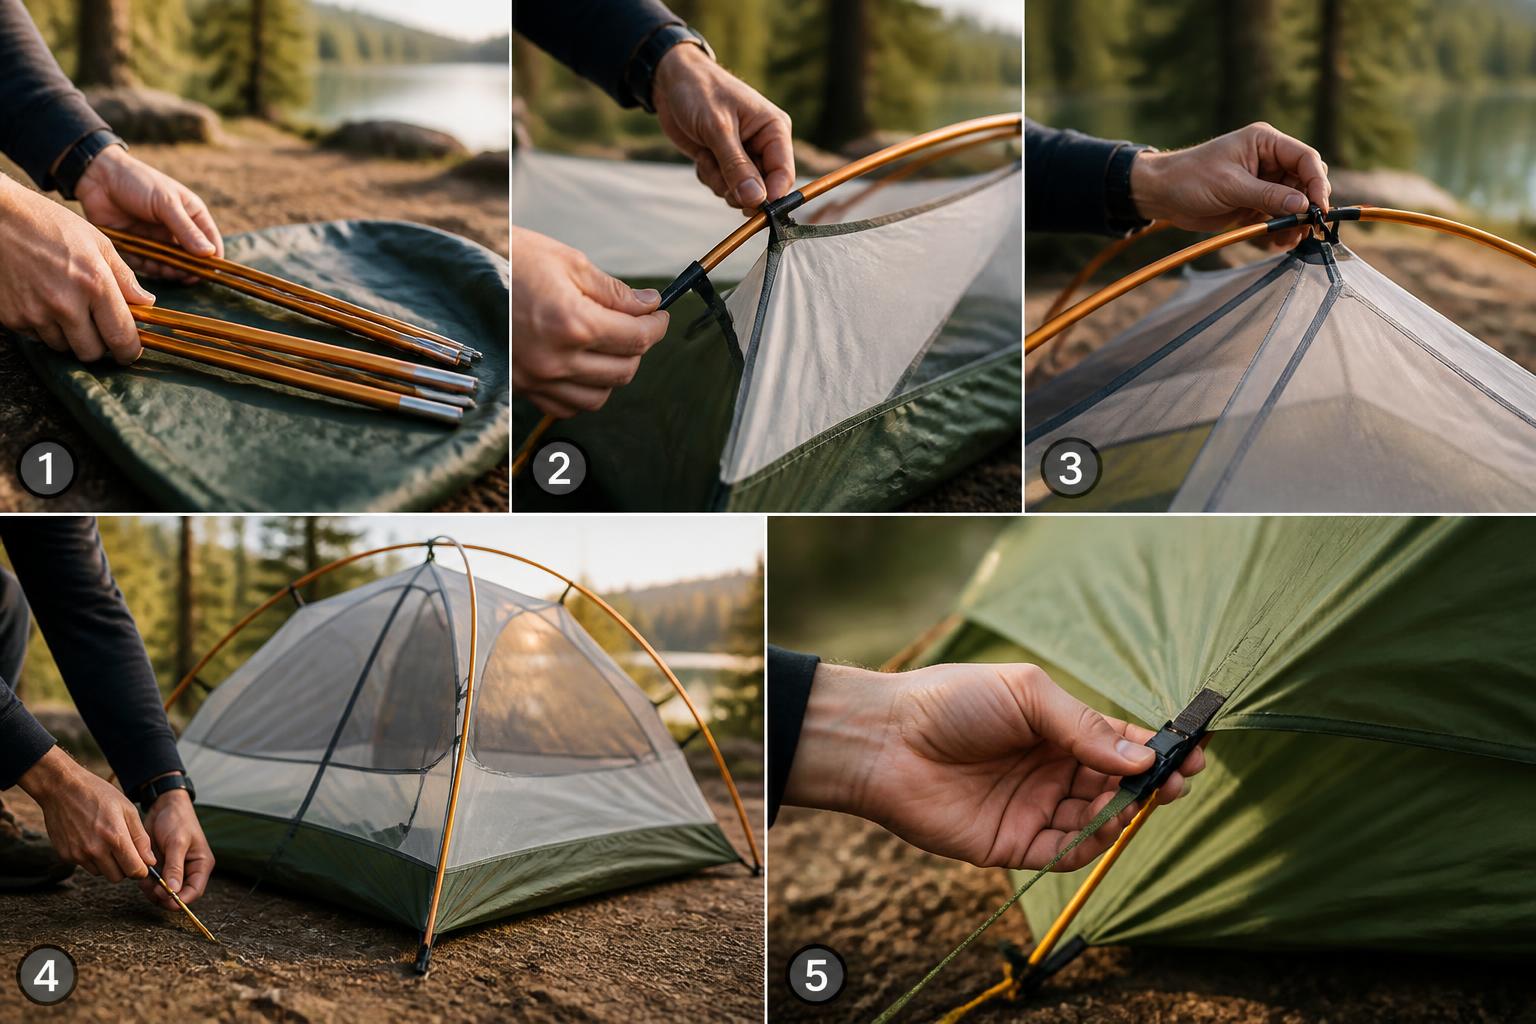
Build Your Kit: 5 Actionable Steps
Follow these steps with natural checkpoints. The process is faster if you already have a clear trip profile.
Preparation Checkpoint – Assess Your Trip
Before you buy anything, answer three questions: How many people? How far from help? What are the likely injuries? Write down the three most probable problems (e.g., fishing trip: punctures, blisters, sunburn). If you’re camping within 30 minutes of a clinic, you can skip trauma gear. If you’re solo and 4 hours from a road, you need a tourniquet. Early checkpoint: If your trip is 2+ days or involves kids, double your bandage and medication supply.
Step 1 – Choose a Container
Pick a waterproof, crush-resistant bag or box. A clear, labeled pouch (like a toiletry organizer) lets you see items at night without dumping everything. Test it: fill the container halfway, close it, shake. If items shift or spill when opened, upgrade to a box with dividers or use internal zip pouches. Stop threshold: If you can’t find a container that passes the shake test for under $15, consider a pre-made kit that already comes organized.
Step 2 – Gather Core Supplies
Start with wound care, blister management, pain meds, and burn treatment. Add trauma items only if your assessment says so. Consider a pre-made base like the Homestockplus Comprehensive First aid Kits, First Aid Trauma Kit with Labelled Compartments for Cars, Home, Office, Backpacking, Camping, Traveling, and Cycling -324 Pieces and then customize it. Its 324 pieces include Israeli bandages, splints, ice packs, and CPR masks—good starting point for a backcountry kit if you strip out unnecessary extras.
Step 3 – Organize by Scenario, Not Item Type
Use small zip pouches labeled “Bleeding,” “Burns,” “Blisters,” “Medication.” This cuts search time under stress. Open each pouch and confirm you can retrieve and use every item without reading instructions. If you can’t remember what the CPR mask is for, repack it into a different pouch or remove it.
Step 4 – Add Personal and Group-Specific Items
Prescription meds, allergy meds, insect repellent, and sunscreen. For kids, include child-safe versions and dosage charts. A common deficiency is forgetting that antihistamines and pain relievers expire—check dates every spring and before any extended trip. Likely cause of failure: Expired medications or dried-out ointments. Set a recurring calendar reminder to check.
Step 5 – Pack and Test
Place the kit where you can reach it within 10 seconds of stopping. In a car, that means not buried under gear. On a backpack, attach it to the top or outside pocket. If you are hiking alone in a remote area (no cell service, more than two hours from a trailhead), add the tourniquet and learn how to apply it before you leave. If you cannot apply it correctly, take a Wilderness First Aid course first. Success check: Run a “10-second clinic” – with eyes closed, hand the kit to someone and ask them to find an item. If it takes longer than 10 seconds, reorganize.
Likely Causes of Kit Failure
- Too heavy or bulky – People leave the kit behind. Solution: separate a lightweight day-hike pouch from a full car kit.
- Unorganized under pressure – If you have to dig for 30 seconds to find gauze, the kit fails. Fix: use labeled pouches.
- Missing key items for the actual trip – A beach camping kit needs extra aloe and waterproof bandages; a cold-weather trip needs instant heat packs and lip balm. Customize per trip.
Red Flags: When to Stop and Seek Help
Your DIY kit is a first-line tool, not a replacement for professional medical care. Stop using the kit and escalate if:
– Bleeding doesn’t stop after 10 minutes of direct pressure – Apply a tourniquet only if you’ve been trained; otherwise, call 911.
– A wound is larger than a credit card, or a burn exceeds 3 inches – These need immediate professional attention.
– You cannot fit the kit into your pack within 60 seconds of trying – That means your container or organization is failing; either rebuild or buy a pre-assembled kit.
– Total DIY cost exceeds $55 – At that point, a pre-made kit (like the Homestockplus) often costs less and includes more, even after customization.
Frequently Asked Questions
How many bandages should I pack for a weekend camping trip?
At least 20 adhesive bandages in mixed sizes for two people—blisters and small cuts add up fast. The CURAD Assorted Bandages Variety Pack, 300 Count, 6 Styles Including Antibacterial, Waterproof, Sheer, Plastic, Heavy Duty & Flex-Fabric covers multiple needs in one box, and you can portion out a smaller supply for each trip.
Should I buy a pre-assembled kit or build my own?
Pre-assembled kits like the Homestockplus are convenient for the base supplies, but you must swap out the included medications (often expired or wrong strength) and add your own blister and trauma items. Building from scratch gives you better control but takes more time. Use the $50 cost threshold: if buying individual items pushes you past that, start with a pre-made base.
How often should I check and replace items?
Twice a year—before spring camping season and before fall—plus after any trip where the kit got wet or used. Sterile items stay good if the wrappers are intact; adhesive bandages and tape become less sticky after a couple of years. Always replace opened ointments after six months.
Camping Bob has spent over 20 years camping across the US — from BLM dispersed sites in the Southwest to KOA campgrounds in the Pacific Northwest. He writes practical, no-nonsense guides to help fellow campers get outdoors with confidence.