
How to Clean a Tent Properly Without Damaging the Fabric
Cleaning a tent wrong—with harsh detergents, a washing machine, or too much elbow grease—can strip the waterproof coating, ruin seam tape, and turn a weekend shelter into a leaky sack. The safe route is simple: use a technical cleaner made for outdoor gear, hand-wash with a soft sponge, and air-dry completely before storage. If at any point you notice the fabric tearing, coating flaking off like dry skin, or seam tape lifting more than a quarter inch, stop washing and contact the manufacturer—those are signs the tent has reached its service limit and a wash won’t fix it.
Quick answer
Start by determining whether your tent actually needs a full wash. If it’s just muddy on the floor, spot-clean the problem areas instead. For a full cleaning:
- Shake out loose dirt and debris.
- Set the tent up in a shady, well-ventilated spot.
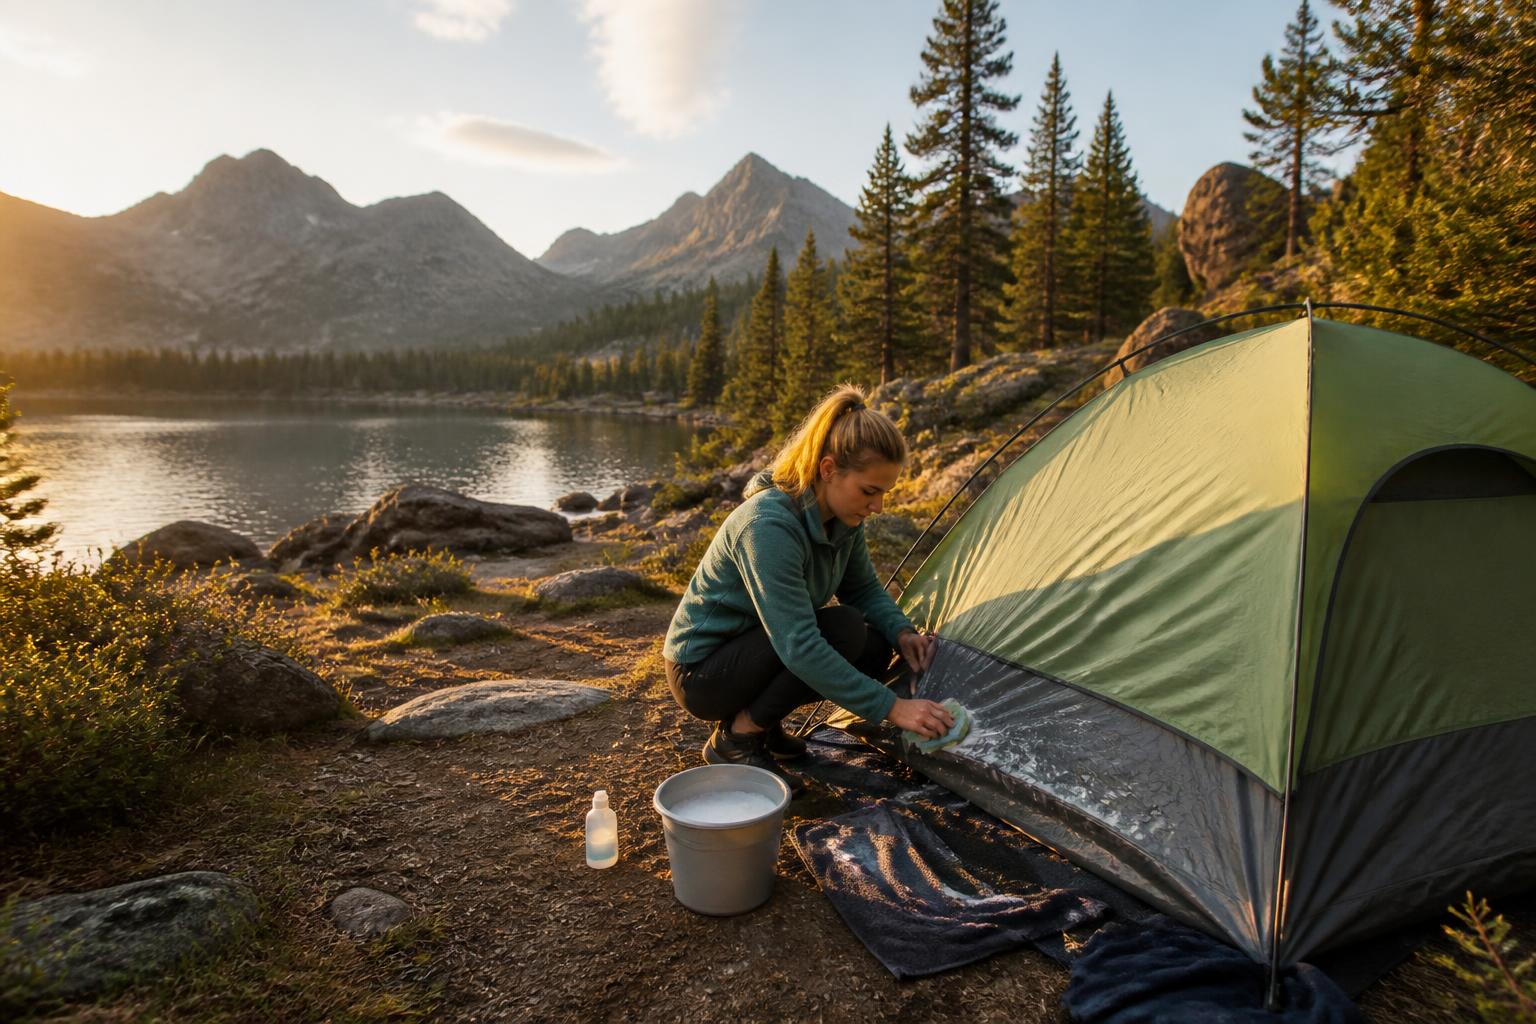
- Hand-wash with a mild technical cleaner (like Nikwax Tent & Gear SolarWash) and a soft sponge.
- Rinse thoroughly until no suds remain.
- Air-dry completely—this can take several hours.
Never machine-wash or machine-dry a tent. The agitation and heat will damage the waterproof membrane and seam tape.
Tools and prerequisites
- Technical tent cleaner – A pH-neutral wash made for outdoor fabrics. Dish soap and laundry detergent leave residues that attract dirt and break down DWR coatings.
- Soft sponge or cloth – Avoid scrub brushes with stiff bristles. The MSR Alpine Dish Brush / Scraper works well for gentle scrubbing on stubborn mud spots because its bristles are firm enough to dislodge dirt but not aggressive enough to abrade the coating.
- Bucket of lukewarm water – Hot water can damage coatings. Keep it below 90°F (about wrist-bath temperature).
- Garden hose with spray nozzle – Or a clean shower head if you’re cleaning indoors.

- Clean towels – For drying the tent after rinsing.
- Well-ventilated, shaded area – Direct sunlight degrades fabric and coatings.
Checkpoint before starting: Set the tent up and inspect it. Run your hand across the fly and floor. If the fabric feels tacky or sticky, the coating is already degrading—a wash might accelerate the breakdown. If you see flakes of coating on your hand, skip the wash and prepare to replace the tent. If the fabric feels clean and dry but is just dusty, skip the full wash and go straight to spot-cleaning.
When to clean vs. when to leave it
| Situation | Do this |
|---|---|
| Light dust or pollen | Shake out or wipe with a damp cloth. No full wash needed. |
| Mud on the floor or fly | Spot-clean with a damp sponge and a dab of cleaner. |
| Tree sap or bird droppings | Spot-clean immediately using a soft cloth and lukewarm water. |
| Persistent musty smell | Full wash is needed—mildew is already growing. |
| Fabric looks clean but won’t bead water | Clean first, then consider reapplying DWR treatment. |
Decision aid – Should you clean your tent now?
- [ ] Does the tent have visible dirt, mold, or odors? → Clean.
- [ ] Is the dirt limited to a single area? → Spot-clean instead.
- [ ] Is the tent still fully waterproof (water beads on the surface)? → No wash needed.
- [ ] Is it the end of the season and you’re storing it? → Clean and dry thoroughly.
- [ ] Are you unsure about the last time it was washed? → Clean.
Step-by-step cleaning plan
Step 1 – Remove loose debris
Shake the tent vigorously outdoors. Use a soft brush or your hand to knock off dried mud and leaf litter from the floor and fly. Check the bathtub floor corners—dirt collects there and can hold moisture, which leads to mildew even if the rest of the tent seems dry.
Step 2 – Set up the tent
Pitch the tent in a shaded, breezy area. A full setup gives you access to all surfaces and lets you see spots you’d miss when the tent is wadded up. Zip all doors and vents closed to keep water out of the interior during washing.
Step 3 – Wet the tent
Using a garden hose with a gentle spray, wet the entire exterior of the fly and the tent body. Avoid high-pressure spray—it can force water through seams and damage the coating on older tents. If you’re using a shower head indoors, keep the spray diffused and the water pressure low.
Step 4 – Apply cleaner
Mix the tent cleaner with lukewarm water per the instructions on the bottle. Using a soft sponge, apply the solution to the fabric in a gentle, sweeping motion. Work from the top down so dirt runs off instead of staining lower panels.
Focus areas:
– Seam tape – Dirt can hide under the edges. Clean gently; aggressive scrubbing can lift the tape. If you see the tape edge peeling during washing, stop—that’s your escalation signal.
– Zipper tracks – Use a soft brush (like the MR.SIGA Mini Dustpan and Brush Set) to remove grit that accelerates zipper wear. Open and close the zipper a few times after cleaning to work the cleaner into the teeth.
– Floor corners – These see the most mud and abrasion. Let cleaner sit for 30 seconds, then wipe. If the floor has dark stains that won’t budge after two passes, those are likely ground-in abrasion marks, not dirt—further scrubbing won’t help and will thin the fabric.
Step 5 – Rinse thoroughly
Switch the hose to a wide, low-pressure spray. Rinse from the top down until no soap bubbles remain. Soap residue attracts dirt and can interfere with DWR performance. Run your hand over the fabric to feel for slick spots—those indicate leftover cleaner. A clean tent should feel slightly textured, not slippery.
Checkpoint – The water beading test
After rinsing, splash a few drops of water on the fly. If they bead up and roll off, the DWR coating is still healthy. If they soak in immediately or spread flat, plan to apply a DWR treatment after the tent is dry. Do not apply DWR to a wet or damp tent—it won’t bond properly.
Step 6 – Dry the tent
Pat the tent with a clean towel to remove excess water. Then let it air-dry in the shade, ideally with good airflow on both sides. Drying can take 2–4 hours on a warm, breezy day; longer in humid weather. Flip the tent halfway through to expose the interior.
Success check – Is it completely dry?
Touch the fabric in multiple spots: fly, floor, corners, and seam tape. It should feel dry and cool, not damp. Press a white paper towel against the seam tape for 10 seconds—if the towel comes away dry, the tape is dry. Any residual moisture will cause mildew during storage. If in doubt, wait another hour.
Step 7 – Store the tent
Pack the tent loosely in its storage sack—not stuff sack—to avoid compressing the insulation or coating. Store in a cool, dry place away from direct sunlight. Do not store in a garage or attic where temperatures fluctuate—that degrades the coating faster than normal use.
Escalation signal – When to stop and seek help
If at any point during cleaning you notice any of these, stop immediately and contact the manufacturer or a tent repair shop:
– Seam tape peeling more than a quarter inch
– Coating flaking off in sheets
– Fabric that has become sticky or gummy after rinsing
– Tears, holes, or fraying that were not there before the wash
These are signs the tent’s materials have degraded beyond what cleaning can fix. Continuing to wash will only make the damage worse.
Troubleshooting
The tent still smells musty after washing
Mold or mildew has likely penetrated the fabric. Wash again with a cleaner labeled for mildew removal. If the smell persists after two washes, replace the affected panel or the tent—mildew can weaken the fabric structure, and the smell will return every time the tent gets damp.
Dirt stains won’t come off
Let the cleaner sit on the stain for 3–5 minutes before scrubbing gently. For stubborn mud, use a soft brush with moderate pressure. Avoid bleach, OxiClean, or any abrasive cleaner—they will damage the fabric and coating. If the stain is from engine oil or grease, try a dab of rubbing alcohol on a cloth first, then rinse immediately.
Water beads but dirt sticks more than before
Residual soap or fabric softener from a previous wash or storage can cause this. Rewash using only the technical cleaner and rinse extra thoroughly. Do not use dryer sheets in the storage sack either—their coating transfers to the tent fabric and attracts dirt.
Seam tape is peeling after washing
The tent may already have been at the end of its tape lifespan, or the wash water was too hot. If the tape is lifting, stop washing immediately. A tent repair shop can re-tape seams, but this is often as expensive as a new tent. If the tape is only peeling in one small spot, you can use seam grip or a tent repair patch as a temporary fix.
Related questions
Can I use dish soap to clean my tent?
No. Dish soap contains degreasers and fragrances that strip the DWR coating and leave a residue that attracts dirt. Stick with a pH-neutral tent cleaner.
Is it safe to machine-wash a tent on a gentle cycle?
No. The agitation can delaminate the waterproof membrane, pinch and tear the mesh, and break seam tapes. Hand-wash only.
How often should I deep-clean my tent?
Once per season, or after a trip where the tent got heavily soiled. More frequent washing is unnecessary and slowly wears down the coatings. A good rule of thumb: if the tent looks clean and smells fine, leave it alone.

Camping Bob has spent over 20 years camping across the US — from BLM dispersed sites in the Southwest to KOA campgrounds in the Pacific Northwest. He writes practical, no-nonsense guides to help fellow campers get outdoors with confidence.