
How to Waterproof Your Tent: Seam Sealing, DWR & Sprays
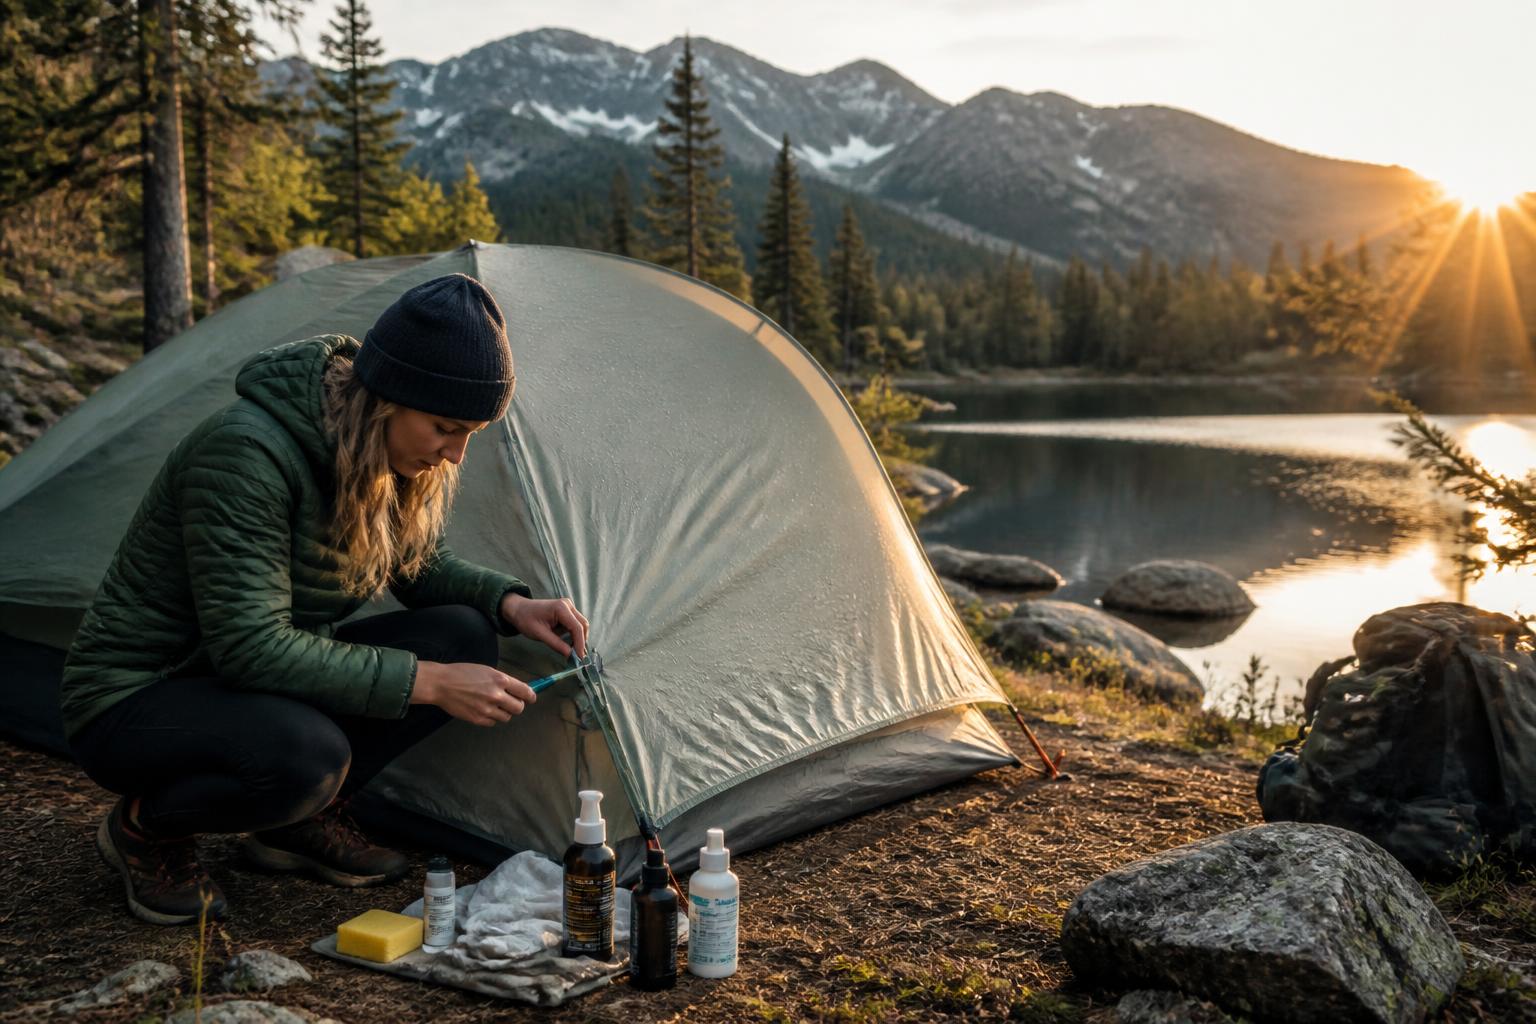
To waterproof your tent effectively, you need to address three separate systems: the seam tape on the inside, the DWR (durable water repellent) coating on the outer fabric, and any bare fabric that was never treated. Most rain leaks happen at seams or where the factory DWR has worn off, not through intact fabric. You can fix all three with the right product and a dry afternoon.
Quick Answer
For most tent waterproofing jobs, you need two different products: a seam sealant for the interior stitch lines and a spray-on waterproofer for the outer fly. Seam sealers are brush-on liquids that fill needle holes; sprays restore the beading effect on the fabric face. If your tent is made of silicone-coated nylon (silnylon), you must use a silicone-compatible sealant — standard urethane-based products won’t stick. For polyurethane-coated tents, a fast-cure urethane sealant works fine.
Do not spray waterproofing formula directly onto factory-sealed seams unless the seams have already failed. The spray is for the broad fabric surface; the seam sealer is for the stitch lines.
Tools and Products You’ll Actually Need
Grab these before you start:
- Seam sealant — choose based on your tent fabric. For polyurethane-coated tents (most family camping tents): GEAR AID Seam Grip FC Fast Cure Sealant (cures in 2 hours). For silicone-coated tents (most ultralight backpacking shelters): GEAR AID Seam Grip SIL Silicone Sealant (needs 12+ hours to cure).

- Tent waterproofing spray — for restoring DWR on the rainfly and tent floor. Nikwax Tent & Gear Solarproof is a solid option that also adds UV protection.
- Rubbing alcohol — for cleaning seams before sealing.
- Soft sponge or cloth — for applying the spray evenly.
- Gloves — waterproofing chemicals are sticky and hard to wash off.
Is Your Tent Ready for Waterproofing? A Quick Pre-Check
Run through these five checks before you buy anything. If you answer “no” to any, fix that first.
| Check | Pass | Fail (What to do) |
|---|---|---|
| Tent is fully clean and dry | Proceed | Wash with mild soap, rinse thoroughly, air dry completely |
| You know your tent’s coating type (PU or silicone) | Proceed | Check the tent tag, manufacturer website, or product specs |
| Existing seam tape is not peeling in large sheets | Proceed | Remove loose tape, clean residue, then seal bare seams |
| Fabric is not delaminating or sticky | Proceed | Delaminated fabric cannot be repaired — replace the tent (this is your stop/escalate threshold) |
| You have a dry, ventilated space to work for 2–24 hours | Proceed | Wait for a dry day or work in a garage with fans |
Step-by-Step Plan
Step 1: Clean the Tent Thoroughly
Dirt blocks sealant from bonding. Set up the tent in the yard or bathe it in a tub with lukewarm water and a few drops of mild soap (no detergents with bleach or fabric softener). Rinse until the water runs clear. Let it dry completely — this can take a full day in humid weather. Do not waterproof a damp tent.
Step 2: Seal the Interior Seams
Turn the tent inside out or work from the underside of the rainfly. Locate every factory-sealed seam. If the original tape is bubbled or peeling, pull it off gently. Clean the stitch line with rubbing alcohol on a rag and let it evaporate.
For polyurethane-coated tents: Apply GEAR Aid Seam Grip FC along the seam. Squeeze a thin bead and spread it with the applicator tip or a small brush. It cures in about 2 hours at room temperature.
For silicone-coated tents: Apply GEAR AID Seam Grip SIL. This product is thinner and soaks into the stitch holes. Spread a thin layer into the seam. It stays liquid for a while — let it cure for at least 12 hours undisturbed. Do not skip the full cure time; moving the tent too early creates weak spots.
One 1.5-ounce tube of Seam Grip SIL covers roughly 24 feet of seam. The 2-ounce Seam Grip FC covers up to 60 feet — plenty for most family tents.
Step 3: Apply Waterproofing Spray to the Outer Fabric
After the seams are fully cured, set up the rainfly (and tent body if needed) in a well-ventilated area. Shake the Nikwax Tent & Gear Solarproof bottle well. Hold it 6–8 inches from the fabric and spray in a steady, sweeping motion. Work in sections about 2×2 feet to avoid puddles. Use a clean sponge to spread any pooling spray into a thin, even coat.
Let the first coat dry for 1–2 hours, then inspect. If water still soaks into the fabric instead of beading, apply a second light coat.
One common failure mode: Spraying too heavily on the canopy so the liquid runs down and pools at the bottom edge. This creates sticky spots that collect dirt and look matte instead of water-repellent. Stop spraying before the fabric looks wet — light misting is better than drenching.
Step 4: Let Everything Cure Fully and Verify
Leave the tent set up or hanging for a full 24 hours if possible. Sunlight can help the cure, but keep it out of direct UV for extended periods.
Verification step: After curing, set the tent up outdoors. Use a garden hose with a gentle spray nozzle from about 3–4 feet away to simulate rain. Focus on seams and high-wear areas for 30 seconds. Go inside the tent and inspect every seam and the fabric surface. You should see water beading and rolling off the fly, and no moisture on the inside of the seams. If you spot any dampness, mark the spot with tape, dry the area completely, and reapply a thin coat of sealant. Repeat the hose test after another 12-hour cure.
Stop/escalate threshold: If after two attempts at sealing a specific seam it still leaks, or if you find fabric delamination (sticky peeling coating) or a tear larger than ½ inch, stop DIY. These issues cannot be fixed with sealant or spray — contact the tent manufacturer for warranty or replace the shelter.
Troubleshooting
-
Water beads up on the fly but soaks through at the stitch lines. This is normal — the seams need sealing, not the fabric. Go back to Step 2 and seal those specific stitch lines.
-
The sealant won’t dry after 24 hours. You likely used liquid urethane sealant on silicone-coated fabric. It will never cure properly. Remove as much as you can with rubbing alcohol and switch to a silicone-specific product like Seam Grip SIL.
-
The spray left white streaks or a cloudy film. This usually means the spray was applied too thickly or the fabric was damp when you applied it. Wipe the area with a damp cloth and reapply in lighter coats.
-
Your tent still leaks after waterproofing. Isolate where the water is coming from. Common hidden sources: the zipper track (which needs wax, not spray), the corner stress points where pole sleeves attach, or tiny pinholes from abrasion. Patch pinholes with repair tape from the inside; wax zippers with a paraffin block.
Related Questions
How often should I reapply tent waterproofing spray?
Plan on recoating the rainfly every two to three seasons, or whenever water stops beading on the fabric. If you camp frequently in heavy rain or intense sun, you may need to treat it annually.
Can I use tent waterproofing spray on the tent floor?
Yes, but only if the floor is a coated nylon or polyester fabric. Apply a lighter coat than on the fly — the floor gets abrasion from the ground, so a heavy coat can peel. Recheck after each trip.
Is Nikwax Solarproof safe for all tent fabrics?
It’s designed for synthetic fabrics (nylon, polyester, canvas). Do not use it on untreated cotton or breathable membrane fabrics like Gore-Tex. Check your tent’s care tag before applying any waterproofing product.

Camping Bob has spent over 20 years camping across the US — from BLM dispersed sites in the Southwest to KOA campgrounds in the Pacific Northwest. He writes practical, no-nonsense guides to help fellow campers get outdoors with confidence.