
Understanding How Pop-Up Campers Operate
Quick answer
- Pop-up campers are lightweight trailers that expand for more living space.
- They typically have a canvas or fabric tent that raises on a metal frame.
- Setup involves lifting the roof and unfolding the sleeping areas.
- Collapsing them reverses the process, making them compact for travel.
- Key components include the frame, lift system, and tent material.
- They offer a step up from tent camping with more comfort and amenities.
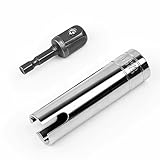
To enhance your pop-up camping experience, consider investing in some essential pop-up camper accessories. These can range from leveling blocks to specialized cleaning supplies, making your trips more comfortable and convenient.
What to check first (do this before you drive out)
Before you even think about hitting the road, there are a few crucial checks. It’s not just about the camper itself; it’s about where you’re going.
- Land manager / legality: Who actually owns and manages the land you plan to camp on? Is it a National Forest, BLM land, a State Park, or private property? Different managers have different rules. Always check the specific regulations for the area. You don’t want to get a ticket for something silly.
- Access/road conditions: Is your pop-up camper and your tow vehicle ready for the road ahead? Many pop-ups are light, but some access roads can still be rough. Check for two-wheel drive (2WD) vs. all-wheel drive (AWD) requirements, ground clearance needed, and if recent weather has made things muddy or snowy. A blown tire on a gravel road is no fun.
- Fire restrictions + weather + wind: This is a big one for safety and comfort. Check for any fire bans – they’re common and for good reason. Look at the weather forecast for your destination. High winds can be a real pain with a pop-up, especially when setting up or taking down the tent material.
- Water plan + waste plan (Leave No Trace): How will you get your water? Are there spigots, or do you need to pack it all in? What about wastewater and trash? Follow Leave No Trace principles religiously. Pack it in, pack it out. Leave the campsite cleaner than you found it.
- Safety (wildlife, distance to help, comms): Be aware of local wildlife. Know what to do if you encounter something. How far is the nearest ranger station or town? Do you have cell service, or will you need a satellite communicator? It’s a good idea to tell someone where you’re going and when you expect to be back.
Step-by-step (field workflow)
Setting up a pop-up camper is a process, but once you do it a few times, it becomes second nature. Think of it as a little dance with your camper.
Many pop-up camper accessories are designed to simplify this setup process. Items like electric tongue jacks or specialized leveling tools can make a big difference.
1. Park and level: Find a suitable spot.
- What “good” looks like: The camper is on relatively flat ground, and you’ve used the stabilizer jacks to make it perfectly level and stable. No rocking when you walk inside.
- Common mistake: Skipping the leveling. This makes everything inside feel wonky and can put stress on the camper’s structure. Just use those jacks!
2. Remove travel latches: Unlock and remove all latches securing the roof for travel.
- What “good” looks like: All latches are undone and stored safely. The roof is free to move.
- Common mistake: Forgetting a latch. This can prevent the roof from lifting or, worse, cause damage if you try to force it.
3. Lift the roof: Use the crank system (manual or electric) to raise the roof.
- What “good” looks like: The roof lifts smoothly and evenly, reaching its full upright position.
- Common mistake: Cranking too fast or unevenly. This can bind the lift mechanism or strain the canvas. Go steady.
4. Secure the roof supports: Once the roof is up, engage the support poles or cables that hold it in place.
- What “good” looks like: The roof feels solid and secure. No sagging.
- Common mistake: Not fully engaging the supports. This is a major safety issue; a collapsing roof is no joke.
5. Unfold the beds: Pull out the slide-out sleeping platforms.
- What “good” looks like: The beds slide out easily and lock into place. The tent material drapes nicely over them.
- Common mistake: Forcing the beds if they stick. Check for obstructions or canvas that’s caught.
6. Set up the tenting: Unzip and pull out the canvas tent sections that cover the beds.
- What “good” looks like: The tent material is taut, with no major wrinkles or slack. All poles and tensioners are in place.
- Common mistake: Not pulling the canvas taut. This can lead to water pooling or wind flapping.
7. Install any interior supports/poles: Some campers have internal poles to support the roof or walls.
- What “good” looks like: All poles are in their designated spots, adding rigidity.
- Common mistake: Missing a pole. This can make the tent feel flimsy and less weather-resistant.
8. Open doors and windows: Unzip and open up the camper for ventilation and access.
- What “good” looks like: Doors and screens are open, letting in fresh air and light.
- Common mistake: Leaving screens zipped up tight. You’ll get stuffy quickly.
9. Set up furniture/appliances: Deploy any tables, chairs, or kitchen components.
- What “good” looks like: Everything is in its ready-to-use position.
- Common mistake: Leaving things stowed when they should be deployed. You’re here to camp, use your space!
10. Connect utilities (if applicable): Hook up water, power, or propane if you’re using them.
- What “good” looks like: All connections are secure and leak-free. Systems are functioning.
- Common mistake: Improperly connecting propane. Always double-check for leaks.
Common mistakes (and what happens if you ignore them)
| Mistake | What it causes | Fix |
|---|---|---|
| Forgetting a travel latch | Roof won’t lift, or damage to camper/vehicle during travel. | Double-check all latches before driving. |
| Not leveling the camper | Uncomfortable sleeping, doors/drawers stick, uneven wear on the frame. | Use stabilizer jacks to get perfectly level. |
| Forcing a stuck bed slide | Damaged slide mechanism, ripped canvas, or bent frame. | Inspect for obstructions, check canvas, and lubricate slide rails if needed. |
| Not securing roof supports | Roof could sag or collapse, especially in wind or rain. | Ensure all roof supports are fully engaged and locked. |
| Improperly tensioned tenting | Water pooling, wind flapping, canvas wear, reduced weather resistance. | Pull tenting taut and adjust all tensioners. |
| Ignoring fire restrictions | Fines, damage to the environment, potential for wildfire. | Always check and strictly adhere to local fire regulations. |
| Not checking road conditions | Getting stuck, damaging tires, or vehicle damage on rough terrain. | Research road conditions and know your vehicle’s capabilities. |
| Forgetting to pack out trash | Attracts wildlife, degrades the natural beauty, potential fines. | Practice Leave No Trace; pack out everything you pack in. |
| Not informing someone of your plans | Delayed help in case of an emergency. | Tell a friend or family member your itinerary and expected return time. |
| Leaving propane connections loose | Leaks, potential fire hazard. | Always check propane connections for leaks after hooking up. |
| Not bringing enough water | Discomfort, dehydration, need for emergency trips to town. | Plan your water needs and bring extra, or know where to refill safely. |
| Setting up in a prohibited area | Eviction, fines, and negative impact on future access. | Verify you are in a designated camping area and have the right permits if required. |
Having the right pop-up camper accessories can help you avoid many common mistakes. For instance, a good set of leveling blocks and chocks are invaluable for stability.
Decision rules (simple if/then)
- If the road is unpaved and looks rough, then use low gear and go slow because this protects your tires and suspension.
- If there’s a burn ban, then absolutely no campfires, no exceptions, because safety comes first.
- If the wind is picking up significantly, then consider taking down any non-essential awnings or tarps because strong gusts can damage them.
- If you hear coyotes or other wildlife nearby, then secure all food properly and don’t leave trash out because you don’t want to attract them to your campsite.
- If your pop-up feels wobbly after leveling, then check the stabilizer jacks again and ensure the ground is firm because a stable camper is a safe camper.
- If the forecast shows heavy rain, then double-check your tent seams and consider bringing extra tarps for added protection because a dry interior is key to a good trip.
- If you’re on BLM land and unsure about dispersed camping rules, then find the local BLM office or website to confirm because regulations can vary.
- If your pop-up has an electric lift and it’s slow or noisy, then check the battery charge or power source before forcing it because you could damage the motor.
- If you plan to cook with propane, then always perform a leak test on all connections before igniting anything because safety is paramount.
- If you plan to use a portable generator, then check campground rules about noise levels and operating hours because you don’t want to be that neighbor.
- If you’re unsure about water quality at a campground, then use a water filter or purification tablets because you don’t want to get sick.
- If you’re leaving your campsite for an extended period, then secure your pop-up and consider taking valuables with you because it’s always better to be safe than sorry.
FAQ
How do you make a pop-up camper level?
You use the crank-down stabilizer jacks located at each corner of the camper. Lower them until they make firm contact with the ground and the camper feels stable and no longer rocks.
What’s the biggest difference between a pop-up and a travel trailer?
Pop-ups are much lighter and more compact when collapsed, making them easier to tow and store. They also offer a more open-air camping experience with their tent-like sides.
Can you use a pop-up camper in the rain?
Yes, most pop-ups are designed to be waterproof. However, it’s crucial to ensure the tenting is properly tensioned to prevent water pooling and that all seams are in good condition.
How do you set up a pop-up camper in the wind?
It’s best to have at least two people. Try to position the camper so the wind is not directly hitting the canvas during setup. Secure everything quickly and consider using extra tie-downs if the wind is severe.
What kind of vehicle can tow a pop-up camper?
Most pop-ups are lightweight enough to be towed by many standard SUVs and even some cars. Always check your vehicle’s towing capacity and the camper’s dry weight.
Do pop-up campers have bathrooms?
Some larger models offer portable toilets or cassette toilets, but dedicated shower and toilet facilities are less common than in larger RVs. Many campers rely on campground facilities or portable shower tents.
How long does it take to set up a pop-up camper?
For a basic setup, it can take anywhere from 15 to 30 minutes once you’re familiar with the process. More complex setups or first-time attempts might take longer.
Is a pop-up camper secure against wildlife?
While the hard roof and walls offer some protection, the fabric tenting can be vulnerable to determined animals. Always store food securely and keep a clean campsite.
What this page does NOT cover (and where to go next)
- Specific maintenance procedures for individual pop-up models.
- Detailed troubleshooting for electrical or plumbing systems.
- Advanced off-road driving techniques for towing.
- Specific campsite reservation systems or booking platforms.
- Legal requirements for RV registration and insurance in your state.

Camping Bob has spent over 20 years camping across the US — from BLM dispersed sites in the Southwest to KOA campgrounds in the Pacific Northwest. He writes practical, no-nonsense guides to help fellow campers get outdoors with confidence.