
Brewing Delicious Coffee With a Camping Percolator
Quick answer
- Get a good quality percolator. Stainless steel or enamel-coated is solid.
- Use coarse grounds. Too fine, and you’ll get sludge.
- Measure your water and coffee. A good starting point is 1:15 coffee to water ratio.
- Heat it up slow and steady. Don’t rush the brew.
- Watch for the steady perking. That’s your signal.
- Let it rest a minute before pouring. Gives the grounds time to settle.
For a durable and reliable option, consider a high-quality stainless steel camping percolator. They’re built to last and provide excellent coffee on the go.
![COLETTI Bozeman Percolator Coffee Pot â?NO Aluminum or Plastic [9 cup]](https://m.media-amazon.com/images/I/31Wxzktrx5L._SL160_.jpg)
What to check first (do this before you drive out)
Before you even think about packing that percolator, a few things need a once-over. It’s the difference between a great cup and a muddy mess, or worse, a fire hazard.
- Land manager / legality: Who’s in charge out there? Is it US Forest Service, BLM, a state park? They set the rules. Check their websites or call ahead. Makes sure you’re allowed to camp and have a fire if you plan on it. I learned that the hard way once, thought I was good to go, turns out it was a restricted area. Bummer.
- Access/road conditions: Can your rig actually get there? Some forest roads are no joke. Gravel, washboard, mud, steep grades – know your vehicle’s limits. A Subaru Outback might handle it, but a sedan definitely won’t. Always check local conditions if you can.
- Fire restrictions + weather + wind: This is huge. Fire bans are common, especially in dry seasons. No fires means no percolating over an open flame. Check the current fire danger level and any burn bans. Also, look at the forecast. High winds can make an open flame dangerous, and rain can put a damper on things, literally.
- Water plan + waste plan (Leave No Trace): Where are you getting your water? Bring enough, or know if there’s a potable source. And what about cleaning up? Pack out everything you pack in. No exceptions. That includes coffee grounds.
- Safety (wildlife, distance to help, comms): Be aware of your surroundings. Bears, snakes, whatever’s local. Let someone know where you’re going and when you expect to be back. Cell service is usually a myth out there, so have a backup plan for emergencies.
Step-by-step (field workflow)
Alright, you’ve checked the boxes. Time to get that coffee brewing. It’s pretty straightforward, but a few details make all the difference.
1. Gather your gear: You need the percolator, coffee grounds, water, a heat source (fire, camp stove), and something to drink from.
- What “good” looks like: Everything is within easy reach and clean.
- Common mistake: Forgetting a mug or the coffee scoop. Always do a quick gear check before you leave home.
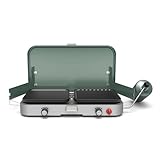
If you’re looking for a consistent heat source, a portable camping stove is an excellent choice. It offers more control than an open fire, ensuring a perfect brew every time.
2. Measure your water: Fill the percolator with cold water up to the desired level. Most have markings.
- What “good” looks like: You know exactly how much water you’re using for your coffee-to-water ratio.
- Common mistake: Guessing. Too much water makes weak coffee; too little can make it boil over and scorch.
3. Add coffee grounds: Put your coarse grounds into the basket. A good starting point is about 1:15 coffee to water by weight, or roughly 2 tablespoons of coffee per 6 ounces of water. Adjust to your taste.
- What “good” looks like: Grounds are evenly distributed in the basket, not packed down.
- Common mistake: Using fine grounds. They’ll clog the filter and end up in your cup. Stick to coarse or percolator grind.
4. Assemble the percolator: Place the basket inside, put the lid on, and ensure the glass sight dome (if it has one) is secure.
- What “good” looks like: All parts are fitted correctly and snugly.
- Common mistake: Not seating the basket properly. It can slip, leading to grounds in the water chamber.
5. Place on heat source: Set the percolator over your campfire coals or camp stove.
- What “good” looks like: Stable placement, not wobbly. Heat is moderate.
- Common mistake: Putting it on super high heat. This can scorch the coffee and make the pot too hot to handle.
6. Heat slowly: Bring the water to a gentle boil. You’ll hear it start to gurgle.
- What “good” looks like: A steady, rhythmic perking sound.
- Common mistake: Letting it come to a rolling boil too fast. This can over-extract the coffee.
7. Watch the perking: Observe the liquid bubbling up through the sight dome. This is the brewing process.
- What “good” looks like: A steady, consistent stream of dark coffee perking.
- Common mistake: Not watching it. If it boils too hard or too long, it can become bitter.
8. Brew for the right time: Let it perk for about 5–10 minutes, depending on your desired strength and heat level.
- What “good” looks like: The coffee is a rich, dark color.
- Common mistake: Perking too long. This extracts bitter compounds.
9. Remove from heat: Carefully take the percolator off the heat source.
- What “good” looks like: You’re using pot holders or a sturdy handle.
- Common mistake: Trying to grab a scorching hot handle without protection. Ouch.
10. Let it rest: Let the percolator sit for 1–2 minutes off the heat. This allows the grounds to settle to the bottom.
- What “good” looks like: The perking action has completely stopped.
- Common mistake: Pouring immediately. You’ll get a mouthful of grounds.
11. Pour carefully: Tilt the percolator slowly and pour into your mug.
- What “good” looks like: Clean coffee, minimal grounds in the cup.
- Common mistake: Pouring too fast or at too steep an angle.
After carefully pouring your freshly brewed coffee, enjoy it in a durable camping coffee mug designed for outdoor adventures.

12. Clean up: Empty the grounds away from water sources, rinse the percolator, and pack out all waste.
- What “good” looks like: The site is cleaner than you found it.
- Common mistake: Leaving grounds in the pot or dumping them carelessly.
Common mistakes (and what happens if you ignore them)
| Mistake | What it causes | Fix |
|---|---|---|
| Using fine coffee grounds | Sludge in your cup, clogged filter, bitter coffee | Use coarse or percolator grind. |
| Rushing the heating process | Scorched coffee, bitter taste, uneven extraction | Heat slowly over moderate heat. |
| Perking for too long | Over-extraction, extremely bitter and harsh coffee | Watch the perking and remove from heat after 5-10 minutes. |
| Not letting it rest after brewing | Grounds in your cup, unpleasant texture | Let the percolator sit for 1-2 minutes off the heat. |
| Using dirty equipment | Off-flavors, potential for spoilage | Clean your percolator thoroughly before and after each use. |
| Not securing the lid or sight dome | Leaks, steam burns, lost parts | Ensure all parts are fitted correctly and snugly. |
| Placing on unstable heat source | Spills, potential fire hazard, damaged equipment | Use a stable surface for your stove or a secure spot on coals. |
| Forgetting essential accessories | Can’t make coffee, frustration | Pack a checklist and verify all items before leaving home. |
| Improper disposal of grounds | Attracts pests, pollutes environment | Pack out grounds or bury them properly, away from water sources. |
| Not checking fire restrictions | Illegal fires, fines, risk of wildfire | Always verify current fire restrictions before your trip. |
| Ignoring weather conditions | Unsafe fire, discomfort, ruined brewing experience | Check the forecast and be prepared for wind and rain. |
Decision rules (simple if/then)
- If the fire danger is “high” or “extreme,” then do not plan to use an open flame for brewing because fire restrictions will likely prohibit it.
- If you are unsure about the road conditions, then check with the local land manager or recent visitor reports because you might get stuck.
- If your percolator is made of thin aluminum, then be extra careful with heat control because it can scorch easily.
- If you want a stronger brew, then use slightly more coffee grounds, not more perking time, because over-perking makes it bitter.
- If the wind picks up significantly, then consider moving your brewing operation to a more sheltered spot or using a camp stove because an open flame becomes hazardous.
- If you are camping in bear country, then store your coffee grounds securely with your food because they can attract wildlife.
- If you only have a short time to brew, then pre-measure your coffee and water at home because it saves time at the campsite.
- If you forgot your coffee scoop, then use a clean tablespoon or a makeshift measuring tool because you still need to measure accurately.
- If you notice the coffee is tasting weak, then check if you used enough grounds or if the grounds are too coarse because these affect extraction.
- If you are at a developed campsite with potable water, then you can bring less water, but always have a backup because sources can dry up or be shut off.
- If you want to avoid grounds in your cup, then pour slowly and leave the last bit of liquid in the pot because that’s where most grounds settle.
If your current percolator is made of thin aluminum, upgrading to a stainless steel camping percolator can provide better heat distribution and prevent scorching.
FAQ
Q: What kind of coffee grounds should I use for a camping percolator?
A: You need coarse grounds, similar to what you’d use for a French press. Fine grounds will go right through the filter and make a muddy mess.
Q: How much coffee do I put in?
A: A good starting point is 1:15 coffee to water ratio by weight, or about 2 tablespoons of coffee for every 6 ounces of water. Adjust to your personal taste.
Q: Can I use my percolator on a camp stove?
A: Absolutely. A camp stove offers more consistent heat control than a campfire, which can be a real advantage.
Yes, you absolutely can use your percolator on a portable camping stove! This often provides more consistent heat control than a campfire.
Q: My coffee tastes bitter. What did I do wrong?
A: You likely perked it for too long or used too fine of grounds. Try reducing the perking time and ensure you’re using coarse grounds.
Q: How do I clean a camping percolator?
A: Once it’s cooled, empty the grounds, rinse with water, and use a brush or sponge if needed. Avoid harsh detergents that can leave a taste. Pack it out clean.
Q: What if I don’t have a glass sight dome?
A: You’ll have to rely on sound and timing. Listen for the gurgling and perking, and estimate the brew time based on experience and heat.
Q: Can I make tea in a percolator?
A: Yes, you can! Use loose leaf tea instead of coffee grounds. Follow the same process, but tea usually requires less brewing time.
Q: Is it okay to leave grounds in the percolator overnight?
A: It’s best not to. It can make cleaning harder and potentially lead to off-flavors for your next brew. Clean it as soon as you can.
What this page does NOT cover (and where to go next)
- Specific campsite reservation systems and booking procedures.
- Detailed regulations on campfire building for every park and forest.
- In-depth guides to identifying local flora and fauna.
- Advanced techniques for backcountry water purification.
- Legalities surrounding firearms or hunting in specific areas.

Camping Bob has spent over 20 years camping across the US — from BLM dispersed sites in the Southwest to KOA campgrounds in the Pacific Northwest. He writes practical, no-nonsense guides to help fellow campers get outdoors with confidence.