
Setting Up Your Pop-Up Tent with Ease
Quick answer
- Find a flat, clear spot.
- Unpack everything first.
- Identify the poles and fabric.
- Lay it out flat, unfolded.
- Follow the color-coding or instruction tags.
- Stake it down securely.
- Toss your sleeping bag in.
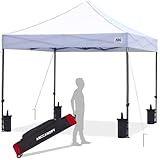
For a hassle-free setup, consider a high-quality pop-up tent designed for quick deployment.
What to check first (do this before you drive out)
Before you even think about heading out, do a quick gear check. It’s the difference between a chill trip and a frustrating one.
- Land manager / legality: Who owns this patch of dirt? Is it National Forest, BLM, a state park, or private land? Rules change. Always check the official website for the area you’re visiting. Some places require permits or have specific camping zones. Don’t assume.
- Access/road conditions: Is that “road” to your campsite actually passable? Some pop-up tent spots are right off the main drag, others are down gnarly dirt tracks. Know your vehicle’s capabilities. Is it a sedan, or do you have that AWD beast? Low clearance and mud are a bad combo.
- Fire restrictions + weather + wind: This is huge. Check for fire bans. Seriously. A stray spark can ruin more than just your trip. Look at the weather forecast, and pay attention to wind. Pop-up tents can be flight risks in high winds if not secured properly.
- Water plan + waste plan (Leave No Trace): Where’s your water coming from? Are you bringing it all, or is there a potable source nearby? And what about waste? Pack it in, pack it out. This is non-negotiable. Leave the spot better than you found it.
- Safety (wildlife, distance to help, comms): What critters call this place home? Know the local wildlife and how to store food safely. How far are you from the nearest ranger station or town? Cell service is often spotty. Have a plan for emergencies, like a satellite communicator if you’re going remote.
Step-by-step (field workflow)
This is how you get that pop-up tent from its bag to your cozy shelter.
1. Unpack and inventory: Pull everything out of the bag. Tent, poles, stakes, footprint (if you have one).
- Good looks like: All parts are accounted for and easily visible.
- Common mistake: Forgetting to check the bag contents before you’re miles from home. Avoid this by doing a quick check in your driveway.
2. Choose your spot: Find a level, clear area, away from hazards like dead trees or water runoff paths.
- Good looks like: A smooth, flat surface with plenty of space around the tent.
- Common mistake: Setting up on a slope or under a dead branch. It’s uncomfortable and dangerous. Take a few extra minutes to find the best spot.
3. Lay out the tent body: Unfold the tent completely on the ground. For most pop-ups, this means unfolding it from its compact circle.
- Good looks like: The tent is spread out flat, with the door facing where you want it.
- Common mistake: Trying to force it into shape before it’s fully laid out. Patience here pays off.
4. Identify the setup mechanism: Most pop-ups have shock-corded poles integrated into the fabric. Some might have a central hub or a frame that needs to be snapped together.
- Good looks like: You can see the poles and how they are meant to bend and connect.
- Common mistake: Not understanding how your specific tent’s mechanism works. Read the tag or manual beforehand.
5. Initiate the pop: This is the fun part. For many, it involves pushing or pulling a central pole or frame until it locks into place. Follow the visible cues on the tent.
- Good looks like: The tent frame springs into its three-dimensional shape with relative ease.
- Common mistake: Forcing it. If it feels like you’re breaking it, stop and re-evaluate. There’s usually a trick.
6. Secure the base: Once the tent is standing, start staking down the corners. Use all the stake loops.
- Good looks like: The tent is firmly anchored to the ground, not shifting.
- Common mistake: Only staking one or two corners. The wind will catch it. Hammer those stakes in deep.
7. Attach the rainfly (if applicable): If your tent has a separate rainfly, drape it over the tent body and secure it to the poles or corners.
- Good looks like: The rainfly is taut and covers the tent evenly.
- Common mistake: Putting the rainfly on backward or upside down. Double-check the orientation.
8. Stake out guylines: Use the provided guylines to further stabilize the tent, especially in windy conditions. Anchor them to trees, rocks, or ground stakes.
- Good looks like: Guylines are tensioned, adding significant stability to the structure.
- Common mistake: Skipping guylines. They are crucial for wind resistance.
9. Ventilation check: Open any vents or mesh windows to ensure good airflow.
- Good looks like: Air can move freely through the tent, reducing condensation.
- Common mistake: Leaving all openings zipped shut. Condensation is your enemy.
10. Interior setup: Toss in your sleeping bag, pad, and any other gear.
- Good looks like: A cozy, organized space ready for sleep.
- Common mistake: Cramming too much stuff in. Keep it organized to maximize space.
Once your tent is up, toss in a comfortable sleeping bag to ensure a good night’s rest.

Common mistakes (and what happens if you ignore them)
| Mistake | What it causes | Fix |
|---|---|---|
| Not checking the weather | Tent blows away, gets soaked, or is too hot/cold | Check forecast and wind, adjust plans or gear accordingly. |
| Setting up on uneven ground | Uncomfortable sleep, potential water pooling | Find a flat spot, use a footprint for extra padding. |
| Forcing the pop-up mechanism | Damaged poles or fabric, tent won’t set up right | Follow instructions, use gentle but firm pressure. |
| Not staking down all corners | Tent can lift or blow away in wind | Use all stake loops, drive stakes in at an angle. |
| Skipping guylines | Tent is unstable in wind, can collapse | Use guylines to anchor tent to trees or ground stakes. |
| Not checking fire restrictions | Wildfire, hefty fines, or jail time | Always check official sources for current fire bans. |
| Leaving vents closed | Excessive condensation inside the tent | Open vents and mesh panels for airflow. |
| Ignoring Leave No Trace principles | Environmental damage, restricted access for others | Pack out all trash, minimize campfire impact, respect wildlife. |
| Not knowing the land manager | Trespassing, breaking rules, getting fined | Verify who manages the land and their specific regulations. |
| Arriving at dusk with no light | Fumbling in the dark, difficult setup | Plan to arrive with ample daylight to set up camp. |
| Not having a repair kit | Small tears or broken poles become major issues | Pack duct tape, cordage, and a small multi-tool. |
| Overpacking the tent | Reduced comfort, difficult to move around | Pack only essentials, utilize external storage if needed. |
Decision rules (simple if/then)
- If the wind is gusting over 20 mph, then deploy all guylines and consider a more sheltered campsite because high winds can easily damage or blow away an unsecured tent.
- If there’s a red flag warning or fire ban in effect, then strictly adhere to it and plan for a stove-only cooking setup because wildfires are devastating and preventable.
- If the ground is rocky or uneven, then use a footprint or extra tarp underneath the tent floor because it protects the tent fabric and provides a smoother sleeping surface.
- If you’re setting up near a water source, then store food properly and keep a clean camp because it’s crucial for preventing unwanted wildlife encounters.
- If you’re unsure about the road conditions, then check with the land manager or local ranger station before you go because a 4WD might be necessary to reach your intended spot.
- If you see signs of recent heavy rain, then look for higher ground or runoff paths to avoid setting up in a potential flash flood area because water can rise quickly.
- If your tent has color-coded poles or clips, then match them during setup because it’s the easiest way to ensure a correct and stable structure.
- If you’re camping with kids or pets, then ensure the tent is well-staked and clear of tripping hazards because safety is paramount.
- If you notice condensation building up inside, then open more vents or the rainfly slightly because proper ventilation prevents dampness and improves comfort.
- If you have a separate rainfly, then orient it correctly before attaching because it’s designed to shed water and protect you from the elements.
- If you’re setting up late in the day, then prioritize getting the tent secure over perfect organization because shelter is the immediate priority.
FAQ
How do I know if I have the right spot for my pop-up tent?
Look for a flat, clear area free of rocks, roots, and low-hanging branches. Ensure it’s not in a natural drainage path where water could pool.
My pop-up tent seems to have a mind of its own. What am I doing wrong?
Most pop-ups are designed to spring into shape. If it’s fighting you, it might be folded incorrectly or you’re not initiating the pop-up mechanism properly. Gentle but firm pressure is key.
If your pop-up tent is giving you trouble, ensure you’re using a model known for its intuitive design.
Do I really need to stake down every single point?
Yes, absolutely. Every stake loop and guyline is there for a reason, especially in windy conditions. A partially staked tent is an invitation for disaster.
What’s the deal with condensation inside my tent?
It’s normal, especially in humid or cool weather. It’s caused by your breath and body heat. Proper ventilation by opening vents and mesh panels helps a lot.
Can I set up my pop-up tent on sand?
Yes, but you’ll need longer, wider stakes designed for sand to keep it secure. Regular stakes will pull out easily.
My pop-up tent bag is too small to repack it. Help!
This is a common struggle. Make sure the tent is completely dry and folded as tightly as possible. Sometimes, it takes a few tries to get it back in the bag neatly.
How do I protect my tent floor from damage?
Always use a footprint or a ground tarp. This adds a layer of protection against sharp objects and moisture.
What if a pole breaks on my pop-up tent?
Most pop-up tents have integrated poles. You can often find repair sleeves or use strong duct tape as a temporary fix. For a permanent fix, you might need to contact the manufacturer.
What this page does NOT cover (and where to go next)
- Specific campsite reservation systems and booking platforms.
- Detailed bear-proofing techniques for food storage.
- Advanced tent repair beyond basic fixes.
- Navigating complex wilderness permit requirements.
- Choosing the right sleeping bag for extreme temperatures.

Camping Bob has spent over 20 years camping across the US — from BLM dispersed sites in the Southwest to KOA campgrounds in the Pacific Northwest. He writes practical, no-nonsense guides to help fellow campers get outdoors with confidence.