
Maximizing Your Cool Bag’s Effectiveness
Quick answer
- Pre-chill everything going into the bag.
- Pack it tight. Air is the enemy.
- Use block ice or frozen water bottles.
- Keep it out of the sun.
- Open it as little as possible.
- Consider a second, smaller bag for drinks.
- Insulate the bag itself if you can.
What to check first (do this before you drive out)
Before you even think about packing your cooler, make sure you’ve got the basics covered for your trip. This isn’t just about keeping your food cold; it’s about safety and being prepared.
- Land manager / legality: Who’s in charge of the area you’re heading to? Is it National Forest, BLM land, a State Park, or private? Each has its own rules about where you can camp, campfires, and sometimes even what you can bring. A quick check on their official website or a call can save you a headache.
- Access/road conditions: Is that dirt road really a two-track that your sedan will hate? Check recent reports or ask locals if you’re unsure. High clearance or 4WD might be the difference between a great spot and a tow truck call.
- Fire restrictions + weather + wind: This is crucial. Dry conditions mean fire bans. High winds can make fires dangerous and camping miserable. Check the forecast for rain, extreme heat, or cold. A little wind can be nice, but a gale force is not.
- Water plan + waste plan (Leave No Trace): How much water do you need? Are you near a potable source or bringing it all? And what about trash? Pack it in, pack it out. This is non-negotiable. Plan to carry out everything you carry in.
- Safety (wildlife, distance to help, comms): Know what critters are in the area. Store food properly to avoid unwelcome visitors. How far is the nearest town or ranger station? Do you have cell service? Consider a satellite messenger if you’re going remote.
Step-by-step (field workflow)
Getting your cool bag dialed in for a trip is key. It’s not rocket science, but a few smart moves make a big difference.
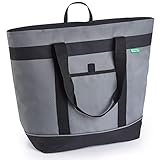
To truly maximize your cool bag’s effectiveness, consider investing in a high-quality insulated cooler bag. A good one can make all the difference in keeping your items cold for longer.
1. Pre-chill your cooler:
- What to do: Bring your cooler inside the night before. If it’s been sitting in a hot garage, it’s starting at a disadvantage.
- What “good” looks like: The inside of the cooler feels cool to the touch.
- Common mistake: Packing warm food and drinks into a warm cooler. This makes your ice work overtime from the start.
- How to avoid it: Put a couple of ice packs or frozen water bottles in the empty cooler overnight.
For an even better start, place a couple of reusable ice packs in your empty cooler overnight. These can significantly boost its pre-chilling efforts.

2. Pre-chill or freeze your contents:
- What to do: Get your drinks and food cold or frozen before they go in. Leftovers should be cooled in the fridge, not on the counter.
- What “good” looks like: Everything is fridge-cold or rock-solid frozen.
- Common mistake: Packing room-temperature items. They’ll melt your ice faster than you can say “warm beer.”
- How to avoid it: Plan ahead. Put drinks in the fridge the day before. Freeze water bottles you’ll use for ice and drinking later.
3. Choose your ice wisely:
- What to do: Block ice lasts longer than cubes. Frozen water bottles are great because they become drinking water as they melt.
- What “good” looks like: You have a mix of block ice and maybe some cubes or frozen bottles.
- Common mistake: Relying solely on loose ice cubes. They melt quickly and leave a lot of water.
- How to avoid it: Buy or make large blocks of ice. Freeze your own water bottles for dual duty.
For an eco-friendly and practical solution, consider using freezable water bottles as your ice source. They keep your cooler cold and provide refreshing drinks as they melt.

4. Layer your ice and food:
- What to do: Put a layer of ice at the bottom. Then food. Then more ice. Top with ice.
- What “good” looks like: Ice is in direct contact with most of your food, especially on the bottom and top.
- Common mistake: Burying all the ice on top, or having food sitting in a puddle of meltwater.
- How to avoid it: Think of it like building a sandwich with ice as the bread.
5. Pack it tight:
- What to do: Fill any empty space. Use towels, crumpled newspaper, or even more ice packs.
- What “good” looks like: The cooler is full, with minimal air pockets.
- Common mistake: Leaving lots of air in the cooler. Air transfers heat.
- How to avoid it: Use smaller items like bags of ice, frozen veggies, or even rolled-up towels to fill gaps.
To fill any empty spaces and further enhance cooling, consider using additional reusable ice packs. They are great for minimizing air pockets and keeping everything colder.
6. Keep it in the shade:
- What to do: Park your vehicle so the cooler is out of direct sunlight. If it’s on the ground, put it under a tarp or picnic table.
- What “good” looks like: The cooler’s exterior is cool to the touch, not radiating heat.
- Common mistake: Leaving the cooler baking in the sun all day. It’s like putting your ice in an oven.
- How to avoid it: Always find a shaded spot for your cooler, even if it means moving it a few times.
7. Open it sparingly:
- What to do: Plan what you need before you open the lid. Get it out quickly and close it.
- What “good” looks like: The cooler is only opened a few times a day, and for short periods.
- Common mistake: Constantly peeking inside to see what’s there or rummaging around.
- How to avoid it: Designate one person to be the “cooler opener” and make sure they know what’s needed.
8. Consider a drinks-only cooler:
- What to do: If you’re drinking a lot, use a separate, smaller cooler just for beverages.
- What “good” looks like: Your food cooler stays closed more often because drinks are easily accessible elsewhere.
- Common mistake: Opening the main food cooler every time someone wants a drink.
- How to avoid it: Keep the main cooler for perishables and the smaller one for drinks that get opened more frequently.
9. Drain meltwater strategically:
- What to do: Depending on your setup, you might drain some water to prevent food from sitting in it, but not too much. Some water helps keep things cold.
- What “good” looks like: You’ve removed excess water but still have some ice and cold water left.
- Common mistake: Draining all the meltwater immediately. The cold water is still doing its job.
- How to avoid it: Check the water level. If food is submerged, drain just enough to free it. Leave some in there.
10. Use insulation:
- What to do: Wrap your cooler in a blanket or sleeping bag when it’s in the car or at camp.
- What “good” looks like: The cooler feels less hot on the outside, even if it’s been in the sun for a bit.
- Common mistake: Thinking the cooler’s plastic is enough. It can always use more help.
- How to avoid it: A simple blanket can add a significant layer of insulation.
Common mistakes (and what happens if you ignore them)
| Mistake | What it causes | Fix |
|---|---|---|
| Packing warm food/drinks | Rapid ice melt, spoiled food | Pre-chill or freeze all contents. |
| Leaving cooler in direct sun | Cooler heats up, ice melts fast | Always keep it in the shade. |
| Opening it too often/too long | Heat enters, cold air escapes | Plan your access, be quick, and close it tight. |
| Not packing it full | Air pockets allow heat transfer | Fill empty space with towels, extra ice, or other items. |
| Using only ice cubes | Melts quickly, leaves lots of water | Use block ice and frozen water bottles for longer-lasting cold. |
| Not pre-chilling the cooler itself | Cooler starts warm, uses more ice | Bring cooler inside and add ice packs overnight. |
| Letting food sit in meltwater | Soggy food, potential for bacterial growth | Drain excess water strategically, but leave some for insulation. |
| Not having a backup plan for ice | Running out of ice on a long trip | Bring extra ice, freeze water bottles, or have a plan to refreeze. |
| Not considering a separate drinks cooler | Food cooler opened too frequently for drinks | Use a smaller, dedicated cooler for beverages. |
| Packing raw meat directly with other food | Cross-contamination if leaks occur | Double-bag raw meats or store them at the bottom. |
To avoid relying solely on ice cubes, incorporate freezable water bottles. They offer a dual benefit: keeping items cold and providing potable water as they thaw.
Decision rules (simple if/then)
- If the trip is longer than two days, then use block ice because it melts slower than cubes.
- If you are car camping and have space, then bring a second cooler for drinks because it reduces how often you open the main food cooler.
- If the weather forecast calls for extreme heat, then pack extra ice or consider a powered cooler because ambient temperatures will challenge your ice retention.
- If you are backpacking or in a situation where weight is critical, then use freeze-dried meals and minimize perishable items because cooler ice is heavy.
- If you have a high-quality, insulated cooler, then you can get away with fewer ice packs because the insulation does most of the heavy lifting.
- If you are going to be accessing your cooler frequently, then consider a chest-style cooler with a lid that opens from the top because less cold air escapes compared to a front-opening style.
- If you are concerned about wildlife getting into your cooler, then use a bear-resistant cooler or secure it properly because food left accessible is a safety hazard for both you and the animals.
- If you are planning on drinking the melted ice water, then use only potable water for your ice because you don’t want to consume contaminants.
- If your cooler is showing signs of wear and tear (cracks, worn seals), then consider replacing it because its insulation capabilities are compromised.
- If you are traveling in a hot vehicle, then place the cooler on the floor of the car, which is generally cooler than the seats, because heat rises.
- If you are using frozen water bottles, then plan to drink them as they thaw because they are a convenient source of cold water.
- If you are camping in a place with limited ice availability, then consider investing in a good quality cooler and packing it efficiently to maximize its performance.
If you are using freezable water bottles, plan to drink them as they thaw because they are a convenient source of cold water.
If you have a high-quality insulated cooler bag, you can often get away with fewer ice packs because its superior insulation does most of the heavy lifting, keeping your contents colder for longer.
FAQ
How long can I expect my cooler to keep ice?
This varies a lot, but a good cooler packed well can keep ice for 3–5 days. Cheaper ones might only last a day or two. It depends on the cooler quality, how much ice you use, and how often you open it.
Should I drain all the water from my cooler?
No, not entirely. Some meltwater helps keep things cold. Only drain it if your food is floating in it or if it’s getting too full. The cold water is still doing its job.
What’s the difference between block ice and cubed ice?
Block ice has less surface area, so it melts much slower. Cubed ice melts faster but can fill gaps better and chill things quickly. A combination is often best.
Can I put dry ice in my cooler?
Yes, but be careful. Dry ice is extremely cold and can cause frostbite. It also sublimates into CO2 gas, so ensure good ventilation. It’s great for keeping things frozen solid.
What if my cooler isn’t full? How do I fill the extra space?
Air is the enemy of cold. Fill empty space with towels, crumpled newspaper, extra ice packs, or even bags of ice. The goal is to minimize air pockets.
How do I clean my cooler after a trip?
Wash it with warm, soapy water. A mild bleach solution (a tablespoon of bleach per gallon of water) can help sanitize it and remove odors. Rinse thoroughly and let it air dry completely.
Is it better to put drinks or food in the cooler first?
It’s generally better to put the food in first, then pack ice around it. If you’re using a separate drinks cooler, pack that one with plenty of ice too.
What are the best types of ice for a cooler?
Block ice, frozen water bottles, and reusable gel packs are all good options. Dry ice is excellent for keeping things frozen but requires special handling.
Among the best types of ice for a cooler, freezable water bottles stand out for their versatility, offering both cooling power and a drinkable water supply.
What this page does NOT cover (and where to go next)
- Detailed reviews of specific cooler brands and models.
- Advanced techniques for multi-week expeditions.
- Recipes for food that travels well in a cooler.
- How to build your own custom cooler or ice chest.
- Regulations on food storage in specific national parks or wilderness areas.

Camping Bob has spent over 20 years camping across the US — from BLM dispersed sites in the Southwest to KOA campgrounds in the Pacific Northwest. He writes practical, no-nonsense guides to help fellow campers get outdoors with confidence.