DIY Cooler: Build Your Own Insulated Container for Cold Drinks
Quick answer
- You can build a functional cooler using common materials like foam board and duct tape.
- Focus on creating a tight seal to keep the cold in and the heat out.
- Consider the size needed for your gear and how you’ll transport it.
- A robust build will keep your drinks frosty for a solid day, maybe more.
- It’s a budget-friendly alternative to expensive hard-sided coolers.
- Test your design before a big trip to iron out any kinks.
What to check first (do this before you drive out)
Before you start building or even think about packing, get a lay of the land. This is about making sure your project fits the reality of your camping trip.
- Land manager / legality: Who actually owns the dirt you’re planning to camp on? Is it National Forest, BLM land, a State Park, or private? Each has its own set of rules. Sometimes you can camp anywhere, other times you need a permit or have to stick to designated spots. A quick check on the managing agency’s website is usually all it takes. Don’t get fined before you even get your cooler wet.
- Access/road conditions: How are you getting to your spot? If it’s a rough dirt road, that DIY cooler might need to be tough enough to handle being jostled around. Is your rig 2WD or 4WD? Any high-clearance needs? Knowing this helps you plan the cooler’s size and how you’ll secure it in your vehicle. Nobody wants a cooler sliding around like a puck on ice.
- Fire restrictions + weather + wind: This is huge. Check for fire bans. Seriously. Nothing ruins a trip faster than accidentally starting a wildfire because you didn’t check. Also, look at the forecast. Extreme heat means your cooler needs to be top-notch. High winds can be a nuisance, especially if you’re setting up a cooking area.
- Water plan + waste plan (Leave No Trace): Think about your water. Will you have potable water readily available, or do you need to carry it all? Your cooler might be part of that. And waste – where’s it all going? Pack it in, pack it out. This applies to your cooler too. Don’t leave bits of foam or tape behind.
- Safety (wildlife, distance to help, comms): Are there bears or other critters where you’re going? Your cooler needs to be secured, maybe even bear-resistant if required. How far is the nearest ranger station or town? Do you have cell service? It’s good to know your escape routes and communication options before you get deep in the backcountry.
Step-by-step (build your own insulated container)
Building a simple, effective cooler isn’t rocket science. It’s more about smart insulation and a good seal. Here’s a straightforward way to do it.
1. Gather your materials.
- What to do: Get a sturdy cardboard box that’s the size you want your cooler to be. Grab thick foam insulation board (often sold as rigid foam for home building projects). You’ll also need strong duct tape, a utility knife, and a measuring tape.
- What “good” looks like: You’ve got a box that fits your needs and enough foam to line it well. No cheap, flimsy stuff.
- Common mistake: Using thin foam or not enough of it. This means your cooler won’t hold ice for long.
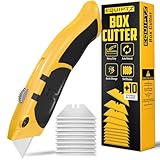
For precise cuts when working with foam board, a sharp utility knife like this one is indispensable.
2. Measure and cut the foam.
- What to do: Measure the inside dimensions of your cardboard box. Cut pieces of foam board to fit the bottom, sides, and lid. You want a snug fit.
- What “good” looks like: Your foam pieces should slide into the box walls and sit flush on the bottom without a lot of gaps.
- Common mistake: Cutting pieces too large, forcing them in, and creating bulges or cracks in the foam.
3. Line the box with foam.
- What to do: Place the foam pieces inside the cardboard box. Start with the bottom, then add the side pieces.
- What “good” looks like: A solid layer of foam completely covering the interior walls and bottom.
- Common mistake: Leaving small gaps between foam pieces. These are thermal bridges that let heat in.
4. Secure the foam.
- What to do: Use duct tape to hold the foam pieces together at the seams and to the cardboard walls. Don’t be shy with the tape.
- What “good” looks like: The foam is firmly in place, creating a continuous insulated barrier.
- Common mistake: Not taping enough. Loose foam means poor insulation.
5. Create the lid.
- What to do: Cut a piece of foam for the lid. You can either tape it directly to the inside of the cardboard box lid, or create a separate foam lid that fits snugly inside the box opening.
- What “good” looks like: A well-fitting lid that creates a tight seal when closed.
- Common mistake: A lid that’s too loose or too tight, making it hard to open or not sealing properly.
6. Seal the exterior.
- What to do: Cover the entire exterior of the cardboard box with duct tape. Overlap the tape generously to create a waterproof and more durable shell.
- What “good” looks like: A smooth, uniformly taped exterior that looks ready for the elements.
- Common mistake: Leaving any cardboard exposed. It will get wet and fall apart.
7. Add handles (optional but recommended).
- What to do: Cut slits in the sides of the cooler and thread rope or sturdy webbing through them, tying secure knots inside. Or, tape handles directly to the outside.
- What “good” looks like: Handles that feel secure and make it easy to carry the loaded cooler.
- Common mistake: Attaching handles poorly, so they pull off when the cooler is heavy.
8. Pre-chill your cooler.
- What to do: Before packing it with food and drinks, fill it with ice or frozen water bottles and let it sit for a few hours.
- What “good” looks like: The inside of the cooler is cold before you even add your actual provisions.
- Common mistake: Packing warm items into a warm cooler. You’re fighting an uphill battle from the start.
9. Pack it tight.
- What to do: Fill your cooler as full as possible with ice packs, frozen water bottles, or block ice. Pack your food and drinks around them.
- What “good” looks like: Minimal air space. The more cold mass, the longer it stays cold.
- Common mistake: Leaving lots of empty space. Air is an insulator, but not a very good one when you want things cold.
10. Seal it up.
- What to do: Close the lid firmly. Make sure it latches or seals as well as possible.
- What “good” looks like: A tight seal that prevents warm air from getting in.
- Common mistake: Not closing the lid completely. Even a small gap is a big problem.
11. Keep it shaded.
- What to do: Once at your campsite, keep the cooler out of direct sunlight. Under a tree or a tarp is ideal.
- What “good” looks like: The cooler stays cool because its exterior isn’t being heated by the sun.
- Common mistake: Leaving the cooler out in the blazing sun all day. It’s like leaving it on a dashboard.
12. Minimize opening.
- What to do: Plan what you need before you open the cooler. Get it out, grab what you need, and close it quickly.
- What “good” looks like: Quick access and minimal time with the lid open.
- Common mistake: Constantly opening and closing the cooler for every little thing.
Common mistakes (and what happens if you ignore them)
| Mistake | What it causes | Fix |
|---|---|---|
| Using thin or insufficient insulation | Ice melts quickly, warm drinks, spoiled food. | Use thick rigid foam board. Double-layer if needed. |
| Gaps in insulation or seals | Thermal bridging; heat enters easily, cold escapes. | Tape all seams thoroughly. Ensure foam fits snugly. |
| Exposed cardboard exterior | Water damage, structural weakness, cooler falls apart. | Cover the entire exterior with waterproof duct tape. |
| Loose-fitting lid | Warm air gets in, cold air gets out. | Trim foam or adjust cardboard for a snug, tight seal. |
| Not pre-chilling the cooler | Wastes ice/cold packs trying to cool down a warm container. | Let the empty cooler sit with ice for a few hours before packing. |
| Packing a warm cooler with cold items | Food and drinks warm up faster. | Always pack with plenty of ice or frozen items. |
| Leaving lots of empty air space | Air is a poor insulator; items shift and cool less efficiently. | Fill with ice, frozen water bottles, or even towels to take up space. |
| Leaving cooler in direct sunlight | Absorbs heat rapidly, ice melts much faster. | Keep the cooler in the shade at all times. |
| Frequent or prolonged cooler openings | Exposes contents to ambient temperature, significant heat gain. | Plan your needs before opening; close it quickly. |
| Not securing handles properly | Handles can rip off, making it hard to move a heavy cooler. | Reinforce handle attachment points with extra tape or sturdy knots. |
| Using a cooler that’s too big or small | Too big: inefficient use of ice. Too small: can’t fit enough. | Choose a box size appropriate for your group and trip length. |
| Not testing the build before a trip | Discovering leaks or poor insulation on your actual camping trip. | Do a dry run with ice for 24 hours before your main adventure. |
Decision rules (simple if/then)
- If you need to carry a lot of food and drinks for a weekend trip, then build a larger DIY cooler because a smaller one won’t hold enough ice.
- If you’re going to a desert environment, then make sure your DIY cooler has extra thick insulation because the ambient heat will be intense.
- If you plan to travel on rough roads, then reinforce the exterior and interior seams of your DIY cooler with extra duct tape because vibrations can loosen things.
- If you want your ice to last longer, then use block ice or frozen gallon jugs instead of cubes because they melt slower.
- If you have a limited budget, then building a DIY cooler is a smart choice because it uses inexpensive materials.
- If you are camping in bear country, then you MUST store your cooler properly, even if it’s DIY, because bears can still access it.
- If you are concerned about water leakage, then seal every seam on the exterior with multiple layers of duct tape because even small holes can let water in or out.
- If you need to keep items separate (e.g., raw meat from veggies), then consider building two smaller DIY coolers or using dividers inside a larger one because cross-contamination is a concern.
- If you are transporting the cooler by vehicle, then secure it so it doesn’t slide around because a shifting cooler can be damaged or spill its contents.
- If you notice your DIY cooler isn’t keeping things cold enough, then check for air gaps around the lid or damaged insulation because these are the most common culprits.
- If you are building a cooler for a day trip, then a simpler, less robust build might suffice because you don’t need extreme ice retention.
- If you want a more permanent solution, then consider using plastic storage bins as the outer shell for your DIY cooler because they are more durable than cardboard.
FAQ
How long can a DIY cooler keep ice?
It really depends on the materials, build quality, and how you use it. A well-made one with thick foam and good seals can keep ice for 24-48 hours, especially if you pre-chill it and keep it in the shade.
What’s the best insulation material for a DIY cooler?
Rigid foam insulation board (like XPS or polyisocyanurate) is generally best. It’s dense, has a good R-value, and is relatively easy to cut and work with.
Can I make a DIY cooler waterproof?
Yes, by thoroughly sealing the entire exterior with a good quality waterproof tape like duct tape or even specialized sealing tapes. The interior should also be lined to prevent water from reaching the cardboard.
What kind of ice is best for a DIY cooler?
Block ice melts slower than cubed ice. Frozen water jugs also work great and provide drinking water as they melt. A combination of block ice and some cubes can offer both longevity and quick chilling.
Is a DIY cooler as good as a store-bought one?
For many situations, yes. High-end commercial coolers are built with specialized vacuum-sealed insulation and robust hinges. A DIY cooler won’t typically match their extreme performance, but it can be very effective for typical camping needs at a fraction of the cost.
How do I prevent my DIY cooler from smelling?
Clean it thoroughly after each use. A mild soap and water solution is usually sufficient. Make sure it dries completely before storing it to prevent mold and mildew.
What if I don’t have a cardboard box of the right size?
You can often find sturdy plastic bins or even old suitcases that can serve as the outer shell for your insulated container. Just ensure you can still fit foam insulation inside.
Can I add a drain plug to my DIY cooler?
While possible, it adds complexity and potential leak points. For most DIY builds, it’s simpler to just tip the cooler to drain meltwater, or use frozen water jugs that don’t create as much liquid.
What this page does NOT cover (and where to go next)
- Advanced insulation techniques like vacuum sealing or multi-layer foam.
- Specific methods for creating bear-resistant DIY coolers.
- Detailed instructions for adding plumbing like drain plugs or pumps.
- Comparisons of specific commercial cooler brands and their performance metrics.
- Recipes for campfire cooking or food preservation while camping.
Camping Bob has spent over 20 years camping across the US — from BLM dispersed sites in the Southwest to KOA campgrounds in the Pacific Northwest. He writes practical, no-nonsense guides to help fellow campers get outdoors with confidence.