
Repairing Airbed Holes: A Guide To Patching Leaks
Quick answer
- Identify the leak source. Submerge the deflated bed in water and watch for bubbles.
- Clean the damaged area thoroughly with soap and water, then let it dry completely.
- Use a patch kit designed for inflatable items. Sand the area around the hole lightly.
- Apply adhesive according to the kit’s instructions, usually a thin, even layer.
- Press the patch firmly onto the glued area and hold for the recommended time.
- Inflate the airbed partially to check the seal, then fully inflate once confirmed.
- Let the bed sit for several hours before heavy use to ensure the patch cures.
What to check first (do this before you drive out)
Before you even think about patching, make sure you’ve got the right setup. A leaky airbed can ruin a trip faster than a bear in the cooler.
- Patch Kit Readiness: Do you have a reliable patch kit? Not all kits are created equal. Make sure it’s designed for vinyl or PVC, which is what most airbeds are made of. Check that the adhesive is still good – dried-out glue is useless.
- Cleanliness is Key: The area around the hole needs to be spotless. Dirt, oils, or even residual soap can prevent the patch from sticking. Gather some mild soap, water, and clean rags.
- Drying Time: You’ll need patience. The airbed must be bone dry before you apply any adhesive. This might mean leaving it out in the sun for a bit, or using a towel and giving it ample time.
- Inflation Method: How are you going to re-inflate it? A manual pump is good exercise, but an electric one is a lifesaver after a long day. Make sure your pump is compatible with your airbed’s valve.
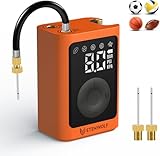
Consider investing in an electric air pump for quick and effortless inflation, especially after a long day.
For reliable repairs, ensure your kit includes high-quality vinyl repair patches designed for inflatables.

Step-by-step (field workflow)
Alright, let’s get this done. It’s not rocket science, but it takes a bit of care.
1. Locate the Leak: This is the detective work. Deflate the airbed completely. If you can hear it, great. If not, you might need to get it wet. Submerge sections of the deflated bed in water and watch for tiny bubbles escaping. Mark the spot.
- What “good” looks like: You can clearly see or feel air escaping from a specific point.
- Common mistake: Giving up too soon or not checking the entire surface. Be thorough.
2. Clean the Area: Once you’ve found the leak, clean the area around it. Use mild soap and water. Scrub gently to remove any dirt, grime, or oils. Rinse thoroughly.
- What “good” looks like: The surface is visibly clean and free of debris.
- Common mistake: Not cleaning enough. Any residue will compromise the patch.
3. Dry Thoroughly: This is crucial. Use a clean, dry towel to absorb as much moisture as possible. Then, let it air dry completely. A bit of sun can help, but don’t leave it out so long it gets brittle.
- What “good” looks like: The patched area is completely dry to the touch, no dampness.
- Common mistake: Patching a damp surface. The adhesive won’t bond properly.
4. Prepare the Patch: If your patch kit requires it, lightly sand the area around the hole on the airbed and the back of the patch itself. This creates a better surface for the adhesive to grip. Use fine-grit sandpaper.
- What “good” looks like: The surfaces are slightly roughened, not shiny.
- Common mistake: Sanding too aggressively, which can damage the airbed material.
5. Apply Adhesive: Follow the instructions on your patch kit. Typically, you’ll apply a thin, even layer of adhesive to both the airbed and the patch. Let it get tacky – this is important for a strong bond.
- What “good” looks like: A thin, consistent layer of glue that feels slightly sticky to the touch.
- Common mistake: Applying too much glue, which can ooze out and make a mess, or not letting it get tacky.
6. Position and Press the Patch: Carefully place the patch over the hole, centering it well. Press down firmly from the center outwards, smoothing out any wrinkles or air bubbles.
- What “good” looks like: The patch is smooth, firmly adhered, with no trapped air.
- Common mistake: Not pressing hard enough or letting the patch shift after placement.
7. Apply Pressure/Wait: Some kits recommend placing a weight on the patch or holding it for a specific duration. Follow the kit’s instructions. This ensures the patch bonds securely.
- What “good” looks like: The patch is held firmly in place for the recommended time.
- Common mistake: Not applying enough sustained pressure.
8. Partial Inflation Test: Once the initial curing time is up (check your kit), inflate the airbed partially. Listen and feel for any escaping air around the patch.
- What “good” looks like: No audible hissing or noticeable air loss from the patched area.
- Common mistake: Fully inflating immediately without testing. If it leaks, you’ll have to start over.
9. Full Inflation and Cure: If the partial inflation test is successful, inflate the airbed to its normal firmness. Let it sit for several hours, or even overnight, before using it. This allows the adhesive to fully cure.
- What “good” looks like: The airbed holds its full inflation overnight.
- Common mistake: Sleeping on it too soon. The patch needs time to reach its maximum strength.
10. Inspect and Store: Once cured, give the patch a final inspection. Make sure it’s holding strong. Store the airbed properly to prevent future damage.
- What “good” looks like: A secure patch that looks like it’s part of the airbed.
- Common mistake: Rough handling during storage, which can stress the patch.
Common mistakes (and what happens if you ignore them)
| Mistake | What it causes | Fix |
|---|---|---|
| Not finding all the leaks | You’ll wake up on the ground, or the bed will slowly deflate. | Be methodical. Submerge the whole bed if necessary. Mark every single leak. |
| Patching a dirty surface | The patch won’t adhere properly, leading to premature failure. | Clean, clean, clean. Use soap and water, then rinse. Don’t cut corners here. |
| Patching a damp surface | The adhesive won’t bond to the material. The patch will peel off. | Dry it completely. Use towels and air dry. Patience is key. |
| Using the wrong type of patch kit | The adhesive might not work with your airbed material, causing failure. | Use a kit specifically for vinyl or PVC inflatables. Check the product description. |
| Not letting adhesive get tacky | The bond will be weak and the patch might slide off. | Follow the kit’s instructions. Most adhesives need a few minutes to become sticky before joining surfaces. |
| Not pressing the patch firmly | Air bubbles or weak adhesion points will compromise the seal. | Use your hands, a roller, or even the edge of a sturdy object to press firmly from the center out. |
| Sleeping on the airbed too soon | The patch may not have fully cured and could fail under pressure. | Let it sit for at least 6-12 hours, or as recommended by the kit, before full use. |
| Over-inflating after patching | Puts excessive stress on the new patch before it’s fully cured. | Inflate partially for the test, then fully inflate. Don’t overdo it. |
| Using a sharp object near the patch | Can snag or tear the patch, creating a new leak. | Be mindful of sharp objects around the repaired area, especially during setup and takedown. |
| Not storing the airbed properly | Can lead to abrasions or punctures that require patching later. | Fold or roll it carefully, avoiding sharp creases. Store in a protective bag or container. |
Decision rules (simple if/then)
- If the leak is tiny and you’re in a pinch, then try a small piece of strong duct tape as a temporary fix, because it can seal small holes in an emergency.
- If the airbed is old and has multiple leaks, then consider replacing it, because constant patching can be more trouble than it’s worth.
- If the leak is near a seam or valve, then be extra careful with the patch, because these areas are under more stress.
- If you can’t find the leak after a good search, then try inflating it slightly and listening closely in a quiet room, because sometimes the sound is subtle.
- If the patch kit adhesive is dried out, then don’t use it, because it won’t create a proper seal. Get a new kit.
- If the airbed material feels brittle or is cracking, then patching might not be effective, because the underlying material is failing.
- If you’re camping in cold weather, then make sure the airbed and patch kit are at a moderate temperature before working, because cold can affect adhesive performance.
- If you have a large tear, then you might need a larger patch or even multiple overlapping patches, because a small patch won’t cover it.
- If the airbed is a high-end model, then check the manufacturer’s warranty, because some might cover damage.
- If you’re unsure about the material, then err on the side of caution and use a patch kit designed for general vinyl repair, because it’s usually safe.
FAQ
How do I find a really small leak?
Try inflating the airbed slightly, then run your hand over the surface. You might feel a faint stream of air. For smaller leaks, submerging sections in water and watching for tiny bubbles is still the most reliable method.
Can I use regular glue to fix an airbed?
No, standard household glues usually aren’t flexible or strong enough for inflatable materials and can actually damage the vinyl. Stick to specialized vinyl or inflatable repair kits.
For the best results, always use specialized vinyl repair patches and adhesives designed for inflatable materials.
How long does a patch usually last?
A well-applied patch can last for a long time, potentially for the remaining life of the airbed. However, factors like how much stress it’s under and the quality of the repair can affect its longevity.
What if the patch won’t stick?
This usually means the surface wasn’t clean or dry enough, or the adhesive wasn’t applied correctly (e.g., not allowed to get tacky). You might need to remove the old patch and try again.
Can I patch a hole on the top fabric part of an airbed?
Yes, but it can be trickier. Ensure the fabric is completely dry and clean. Some patch kits have fabric-specific adhesives; otherwise, a strong vinyl adhesive should work if applied carefully.
Is it worth patching an old airbed?
If it’s a minor leak on a relatively new or expensive airbed, absolutely. If the airbed is old, shows signs of wear, or has multiple leaks, the effort might not be worth it.
What this page does NOT cover (and where to go next)
- Specific brand recommendations for airbeds or patch kits.
- Advanced repair techniques for structural damage or delamination.
- How to clean and maintain airbeds for long-term storage.
- Troubleshooting issues with electric air pumps.
- Choosing the right airbed for your camping needs.

Camping Bob has spent over 20 years camping across the US — from BLM dispersed sites in the Southwest to KOA campgrounds in the Pacific Northwest. He writes practical, no-nonsense guides to help fellow campers get outdoors with confidence.