How To Clean Your Hydration Pack Bladder Thoroughly
Quick answer
- Rinse with warm water immediately after each use.
- Use a stiff brush or cleaning tablets for deeper cleaning.
- Air dry completely upside down to prevent mold.
- Store dry and loosely packed.
- Periodically check the hose and bite valve for gunk.
- Don’t use harsh chemicals or dish soap; they can leave residue.
What to check first (do this before you drive out)
Before you even think about hitting the trail, a clean hydration pack is key. Nobody wants a mouthful of yesterday’s energy drink or, worse, something growing. This isn’t just about taste; it’s about your health.
- Land manager / legality: For camping, this means knowing if you’re on National Forest, BLM, National Park, or state land. Each has its own rules, especially regarding water sources and waste disposal. You don’t want to accidentally get fined for improper disposal of cleaning water.
- Access/road conditions: This is crucial for getting to your campsite. If you’re driving a standard 2WD car, you need to know if the road is paved, gravel, or a mud pit. High-clearance vehicles might be needed for rougher routes. A quick check on local ranger district websites or forums can save you a tow.
- Fire restrictions + weather + wind: Always check current fire restrictions before you go. A campfire ban means no cozy nights by the fire. Also, check the weather forecast. High winds can make for a rough night or dangerous hiking.
- Water plan + waste plan (Leave No Trace): Where will you get water? If you’re relying on natural sources, you must filter or purify it. And how will you dispose of your cleaning water? Don’t dump it directly into a creek. Disperse it away from water sources and campsites.
- Safety (wildlife, distance to help, comms): Know what wildlife is in the area and how to store your food properly. How far is the nearest ranger station or town? Cell service is often spotty, so consider a satellite communicator for emergencies.
Step-by-step (field workflow)
Cleaning your hydration bladder doesn’t have to be a chore. A little effort after each use goes a long way.
1. Empty the bladder completely.
- What to do: Drink the last drop or pour out any remaining liquid.
- What “good” looks like: The bladder is totally empty. No sloshing.
- Common mistake: Leaving a little bit of water in the bottom. This is prime breeding ground for funk. Always get it all out.
2. Rinse with warm water.
- What to do: Fill the bladder with warm (not hot) water and swish it around. Empty. Repeat a few times.
- What “good” looks like: The water coming out is clear.
- Common mistake: Using hot water. It can warp some bladder materials. Stick to warm.
3. Use a cleaning brush (optional but recommended).
- What to do: Insert a long, flexible hydration bladder cleaning brush and scrub the inside walls and bottom. Pay attention to seams.
- What “good” looks like: You can feel the brush scraping away any residue. The inside looks clean.
- Common mistake: Not getting the brush into all the nooks and crannies. The brush needs to reach everywhere.
For a truly thorough clean, consider investing in a dedicated hydration bladder cleaning kit. These often include specialized brushes for both the bladder and the hose.
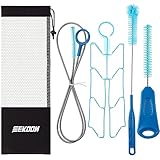
4. Clean the hose and bite valve.
- What to do: Use a smaller hose brush to clean the inside of the tube. Disassemble the bite valve if possible and clean all parts with a small brush.
- What “good” looks like: The hose is clear, and the bite valve parts are free of any gunk.
- Common mistake: Forgetting the bite valve. This is often the dirtiest part.
5. For stubborn stains or odors, use cleaning tablets or a baking soda solution.
- What to do: Follow the instructions for hydration bladder cleaning tablets, or mix a tablespoon of baking soda with water and let it sit in the bladder for a few hours or overnight.
- What “good” looks like: The stains are gone, and any lingering smells are neutralized.
- Common mistake: Using bleach or strong detergents. They can damage the bladder or leave an unsafe residue.
When tackling stubborn stains or odors, a good hydration bladder cleaning kit will often include effective cleaning tablets designed to sanitize without damaging the material.
6. Rinse thoroughly again.
- What to do: After using tablets or baking soda, rinse the bladder, hose, and bite valve multiple times with clean, warm water.
- What “good” looks like: No soapy taste or smell. All cleaning agents are gone.
- Common mistake: Not rinsing enough. You’ll taste it on your next hike, guaranteed.
7. Dry the bladder completely.
- What to do: Hang the bladder upside down. Some bladders come with a drying hanger. If not, you can use a wide-mouth jar or even a sturdy plastic bag to prop it open. Ensure air can circulate inside.
- What “good” looks like: The inside is totally dry. No damp spots.
- Common mistake: Storing it while still damp. This is how mold and mildew start.
8. Dry the hose and bite valve.
- What to do: Hang the hose so water can drain. Leave the bite valve open and air dry.
- What “good” looks like: All parts are visibly dry.
- Common mistake: Stuffing the hose back into the bladder before it’s dry.
9. Reassemble and store.
- What to do: Once everything is bone dry, reassemble the bite valve and hose. Store the bladder loosely packed, not compressed.
- What “good” looks like: It’s ready for your next adventure, clean and odor-free.
- Common mistake: Cramming it into a tight space. This can stress the material and make it harder to dry next time.
Common mistakes (and what happens if you ignore them)
| Mistake | What it causes | Fix |
|---|---|---|
| Not rinsing immediately after use | Liquid residue dries, making it harder to clean and promoting bacterial growth | Rinse with warm water as soon as you finish your drink. |
| Using hot water | Can warp or damage the bladder material | Always use warm, not hot, water for rinsing and cleaning. |
| Using harsh chemicals (bleach, strong soap) | Leaves residue that can affect taste and health, or damage the bladder | Opt for mild cleaning tablets, baking soda, or specific hydration pack cleaners. Rinse thoroughly. |
| Not drying completely | Mold and mildew growth, resulting in foul odors and potential health issues | Hang the bladder upside down and ensure good air circulation. Dry the hose and bite valve separately. |
| Storing while damp | Mold and mildew, making the bladder unusable until thoroughly cleaned again | Make sure every part is bone dry before storing. |
| Forgetting to clean the hose and bite valve | Bacteria and mold build-up in these hard-to-reach areas | Use a dedicated hose brush and clean the bite valve parts meticulously. |
| Not using a cleaning brush | Lingering residue and potential for unseen mold, especially in corners | Invest in a cleaning brush kit for thorough scrubbing of the bladder interior and hose. |
| Forgetting to rinse after cleaning | Lingering taste of cleaning agents, making your water unpleasant to drink | Rinse the bladder, hose, and valve multiple times until all traces of cleaning solution are gone. |
| Storing the bladder compressed | Can stress the material and make it harder to dry properly next time | Store the bladder loosely, allowing air to circulate. |
| Using old, expired cleaning tablets | Ineffective cleaning, leaving residue and not properly sanitizing | Check the expiration date on cleaning tablets and replace them if they are old or ineffective. |
To avoid common mistakes like not reaching all areas, a comprehensive hydration bladder cleaning kit provides all the necessary tools for a complete clean.
Decision rules (simple if/then)
- If you used a sports drink, then rinse immediately because sugary residue attracts bacteria.
- If you see any discoloration or black spots, then use cleaning tablets or a baking soda soak because that’s likely mold.
- If the bladder smells funky, then it’s not dry enough, so hang it to dry more.
- If you’re unsure about the water source, then always filter or purify it before putting it in your bladder.
- If you’re going on a multi-day trip, then clean the bladder thoroughly before you leave because starting clean is best.
- If the bite valve feels sticky or has a weird taste, then disassemble and scrub it thoroughly because it’s a prime spot for gunk.
- If you notice the bladder material feels sticky or degraded, then it might be time for a new one; some materials don’t last forever.
- If you’re cleaning at a campsite, then disperse the dirty rinse water away from your camp and any water sources.
- If you’re using a bladder for the first time, then give it a good rinse before filling it with water.
- If you’re storing it for a long time (off-season), then make sure it’s completely dry and store it in a cool, dry place.
FAQ
How often should I clean my hydration bladder?
Ideally, rinse it with warm water after every single use. For a deeper clean with brushes or tablets, aim for once a week or after every few uses, depending on what you’re drinking.
Can I put my hydration bladder in the dishwasher?
Some manufacturers say yes, but it’s generally not recommended. The heat can warp the bladder, and detergents can leave residue. Handwashing is safer.
What’s the best way to dry it?
Hang it upside down with the opening propped open so air can circulate freely inside. A dedicated drying hanger works wonders.
My bladder smells like plastic. What do I do?
This is common with new bladders. Try rinsing it multiple times with warm water and a bit of baking soda. Let it air out completely.
How do I clean the actual drinking tube?
Use a long, thin brush designed for hydration tubes. Scrub it out after each use, and make sure it dries thoroughly.
Is it safe to drink from a bladder that had mold in it?
No. Mold can cause respiratory issues and other health problems. Always clean thoroughly and ensure it’s completely dry to prevent mold.
What if my bladder has a weird taste even after cleaning?
It might be residue from a cleaning agent or mineral deposits. Try rinsing with a dilute vinegar solution, followed by thorough rinsing with clean water.
What this page does NOT cover (and where to go next)
- Specific cleaning products and their chemical compositions.
- Detailed instructions for every single brand and model of hydration pack.
- Advanced repair techniques for bladder leaks or damage.
- Troubleshooting issues with electronic hydration pack components (if applicable).
Next, you might want to research water filtration and purification methods for backcountry use, or explore different types of camping gear maintenance.