
Tent Costs: What to Expect When Buying a Tent
Quick answer
- Basic dome tents start around $50-$100.
- Mid-range family tents run $150-$300.
- High-end backpacking tents can be $300-$700+, sometimes more.
- Specialty tents (yurts, truck bed) are a different ballgame.
- Price often reflects durability, weight, and features.
- Don’t forget accessories – stakes, footprint, repair kits.
For those serious about minimizing pack weight, consider investing in a high-quality ultralight backpacking tent.
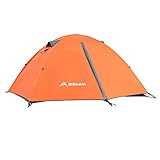
For those serious about minimizing pack weight, consider investing in a high-quality ultralight backpacking tent.

What to check first (do this before you drive out)
Before you even think about pitching a tent, you need to know where you’re going and what the deal is. This saves a ton of hassle.
- Land manager / legality: Who actually owns or manages this patch of dirt? Is it National Forest, BLM, State Park, or private? Each has its own rules, fees, and permit requirements. Some spots are first-come, first-served, others need reservations months in advance. Always check the official website for the specific area. This is your first checkpoint.
- Access/road conditions: How do you get there? Is it a paved road, a gravel track, or a rugged 4×4 trail? Do you need high clearance? All-wheel drive? A lifted truck? Some campsites are right off the highway, others are deep in the backcountry. Knowing this prevents getting stuck or disappointed. I learned that lesson the hard way once with a blown tire on a road that was way rougher than advertised.
- Fire restrictions + weather + wind: This is huge. Fire bans can happen anytime, especially in dry seasons. Check the local fire danger level and any active restrictions. Also, look at the forecast. Rain is one thing, but strong winds can make any tent feel like a kite. And don’t forget to factor in the season – summer heat vs. winter chill.
- Water plan + waste plan (Leave No Trace): Will there be potable water at the campsite? If not, you need to pack enough or have a reliable filter/purifier. Same goes for waste. Pack it in, pack it out. Know where the trash facilities are, or be prepared to carry everything home. LNT principles are non-negotiable out there.
- Safety (wildlife, distance to help, comms): What kind of critters share the space? Bears? Snakes? Know the local wildlife and how to store food properly. How far is the nearest ranger station or town if you have an emergency? Do you have cell service? If not, consider a satellite communicator. Being prepared means staying safe.
Step-by-step (field workflow)
Alright, you’ve done your homework. Now it’s time to set up camp.
1. Arrive and scout: Get to your designated spot or chosen area.
- Good looks like: A flat, clear area, sheltered from the worst wind, with good drainage.
- Common mistake: Picking the first vaguely flat spot without checking for rocks, roots, or potential water runoff. Avoid this by walking around a bit.
2. Clear the ground: Remove any sharp rocks, twigs, or debris from the tent footprint.
- Good looks like: A smooth, clean surface.
- Common mistake: Skipping this and ending up with holes in your tent floor or a lumpy bed. Take the extra 5 minutes.
3. Lay out the footprint (optional but recommended): Place the ground tarp or footprint where the tent will go.
- Good looks like: The footprint is centered and slightly smaller than the tent floor, so it doesn’t catch rain.
- Common mistake: Having the footprint extend beyond the tent, channeling water underneath.
Protect your tent’s floor and extend its life with a durable tent footprint tarp.

4. Unpack the tent: Get the tent body, poles, and rainfly out of the bag.
- Good looks like: Everything is easily accessible and organized.
- Common mistake: Trying to untangle poles while wrestling with a flapping tent body in the wind. Lay it all out first.
5. Assemble the poles: Connect the shock-corded pole sections.
- Good looks like: Poles are fully assembled and ready to insert.
- Common mistake: Forcing bent poles or not fully seating sections, which can lead to breakage. Be gentle.
6. Attach poles to tent body: Insert poles into grommets, sleeves, or clips on the tent.
- Good looks like: Poles are securely attached, and the tent starts to take shape.
- Common mistake: Putting poles in the wrong sleeves or not securing them properly, leading to a saggy or unstable structure. Double-check the instructions if unsure.
7. Stake down the tent body: Secure the corners and anchor points of the tent.
- Good looks like: Tent is taut and stable, with stakes driven in at an angle.
- Common mistake: Not staking it down firmly, or staking straight down, which makes it easy to pull out. Angle them for best hold.
Ensure your tent stays put in any weather by using high-quality camping tent stakes.

8. Attach the rainfly: Drape the rainfly over the tent and secure it.
- Good looks like: Rainfly is centered, taut, and not touching the inner tent body.
- Common mistake: Putting the rainfly on backward or upside down, or not securing it to the tent poles or stake points. This defeats its purpose.
9. Stake out guylines: Use the guyropes for added stability, especially in wind.
- Good looks like: Guylines are taut and angled away from the tent, creating tension.
- Common mistake: Leaving guylines loose or not using them at all when conditions warrant. They are your tent’s best friend in a storm.
10. Final check: Walk around, check tension, ensure zippers work smoothly.
- Good looks like: A solid, well-pitched shelter.
- Common mistake: Rushing this step and discovering a loose stake or a gap later when the rain starts.
Common mistakes (and what happens if you ignore them)
| Mistake | What it causes | Fix |
|---|---|---|
| Not checking fire restrictions | Fines, wildfire, banned from area | Always check the land manager’s website and local fire stations before you go. |
| Driving on a road too rough for your vehicle | Flat tires, stuck vehicle, costly repairs | Know your vehicle’s clearance and capabilities. Consult recent trail reports or local ranger districts. |
| Pitching on a low spot | Waking up in a puddle, wet gear | Scout for higher ground with good drainage. Look for signs of where water flows. |
| Not staking guylines | Tent collapses in wind, poles break, damage to tent | Always use guylines in windy conditions or when rain is expected. Angle them for maximum holding power. |
| Leaving the rainfly off in rain/dew | Inner tent gets soaked, condensation buildup | Never skip the rainfly unless it’s a perfectly clear, dry night and you want maximum airflow. |
| Not bringing a footprint/ground tarp | Tent floor wears out faster, gets dirty, small punctures | A footprint is cheap insurance. It protects your tent’s most vulnerable part from abrasion and moisture. |
| Forgetting bug spray or sunscreen | Miserable trip, sunburn, insect bites | Pack these essentials. Consider a wide-brimmed hat and long sleeves too. |
| Not packing enough water or a filter | Dehydration, illness, emergency trip to town | Plan your water needs carefully. Bring more than you think you’ll need, or have a reliable purification method. |
| Leaving food accessible | Attracts wildlife, potential encounters, food stolen | Store food in bear-proof containers or hang it properly. Never leave food in your tent. |
| Not telling anyone your plans | Delays in rescue if something goes wrong | Leave your itinerary with a trusted friend or family member, including when you expect to be back. |
| Ignoring weather forecasts | Caught in unexpected storms, hypothermia, heatstroke | Check the forecast right before you leave and be prepared for sudden changes. Mountain weather is notorious for being unpredictable. |
| Packing out trash | Polluted campsites, wildlife getting into trash, fines | “Pack it in, pack it out” is the golden rule. Leave your campsite cleaner than you found it. |
Decision rules (simple if/then)
- If the forecast calls for heavy rain, then pitch the rainfly taut and use all guylines because water pooling or flapping can compromise your shelter.
- If you’re in bear country, then store all food and scented items in a bear canister or bear bag, hung properly, because bears are attracted to smells and can cause damage or dangerous encounters.
- If the ground is rocky or uneven, then use a footprint and consider bringing extra ground padding because this protects your tent floor and improves comfort.
- If you’re unsure about road conditions, then call the local ranger station or check recent online reports because driving into a situation your vehicle can’t handle is a rookie mistake.
- If you see signs of wildlife (scat, tracks), then be extra vigilant about food storage and noise levels because you are sharing their home.
- If you are setting up camp late in the day, then prioritize getting the tent body and rainfly up before dark because fumbling with it in the dark is a recipe for frustration.
- If there’s a strong wind, then angle your stakes at 45 degrees and use guylines because this provides the best resistance against uplift.
- If you plan to camp in a popular area during peak season, then book your campsite well in advance because walk-up spots can be rare.
- If you are unsure about water sources, then pack in all the water you’ll need or bring a reliable filter/purifier because dehydration is a serious risk.
- If you are in an area with high fire danger, then know the current restrictions and have a backup plan for cooking (e.g., camp stove) because campfires might be prohibited.
- If you are solo camping, then ensure you have reliable communication (satellite messenger) and have told someone your exact plans and expected return time because self-reliance is key, but help should be an option.
FAQ
How much does a basic camping tent cost?
You can find simple dome tents designed for casual camping for around $50 to $100. These are usually good for fair weather and occasional use.
What makes a tent more expensive?
Higher prices usually mean better materials (stronger poles, more durable fabric, waterproof coatings), lighter weight (for backpacking), more features (multiple doors, vestibules, gear lofts), and better engineering for challenging conditions.
Is it worth it to buy a tent footprint?
Absolutely. A footprint is a small investment that significantly extends the life of your tent by protecting the floor from abrasion and punctures. It also helps keep the inside dry.
Investing in a good tent footprint tarp is a smart move to protect your tent’s floor from wear and tear.
How do I choose a tent for backpacking versus car camping?
Backpacking tents prioritize low weight and compact size, often sacrificing a bit of space or features. Car camping tents can be larger, heavier, and more feature-rich since weight isn’t a major concern.
If you’re looking for a tent specifically designed for long treks, an ultralight backpacking tent is an excellent choice for its minimal weight and compact size.
What’s the difference between a 3-season and a 4-season tent?
A 3-season tent is designed for spring, summer, and fall, balancing ventilation and protection. A 4-season tent is built for harsh winter conditions, with stronger frames, less mesh, and better snow-load resistance.
Can I use a cheap tent for serious camping?
For light use in good weather, maybe. But for any kind of challenging conditions, or frequent trips, a cheap tent will likely fail you. Invest in quality for reliability.
How much should I spend on a family tent?
For a family of four, expect to spend anywhere from $150 to $400 or more. This range gets you a tent with enough space, decent weather protection, and features that make camp life easier.
Do I need a tent with a footprint?
While not strictly mandatory, it’s highly recommended. It protects your tent floor from sharp objects and moisture, saving you money in the long run.
What are vestibules for on a tent?
Vestibules are covered areas outside the main tent body, usually created by the rainfly. They’re perfect for storing muddy boots, wet gear, or a backpack, keeping the inside of your tent clean and dry.
How much does a good backpacking tent weigh?
A high-quality, lightweight backpacking tent for one or two people typically weighs between 1.5 to 4 pounds.
If you’re looking to shave ounces off your pack, a lightweight backpacking tent is an essential piece of gear.
For serious backpackers, a good ultralight backpacking tent is crucial for keeping your pack weight down without sacrificing protection.
What this page does NOT cover (and where to go next)
- Specific tent models and brands. (Next: Research reputable camping gear manufacturers.)
- Detailed tent repair techniques. (Next: Look for guides on patching fabric and fixing poles.)
- Advanced campsite selection strategies for specific environments (e.g., desert, alpine). (Next: Explore resources on backcountry camping and environmental ethics.)
- How to choose sleeping bags or pads. (Next: Research related sleep system components.)
- Camp cooking gear and techniques. (Next: Investigate portable stoves and food preparation methods.)

Camping Bob has spent over 20 years camping across the US — from BLM dispersed sites in the Southwest to KOA campgrounds in the Pacific Northwest. He writes practical, no-nonsense guides to help fellow campers get outdoors with confidence.