Setting Up a Pop-Up Tent Solo
Quick answer
- Unpack everything first. Know your tent’s basic shape.
- Find a flat, clear spot. Avoid low-lying areas.
- Lay the tent out flat, fabric side up.
- Locate the central hub or frame.
- Toss the central hub upwards, letting it spring open.
- Secure the base with stakes.
- Attach the rainfly if needed.
- Do a quick check for tautness.
What to check first (do this before you drive out)
Before you even think about heading to your campsite, a few key checks can save you a ton of hassle, especially when you’re going solo.
- Land manager / legality: Who actually owns this patch of dirt? Is it National Forest, BLM land, a State Park, or private? Different agencies have different rules about where you can camp, fire regulations, and permit requirements. A quick look at the managing agency’s website or a call to their local office is your best bet. Don’t assume it’s all fair game.
- Access/road conditions: How are you getting there? Is the road paved, gravel, or just a suggestion? Some pop-up spots are right off a main road, others require a bit of a trek. Know if your vehicle can handle it. A sedan might be fine for some, but if it’s rocky or rutted, you’ll want something with higher clearance or AWD. Mud and snow are the great equalizers; always have a backup plan if conditions are iffy.
- Fire restrictions + weather + wind: This is non-negotiable. Check current fire bans. Seriously. A campfire is great, but not worth a wildfire. Then, look at the forecast. Pop-up tents are generally pretty good in moderate weather, but strong winds can be a real challenge when you’re setting up alone. A sudden gust can turn your tent into a kite before you’ve even staked it down.
- Water plan + waste plan (Leave No Trace): Where’s your water source? Are you bringing it all, or is there potable water available? And what about waste? Pack it in, pack it out. This includes food scraps, wrappers, and human waste if no facilities are provided. Plan for it before you get there.
- Safety (wildlife, distance to help, comms): What critters share this space? Be aware of local wildlife and how to store your food properly. How far are you from the nearest ranger station or town? Do you have cell service? It’s good to have a rough idea of your isolation level and have a way to call for help if needed, even if it’s just letting someone know your itinerary.
Step-by-step (field workflow)
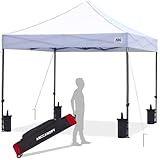
Setting up a pop-up tent solo is all about understanding the mechanics. Most of these tents are designed to spring open with a bit of a toss.
When setting up a pop-up tent solo, understanding its mechanics is key. Many models, like this highly-rated pop-up tent, are designed to spring open with a simple toss.
1. Unpack and Identify: Pull the tent out of its bag. Lay out all the components: the tent body, stakes, guy lines, and rainfly (if applicable).
- Good looks like: You can quickly see all the pieces and have a general idea of how they fit together.
- Common mistake: Rushing this and trying to figure it out on the fly. You’ll end up digging through the bag for stakes when the tent is already half-deployed.
2. Choose Your Spot: Find a flat, level area, free of rocks, roots, or sharp objects. Avoid depressions where water might pool.
- Good looks like: A smooth, clear patch of ground that feels solid underfoot.
- Common mistake: Setting up on a slope or in a low spot. Your tent will be uncomfortable and potentially flood.
3. Lay the Tent Flat: Spread the tent out on your chosen spot. Make sure the floor is facing down and the main fabric is facing up.
- Good looks like: The tent is spread out evenly, with no major creases or twists.
- Common mistake: Leaving it bunched up. This makes it harder to find the frame and can lead to an uneven deployment.
4. Locate the Frame/Hub: Most pop-ups have a central hub or a series of integrated poles that form the frame. Find this key structural element.
- Good looks like: You can easily see and access the main joint or connection point of the tent’s frame.
- Common mistake: Not knowing where the “spring” mechanism is. You might try to force it open incorrectly.
5. The Toss: This is the money step. With most pop-ups, you’ll hold the central hub and give it a firm, upward toss. It’s designed to spring open on its own.
- Good looks like: The tent pops open into its basic dome or structure shape with a satisfying thwack.
- Common mistake: Not tossing it high or hard enough, or tossing it sideways. It might only partially open or get tangled. Practice this at home first!
This is the money step. With most pop-ups, you’ll hold the central hub and give it a firm, upward toss. This pop-up tent is known for its easy, spring-open design.
6. Secure the Base: Once the tent has sprung open, immediately start staking down the corners and any anchor points.
- Good looks like: All the base loops are firmly attached to the ground with stakes.
- Common mistake: Forgetting to stake it down immediately. A breeze can easily pick up the tent before you’ve secured it.
7. Adjust and Tighten: Walk around the tent. Pull the fabric taut and ensure the poles are properly seated.
- Good looks like: The tent walls are smooth and firm, not sagging.
- Common mistake: Leaving slack in the fabric. This makes it prone to flapping in the wind and can reduce interior space.
8. Attach the Rainfly (if applicable): If your tent came with a rainfly, now’s the time to put it on. Drape it over the tent and secure it according to the manufacturer’s instructions, usually with clips or velcro.
- Good looks like: The rainfly is centered, covers the tent effectively, and is secured at all attachment points.
- Common mistake: Putting the rainfly on backward or upside down. Double-check the orientation.
9. Stake the Rainfly: Use the guy lines and stakes to tension the rainfly. This is crucial for ventilation and keeping rain out.
- Good looks like: The rainfly is snug, with no sagging, and the guy lines are angled away from the tent.
- Common mistake: Not using the guy lines or not tensioning them. This defeats the purpose of the rainfly and can let water pool.
10. Final Inspection: Do a walk-around. Check that all zippers work, there are no obvious gaps, and everything feels secure.
- Good looks like: A solid, taut shelter ready for the elements.
- Common mistake: Skipping this final check. You might discover a zipper snag or a loose guy line when you really don’t want to.
Common mistakes (and what happens if you ignore them)
| Mistake | What it causes | Fix |
|---|---|---|
| Not practicing at home | Frustration, tangled tent, delayed setup | Toss it a few times in your backyard or living room before your trip. |
| Choosing a poor campsite | Uncomfortable sleeping, flooding, bugs, uneven setup | Scout for flat, well-drained ground away from obvious animal trails or standing water. |
| Forgetting to stake immediately | Tent blows away or becomes a tangled mess | Stake down the base corners as soon as the tent springs open. |
| Not staking guy lines tautly | Rainfly sags, poor ventilation, water pools | Use all guy lines and tension them properly to create a shed for rain and allow airflow. |
| Forcing the frame | Bent poles, torn fabric, broken hub | Let the spring mechanism do the work; it’s designed to pop open, not be forced. |
| Not checking weather/wind | Tent collapses, blows away, or is difficult to manage | Always check the forecast and be prepared for sudden changes. If it’s too windy, wait it out. |
| Ignoring Leave No Trace principles | Environmental damage, fines, poor camping experience | Pack out everything you pack in, and be mindful of your impact on the campsite and surroundings. |
| Not reading manufacturer instructions | Incorrect setup, damage to tent, ineffective shelter | Even for pop-ups, a quick read of the manual can clarify specific steps. |
| Trying to set up in the dark | Tripping, losing parts, inefficient setup | Aim to set up camp before dusk. If you must, use a good headlamp and go slow. |
| Not having a plan for rain/wind | Wet gear, sleepless night, damaged tent | Always bring a rainfly and practice staking guy lines. Consider extra stakes for windy conditions. |
Not practicing at home can lead to frustration. Before your trip, try setting up your pop-up tent a few times in your backyard or living room to get the hang of it.
Decision rules (simple if/then)
- If the ground is significantly sloped, then find a flatter spot because sleeping on an angle is miserable.
- If you see signs of recent heavy rain (puddles, mud), then look for higher ground because you don’t want to wake up in a puddle.
- If the wind is gusting over 20 mph, then consider waiting for it to calm down or finding a more sheltered spot because strong winds can make solo setup very difficult and dangerous.
- If you can’t find a flat spot, then choose the least sloped area and use rocks or gear to level your sleeping pad because comfort is key.
- If you’re setting up after sunset, then use a bright headlamp and go slowly because visibility is low and you don’t want to miss a step.
- If the tent doesn’t spring open easily, then check that you’re holding the correct part of the frame and giving it a proper toss because forcing it will break it.
- If you’re on BLM land and unsure about dispersed camping rules, then check the local BLM office website or call them because regulations can vary.
- If the tent fabric feels damp, then make sure to dry it thoroughly before packing it away to prevent mildew and mold.
- If you’re in bear country, then always store food and scented items in a bear-resistant container or hang them properly before setting up your tent.
- If you have a brand-new tent, then do a test run at home first because you’ll learn its quirks without the pressure of being in the backcountry.
- If you notice any tears or holes during setup, then consider a quick patch job with tape if you have it because small issues can become big problems.
FAQ
How do I actually make the pop-up tent close?
Closing most pop-up tents involves collapsing the frame into a disc shape. This usually requires bending the poles inward and then forcing them into a circular configuration. It often takes a bit of practice and sometimes a specific twist.
What if the wind is really strong when I’m trying to set up alone?
If the wind is severe, it’s best to wait it out if possible. If you must set up, try to find a natural windbreak like a large rock or dense trees. Stake down one corner firmly, then work your way around, keeping the tent as low to the ground as possible until it’s secured.
Do I really need to stake down a pop-up tent if it’s not raining or windy?
Absolutely. Even on a calm day, a pop-up tent can be surprisingly light and susceptible to being moved by a strong breeze. Staking it down is fundamental to its stability and prevents it from becoming a projectile.
My pop-up tent feels saggy. What did I do wrong?
Sagging usually means the fabric isn’t taut. Ensure all poles are fully extended and seated, and that the base is well-staked. If you have a rainfly, make sure its guy lines are tensioned correctly, as this also pulls the inner tent fabric tight.
Can I use a pop-up tent for car camping?
Yes, pop-up tents are great for car camping, especially if you value quick setup and takedown. They are generally less durable and weather-resistant than traditional tents, so they’re best suited for fair-weather trips.
Yes, pop-up tents are great for car camping, especially if you value quick setup and takedown. This pop-up tent is a popular choice for its convenience and ease of use.
What’s the best way to store a pop-up tent?
Always ensure the tent is completely dry before packing it. Fold it as neatly as possible, then roll it tightly before placing it in its stuff sack. Storing it dry prevents mildew and prolongs its lifespan.
Are pop-up tents good for backpacking?
Generally, no. They are often heavier and bulkier than dedicated backpacking tents, and while they set up fast, the weight and packed size make them impractical for carrying long distances.
What this page does NOT cover (and where to go next)
- Specific tent models and their unique setup mechanisms.
- Advanced pitching techniques for extreme weather conditions.
- Detailed campsite selection for specific environments (e.g., desert, mountains).
- Long-term tent maintenance and repair.
- Choosing the right tent for specific activities like mountaineering or ultralight backpacking.
Camping Bob has spent over 20 years camping across the US — from BLM dispersed sites in the Southwest to KOA campgrounds in the Pacific Northwest. He writes practical, no-nonsense guides to help fellow campers get outdoors with confidence.