Removing Mold From Your Awning: A Cleaning Guide
Quick answer
- Identify the mold. Is it surface grime or deep-set mildew?
- Choose your cleaner. Mild soap, vinegar, or a specialized awning cleaner.
- Test in an inconspicuous spot. Always.
- Scrub gently. Don’t damage the fabric.
- Rinse thoroughly. No residue left behind.
- Dry completely. This is key to preventing regrowth.
- Protect it. Consider a sealant for future trips.
What to check first (do this before you drive out)
Before you even think about scrubbing, you gotta know your awning’s situation. This ain’t just about a clean look; it’s about keeping your gear solid.
- Awning Material and Condition: What’s it made of? Vinyl, acrylic, canvas? Is it old and brittle, or still tough? This dictates what cleaners you can use. Old fabric might tear if you scrub too hard.
- Mold Type and Severity: Is it just a few spots, or is it a fuzzy green blanket? Surface mold is easier to tackle than deep-set mildew that’s stained the fabric. Get a good look in decent light.
- Manufacturer’s Recommendations: Did you keep that manual? Seriously, check it. They often have specific cleaning instructions or warnings about what not to use. It’s like getting the cheat codes straight from the source.
- Weather Forecast: Are you planning this cleaning project on a sunny, breezy day? Perfect. If it’s looking like rain for a week, you’re setting yourself up for disappointment and more mold.
- Available Cleaning Supplies: Do you have what you need? A soft brush, buckets, your chosen cleaner, and plenty of water. Don’t start the job and then realize you’re missing a crucial item.
Step-by-step (field workflow)
Alright, let’s get this awning looking right. It’s not rocket science, but it takes a bit of care.
1. Extend the Awning Fully: Pull that thing all the way out. You need access to every inch, and you don’t want to be wrestling with it while it’s half-rolled.
- Good looks like: The awning is stable, fully extended, and you can walk around it easily.
- Common mistake: Trying to clean it while it’s only partially extended. You’ll miss spots and make the job harder.
2. Sweep Away Loose Debris: Grab a soft broom or brush and get rid of any leaves, dirt, or cobwebs. This prevents you from just grinding that gunk into the fabric when you start wet cleaning.
- Good looks like: The awning surface is free of loose stuff.
- Common mistake: Skipping this and immediately spraying water. You’re just making mud.
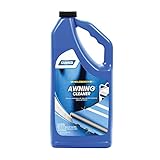
3. Choose Your Cleaning Solution: For light mold, a mix of mild soap (like dish soap) and water is often enough. For tougher spots, a 1:1 solution of white vinegar and water can work wonders. For really stubborn cases, a dedicated awning cleaner might be necessary, but always test it first.
- Good looks like: You’ve got a bucket ready with your chosen, tested solution.
- Common mistake: Using harsh chemicals like bleach or ammonia without checking compatibility. You can ruin the fabric or cause discoloration.
For really stubborn cases, a dedicated awning cleaner like this one can be highly effective, but always test it first.
4. Test Your Cleaner: Find a small, hidden spot on the awning. Apply your cleaner and let it sit for a few minutes. Rinse it off and let it dry.
- Good looks like: No damage, fading, or weird reactions to the fabric.
- Common mistake: Forgetting to test and ending up with a bleached patch on your awning. Been there, done that. Not fun.
5. Apply the Cleaner: Using a soft brush or sponge, gently apply your chosen cleaning solution to the moldy areas. Work in sections.
- Good looks like: The moldy spots are getting saturated with the cleaner.
- Common mistake: Spraying cleaner everywhere and letting it dry before you can scrub. Work methodically.
6. Gentle Scrubbing: This is where the magic happens. Use a soft-bristle brush or a non-abrasive sponge to gently scrub the mold. Don’t go at it like you’re trying to remove barnacles. Be patient.
- Good looks like: You’re lifting the mold and grime without damaging the fabric weave.
- Common mistake: Using a stiff brush or steel wool. You’ll shred the fabric.
7. Thorough Rinsing: This is crucial. Use a hose with a decent spray nozzle to rinse away all the cleaner and loosened mold. Work from top to bottom. Make sure you get all the soap or vinegar residue out.
- Good looks like: The awning is completely rinsed, no suds or streaks visible.
- Common mistake: Not rinsing enough. Leftover cleaner can attract dirt and damage the fabric over time.
8. Air Dry Completely: This is non-negotiable. Let the awning air dry completely. Ideally, leave it extended in the sun. If you have to roll it up, make sure it’s bone dry first.
- Good looks like: The awning is totally dry to the touch, no damp spots.
- Common mistake: Rolling up a damp awning. This is a mold party waiting to happen. You’ll be back to square one.
9. Inspect and Repeat if Necessary: Once dry, give it a good look. If some stubborn spots remain, you might need a second round, or a slightly stronger cleaner (remember to test!).
- Good looks like: The awning is clean and free of mold.
- Common mistake: Settling for “good enough” when there are still visible mold stains.
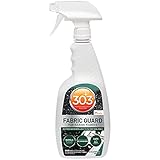
10. Consider Protection: Once clean and dry, think about applying a fabric protector or water repellent specifically designed for awnings. This helps prevent future mold and makes cleaning easier.
- Good looks like: The fabric feels treated and water beads up on the surface.
- Common mistake: Skipping this step and dealing with mold again next season.
Once clean and dry, consider applying a high-quality outdoor fabric cleaner and protector to help prevent future mold and make cleaning easier.
Common mistakes (and what happens if you ignore them)
| Mistake | What it causes | Fix |
|---|---|---|
| Using harsh chemicals (bleach, ammonia) | Fabric damage, discoloration, weakening of material, potential health hazards. | Always use mild cleaners or those specifically designed for your awning material. Test in an inconspicuous spot first. |
| Aggressive scrubbing | Rips, tears, fraying, and permanent damage to the fabric weave. | Use only soft brushes or non-abrasive sponges. Work gently and patiently. |
| Not testing the cleaner | Bleached spots, permanent stains, or other irreversible fabric damage. | Always test any cleaning solution on a small, hidden area before applying it to the whole awning. |
| Incomplete rinsing | Soap residue attracts dirt, can degrade fabric over time, and promotes mildew. | Rinse thoroughly with clean water until all traces of the cleaner are gone. Work from top to bottom. |
| Rolling up a damp awning | Creates a perfect breeding ground for mold and mildew. | Ensure the awning is completely dry before retracting it. Air dry it fully in the sun if possible. |
| Using a stiff brush or steel wool | Shreds the fabric, leaving it permanently damaged and unsightly. | Stick to soft-bristle brushes or microfiber cloths. The goal is to lift the mold, not scrape the material. |
| Leaving mold untreated for too long | Mold can permanently stain and weaken the fabric, making it harder to remove. | Address mold spots as soon as you notice them. The longer it sits, the deeper it penetrates. |
| Not extending the awning fully | Missed spots, uneven cleaning, difficulty accessing all areas. | Always extend the awning completely before cleaning. This ensures you can reach every part of the fabric. |
| Not sweeping off loose debris | Grinding dirt and leaves into the fabric, making cleaning harder. | Before wetting, sweep or brush off all loose debris like leaves, twigs, and dust. |
| Not drying thoroughly after cleaning | Dampness encourages new mold growth, undoing all your hard work. | Allow the awning to air dry completely. Sunlight and a gentle breeze are your best friends here. |
Decision rules (simple if/then)
- If the mold is light and superficial, then a mild soap and water solution is likely sufficient because it’s the least aggressive option.
- If the mold is stubborn or has stained the fabric, then a diluted white vinegar solution can be tried because it’s a natural disinfectant and mold killer.
- If you have an acrylic awning, then be extra gentle with scrubbing because acrylic can be more sensitive than vinyl.
- If you have a canvas awning, then be aware that it might absorb more moisture and take longer to dry, so ensure complete dryness before retracting.
- If you’re unsure about your awning material, then check the manufacturer’s tag or website first because using the wrong cleaner can cause permanent damage.
- If you see any signs of fabric degradation (brittleness, small tears), then avoid aggressive cleaning and consider professional restoration or replacement because you risk making it worse.
- If you’re cleaning in humid weather, then plan for extra drying time and consider using a fan to help circulate air because dampness is mold’s best friend.
- If you’re dealing with a very large or deeply ingrained mold problem, then consider a specialized awning cleaner but always test it first because they can be more potent.
- If you want to prevent future mold, then apply a fabric protector after cleaning and drying because it creates a barrier against moisture and stains.
- If you notice mold after a trip, then address it immediately upon returning home because storing a moldy awning is a recipe for disaster.
- If the mold seems to be coming from inside the roller mechanism, then that’s a different problem requiring mechanical inspection and possibly professional help.
If you’re dealing with a very large or deeply ingrained mold problem, then consider a specialized awning cleaner like this, but always test it first because they can be more potent.
FAQ
Q: How often should I clean my awning?
A: It depends on your environment. Clean it annually, or whenever you spot mold or significant dirt buildup. Regular checks are better than waiting for a big problem.
Q: Can I use a pressure washer on my awning?
A: Generally, no. High pressure can damage the fabric, seams, and coatings. Stick to gentler methods like a hose and soft brush.
Q: What’s the difference between mold and mildew?
A: They’re both types of fungi, but mildew typically appears as a powdery or fuzzy growth on surfaces, while mold can be more varied in texture and color, often growing deeper into materials. For cleaning purposes, the approach is similar.
Q: Will mold permanently damage my awning?
A: If left untreated, yes. Mold can stain the fabric, weaken it, and eventually lead to tears. Early intervention is key.
Q: My awning smells musty even after cleaning. What gives?
A: The smell might be trapped in the fabric or the roller mechanism. Ensure it’s completely dry and that you’ve removed all residue. If the smell persists, it might be in the internal components.
Q: What if I can’t get all the mold off?
A: For persistent stains, you might need to consult a professional awning cleaner or consider a specialized product. Sometimes, a stain is just part of the awning’s history.
Q: Is it safe to sleep under an awning with mold?
A: While the mold itself might not be directly harmful in small amounts, it can degrade the fabric, making it less functional and potentially releasing spores. It’s best to have it clean and in good condition for your comfort and safety.
Q: How do I prevent mold on my awning when storing the RV?
A: Always ensure the awning is completely dry before retracting it for storage. If possible, leave it slightly unrolled or use moisture-absorbing packets inside the RV.
What this page does NOT cover (and where to go next)
- Deep mechanical repairs: This guide is for surface cleaning. If your awning mechanism is broken, jammed, or making weird noises, that’s a different ballgame.
- Professional awning restoration services: We’re talking DIY here. If you need a pro, that’s a separate search.
- Specific product recommendations: There are tons of cleaners out there. We’re giving you the types of solutions to use, not brand names.
- Retractable awning motor issues: Electrical or motor problems are beyond the scope of a simple cleaning guide.
- Repairing tears or seam damage: This is about mold removal, not patching up holes.
Camping Bob has spent over 20 years camping across the US — from BLM dispersed sites in the Southwest to KOA campgrounds in the Pacific Northwest. He writes practical, no-nonsense guides to help fellow campers get outdoors with confidence.