
How to Securely Tie Down a Tarp
Quick answer
- Know your anchor points. Trees, rocks, stakes – pick solid ones.
- Use the right knots. Bowline and taut-line hitch are your friends.
- Tension is key. A loose tarp is a kite waiting to happen.
- Protect your tarp. Use cord protectors or rags where it rubs.
- Consider wind direction. Angle your tarp to shed gusts, not catch them.
- Practice at home. Don’t learn in a storm.
- Always have a backup. A spare tarp or extra cord never hurts.
What to check first (do this before you drive out)
Before you even think about heading out, a few crucial checks will save you a world of headaches. This isn’t just about comfort; it’s about safety and making sure your gear lasts.
- Land manager / legality: Who’s in charge here? Is it National Forest, BLM land, a State Park, or private property? Rules vary like the weather. Make sure camping and tarp use are allowed. A quick check of the managing agency’s website is usually all it takes. Don’t get surprised by a ranger.
- Access/road conditions: Can your rig actually get there? Is the road paved, gravel, or just a suggestion? Think about your vehicle’s clearance and if you need 4WD. Mud, snow, or washouts can turn a fun trip into a tow truck call. Always check recent reports if you can.
- Fire restrictions + weather + wind: This is a big one. Are campfires allowed? What about stoves? Fire bans are common and serious. Then, check the forecast. Not just rain, but wind. High winds are the enemy of a poorly secured tarp. I’ve seen tarps ripped to shreds in minutes.
When checking the weather, remember that a good quality waterproof camping tarp is your first line of defense against unexpected downpours and strong winds.
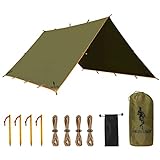
- Water plan + waste plan (Leave No Trace): Where will you get water? How will you treat it? And what about waste? Pack it in, pack it out. This applies to everything, including food scraps and hygiene products. A good tarp setup helps keep your gear dry and organized, which makes LNT easier.
- Safety (wildlife, distance to help, comms): What critters share this space? Know the local wildlife and how to store food properly. How far is the nearest town or help if something goes wrong? Cell service is often spotty. Have a plan for emergencies, maybe a satellite messenger if you’re truly remote.
Step-by-step (field workflow)
Alright, you’ve done your homework. Now it’s time to get that tarp up and working for you.
1. Scout your location: Find the best spot. Look for flat ground, shelter from wind if possible, and good anchor points.
- Good looks like: A clear, relatively level area with sturdy trees or large rocks within reach.
- Common mistake: Picking the flattest spot without checking for drainage or potential falling branches. Avoid setting up under dead trees (“widowmakers”).
2. Lay out your tarp: Spread it out to visualize your setup. Decide which side will face up (usually the coated/waterproof side) and which way you want it pitched.
- Good looks like: The tarp is spread evenly, showing you where your corners and ridgeline will be.
- Common mistake: Not unfolding it first, leading to a tangled mess and wasted time trying to figure out orientation later.
When laying out your tarp, ensure you’re familiar with its features, especially if it’s a waterproof camping tarp designed for specific pitching configurations.
3. Establish your ridgeline (if applicable): If using a ridgeline for a-frame or lean-to style, string a rope between two anchor points.
- Good looks like: The ridgeline is taut, at the desired height, and securely tied.
- Common mistake: Tying the ridgeline too low, making the shelter cramped, or too loose, causing sagging.
4. Attach corner/edge lines: Use carabiners or directly tie your tarp’s grommets or reinforced loops to your anchor points.
- Good looks like: The tarp is loosely held in place, ready for final tensioning.
- Common mistake: Pulling too hard on a single grommet, potentially tearing it. Distribute the load.
For quick and secure attachment, consider using durable aluminum carabiners to connect your tarp’s grommets to anchor points.

5. Select and prepare anchor points: For stakes, drive them into the ground at an angle away from the tarp. For trees, use webbing or cord protectors to prevent damage.
- Good looks like: Stakes are firmly seated at about a 45-degree angle, and tree anchors are padded.
- Common mistake: Driving stakes straight down, making them easy to pull out, or wrapping cord directly around a tree, which can girdle it over time.
6. Introduce tension with knots: Use adjustable knots like the taut-line hitch or truckers hitch to create tension.
- Good looks like: The tarp is becoming taut, with minimal sag. The knots are easy to adjust.
- Common mistake: Using non-adjustable knots, making it impossible to fine-tune tension as the tarp stretches or conditions change.
7. Adjust for wind and rain: Pitch the tarp to shed water effectively. Angle it to deflect prevailing winds.
- Good looks like: Water will run off cleanly, and wind will flow over or around the structure, not push against it like a sail.
- Common mistake: Setting up a flat, horizontal tarp that will collect water or a tarp directly facing strong winds.
8. Add guylines for stability: Use extra ropes (guylines) from the tarp’s edges or mid-points to additional anchor points for maximum stability.
- Good looks like: The tarp is drum-tight and won’t budge even in a stiff breeze.
- Common mistake: Skipping guylines, leaving the tarp vulnerable to flapping and tearing in anything more than a light breeze.
For maximum stability, especially with a larger waterproof camping tarp, always add guylines from the tarp’s edges or mid-points to additional anchor points.
9. Check all points: Walk around and inspect every knot, stake, and anchor.
- Good looks like: Everything is secure, and there’s no slack anywhere.
- Common mistake: Assuming everything is fine without a thorough check, leading to a failure later.
10. Reinforce as needed: If you anticipate heavy rain or wind, add more stakes or guylines. Consider a double ridgeline for extra support.
- Good looks like: You’ve proactively addressed potential weak points.
- Common mistake: Not anticipating changing weather and failing to reinforce the setup.
Common mistakes (and what happens if you ignore them)
| Mistake | What it causes | Fix |
|---|---|---|
| Using weak anchor points | Tarp rips loose, gear gets wet, potential damage | Use trees, large rocks, or drive stakes deep at an angle. |
| Tying directly to trees | Girdles and kills trees | Use webbing straps or a thick piece of cloth as a buffer. |
| Not using adjustable knots | Tarp sags or becomes too tight, can tear | Learn and use knots like the taut-line hitch or a truckers hitch. |
| Setting up a flat tarp | Water pools, tarp collapses under weight | Pitch with a slope to shed water effectively. |
| Ignoring wind direction | Tarp acts like a sail, rips or pulls loose | Angle the tarp to deflect wind, use guylines. |
| Not checking for drainage | Your campsite floods | Scout for high ground and natural drainage channels. |
| Over-tightening grommets | Tears the tarp | Gently pull to tension; use adjustable knots to fine-tune. |
| Not using cord protectors | Rubs holes in the tarp over time | Use rags or dedicated tarp protectors where cord rubs on edges. |
| Not practicing at home | Fumbling in bad weather, mistakes are made | Set up your tarp in the backyard before your trip. |
| Relying on only corner tie-outs | Tarp flaps and tears in wind | Use mid-panel tie-outs and guylines for maximum stability. |
| Not considering wildlife | Food gets raided, potential encounters | Secure food away from your shelter and your sleeping area. |
| Setting up under dead branches | Risk of falling debris | Always look up and avoid “widowmakers.” |
Decision rules (simple if/then)
- If the forecast shows high winds, then add extra guylines because wind will stress your tarp’s anchor points.
- If you are camping in a desert environment, then use sand stakes or large rocks as anchors because the ground might not hold regular stakes.
- If you are using a very large tarp, then consider using a ridgeline setup because it distributes the load better than just pole supports.
- If the ground is frozen, then use rocks or logs as anchors instead of stakes because stakes won’t penetrate.
- If you plan to sleep under the tarp, then ensure it’s pitched low and tight to prevent drafts and water intrusion.
- If you are setting up near water, then check for potential flash flood areas and set up on higher ground.
- If you see signs of animal activity (tracks, scat), then secure your food properly and keep your camp clean because animals are attracted to smells.
- If you are in a national park, then check their specific regulations on tarp use and campsite setup because rules can be stricter.
- If you are using a silnylon tarp, then remember it can stretch when wet, so you might need to readjust tension after rain.
- If you are unsure about a knot, then practice it until you can tie it reliably with your eyes closed.
- If the weather turns bad unexpectedly, then prioritize securing your tarp and gear before worrying about other tasks.
- If you are setting up in a high-use area, then be mindful of other campers and avoid blocking trails or common areas.
FAQ
Q: What’s the best knot for tying down a tarp?
A: The taut-line hitch is excellent for adjustable tension. The bowline is great for creating a secure loop that won’t slip. Learn both.
Q: How tight should a tarp be?
A: Drum-tight is the goal. It should be taut enough to shed water and resist flapping, but not so tight that you risk tearing grommets.
Q: Do I need a special tool to set up a tarp?
A: Not usually. A good knife or multi-tool for cutting cord and maybe a small mallet for stakes are helpful, but often not essential.
Q: What’s the difference between guylines and a ridgeline?
A: A ridgeline is the main support rope running over the top. Guylines are additional ropes extending from the tarp’s edges to anchor points for stability.
Q: Can I use my trekking poles as tarp supports?
A: Absolutely. Trekking poles are fantastic for creating pitched shelters when you don’t have trees or need more flexibility in placement.
Q: My tarp ripped. Can I fix it in the field?
A: Yes. A patch kit with fabric glue or tenacious tape can make a temporary, sometimes permanent, repair. Always carry one.
Q: What are grommets?
A: Grommets are the metal rings found on the edges of tarps. They are reinforced points where you attach ropes or carabiners.
Q: How do I keep my tarp from making noise in the wind?
A: Proper tension is key. A well-pitched, taut tarp will flap much less and be quieter. Also, ensure no loose ends are whipping around.
Q: Is it okay to set up a tarp over my hammock?
A: Definitely. A tarp is essential for hammock camping to keep you dry. Just ensure it’s pitched correctly to shed rain away from your hammock.
If you’re planning to sleep under your tarp, a reliable waterproof camping tarp is crucial for staying dry and comfortable throughout the night.
What this page does NOT cover (and where to go next)
- Specific tarp materials and their pros/cons (e.g., silnylon vs. polyester).
- Advanced tarp shelter designs and configurations.
- Detailed gear reviews for specific tarp models.
- Comprehensive Leave No Trace principles beyond basic waste and water.
- Advanced knot-tying techniques beyond the essentials.
- Emergency shelter construction in survival situations.

Camping Bob has spent over 20 years camping across the US — from BLM dispersed sites in the Southwest to KOA campgrounds in the Pacific Northwest. He writes practical, no-nonsense guides to help fellow campers get outdoors with confidence.