How to Make Ice Blocks for Coolers
Quick answer
- Freeze water in large containers. Think gallon jugs, food-grade buckets, or even large Tupperware.
- Use purified or distilled water. This makes for clearer ice and less “off” taste.
- Plan ahead. Freezing takes time, often 24-48 hours for big blocks.
- Consider block shape. Flat, wide blocks fit better in most coolers.
- Don’t overfill. Leave a little room for expansion as water freezes.
- Protect your hands. Frozen blocks can be slick and cold.
- Use them strategically. Place them at the bottom of the cooler for best results.
What to check first (do this before you drive out)
Before you spend time making ice, and definitely before you pack the car, let’s get a few things straight. It’s not just about the ice; it’s about the whole operation.
- Land manager / legality
Who owns the land where you’re camping? Is it National Forest, BLM, a State Park, or private? Different agencies have different rules about fires, waste, and even what you can bring. A quick check on their website or a call can save you a headache. I once pulled into a spot that looked perfect, only to find out it was restricted for a special event. Not ideal.
- Access/road conditions
Can your vehicle actually get there? Is the road paved, gravel, or just a suggestion? Some backcountry spots need 4WD and decent clearance. A sedan might be fine for a campground, but a lifted truck is a must for that hidden gem I heard about. Check recent reports if possible – rain can turn a dirt road into a mud bog real quick.
- Fire restrictions + weather + wind
This is huge. Fire bans are common, especially in dry seasons. Check the local ranger district or park website for current restrictions. Also, look at the forecast. Extreme heat means your ice won’t last as long. High winds can make camp life miserable and increase fire risk.
- Water plan + waste plan (Leave No Trace)
Where will you get your drinking water? Are there potable sources, or do you need to bring it all? And what about trash and human waste? Pack it in, pack it out. Know the rules for catholes or if you need to bring a wag bag. LNT principles are key to keeping these places wild.
- Safety (wildlife, distance to help, comms)
What kind of critters share the space? Know how to store food properly to avoid unwanted visitors. How far is the nearest town or ranger station? Cell service is often spotty in the backcountry. Let someone know your itinerary and when you expect to be back.
Step-by-step (field workflow)
Making ice blocks at home is pretty straightforward, but a little planning goes a long way.
1. Gather your containers.
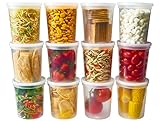
- What to do: Find large, sturdy containers. Think 1-gallon milk jugs, food-grade buckets (like those from restaurants or hardware stores), or even large plastic food storage bins.
- What “good” looks like: Containers that are clean, leak-proof, and a size that will fit into your cooler.
- Common mistake: Using containers that are too big for your cooler, or ones that aren’t food-grade and might leach chemicals into your water. Always check the label.
Alternatively, large freezer-safe food storage containers are excellent for making custom-sized ice blocks. Look for ones that fit your cooler dimensions for optimal space utilization.
For making large ice blocks, consider using sturdy 1-gallon water jugs. They are perfect for creating substantial ice blocks that will keep your cooler cold for longer.

2. Choose your water.
- What to do: Use filtered, distilled, or purified water. Tap water works, but it might make your ice cloudy and impart a slight taste.
- What “good” looks like: Clear water going in means clearer ice coming out, which tastes better and looks sharper.
- Common mistake: Using heavily chlorinated or mineral-rich tap water. This can make the ice cloudy and affect the taste of your food and drinks.
3. Prepare the containers.
- What to do: Wash your containers thoroughly with soap and water. Rinse them well.
- What “good” looks like: Clean containers free of any residue.
- Common mistake: Not rinsing thoroughly, leaving soap that can foam up and affect the ice taste.
4. Fill the containers.
- What to do: Fill the containers with your chosen water, leaving about 1-2 inches of headspace at the top.
- What “good” looks like: The container is mostly full, but there’s room for the water to expand as it freezes.
- Common mistake: Filling the container to the brim. This can cause the container to crack or burst as the water expands, creating a messy situation in your freezer.
5. Seal and place in the freezer.
- What to do: Securely put the lids on your containers. Place them in your freezer, ideally on a flat surface so they freeze evenly.
- What “good” looks like: Lids are tight, and the containers are stable.
- Common mistake: Not sealing the lids properly. This can lead to freezer burn on the ice or water leaking out if the container tips.
6. Freeze completely.
- What to do: Let the containers freeze solid. This can take 24-48 hours, depending on the size of the container and the temperature of your freezer.
- What “good” looks like: The water is completely frozen, forming a solid block of ice. You can test this by tapping the container; it should sound solid.
- Common mistake: Pulling the ice out too early. If it’s not completely frozen, it will melt faster and won’t be as effective.
7. Remove ice blocks from containers.
- What to do: Run a little warm water over the outside of the container, or let it sit at room temperature for a few minutes. Then, carefully invert the container to slide the ice block out. For rigid containers, you might need to gently pry the edges.
- What “good” looks like: The ice block slides out cleanly without breaking.
- Common mistake: Forcing the ice block out, which can cause it to crack or break apart. Patience is key here.
8. Transfer to cooler.
- What to do: Carefully place the ice blocks into your cooler. It’s best to put them at the bottom, as they’ll chill everything above them.
- What “good” looks like: The ice blocks fit well, and there’s still room for your food and drinks.
- Common mistake: Trying to cram too much ice into the cooler, leaving no room for the actual items you want to keep cold.
Common mistakes (and what happens if you ignore them)
| Mistake | What it causes | Fix |
|---|---|---|
| Using small ice cubes | Melts too fast, requires constant replenishment, less efficient cooling | Make large blocks; they melt much slower. |
| Filling containers to the brim | Container cracks/bursts, messy freezer, wasted water/space | Leave 1-2 inches of headspace for expansion. |
| Using non-food-grade containers | Potential chemical leaching into water/ice, off-taste in food/drinks | Always use containers labeled as food-grade or specifically intended for food storage. |
| Not freezing solid | Ice melts quickly, doesn’t keep things cold for long, less effective cooling | Ensure blocks are fully frozen solid (24-48 hours) before removing from freezer. |
| Forcing ice blocks out of containers | Ice block cracks or breaks, reducing its effectiveness and making it harder to handle | Run warm water on the outside of the container or let it sit at room temp briefly before inverting. |
| Not sealing containers properly | Freezer burn on ice, potential leaks if container tips, contamination | Ensure lids are tight and secure before freezing. |
| Using tap water with high mineral content | Cloudy ice, potential slight off-taste in beverages/food | Use filtered, distilled, or purified water for clearer, better-tasting ice. |
| Placing ice blocks on top of food | Can crush delicate items, potential for leaks as ice melts | Always place large ice blocks at the bottom of the cooler for optimal cooling and to prevent crushing. |
| Not planning enough freezing time | Not having enough ice when you need it, rushed to pack, less effective cooling | Start making ice blocks at least 2 days before your trip to ensure they are fully frozen. |
| Using containers that are too large | Won’t fit in cooler, difficult to handle, wasted freezer space | Measure your cooler’s interior dimensions and choose containers accordingly. |
Decision rules (simple if/then)
- If your trip is longer than 3 days, then use a combination of ice blocks and a few bags of ice cubes, because blocks provide sustained cooling while cubes fill gaps initially.
- If you’re camping in extreme heat, then make extra ice blocks, because they will melt faster and you’ll need more to keep your cooler cold.
- If your cooler is well-insulated, then you can get away with fewer ice blocks, because good insulation means less heat transfer.
- If you’re camping with sensitive items like raw meat, then pack them in a separate, smaller cooler with ice blocks, because this ensures consistent, cold temperatures and prevents cross-contamination.
- If you plan to drink the melted ice water, then use distilled or purified water, because tap water might have impurities or tastes you don’t want.
- If you’re short on freezer space, then use flatter, wider containers for your ice blocks, because they tend to fit better than tall, narrow ones.
- If you’re going to be car camping and have access to power, then consider an electric cooler or ice maker, because these can reduce your reliance on traditional ice.
- If you can’t get a perfect block out of the container, then break it up into chunks, because even broken ice is better than no ice.
- If you want to keep drinks colder than food, then put them in a separate cooler with ice, because you’ll open the drink cooler more often, causing it to lose cold faster.
- If you’re concerned about weight, then consider using frozen water bottles instead of large blocks, because they are easier to handle and can be refilled as they melt.
- If you have a very large cooler, then consider using multiple large blocks to fill the bottom space effectively, because this maximizes the chilling surface area.
FAQ
How long will ice blocks last in a cooler?
That depends on the cooler’s insulation, the ambient temperature, and how often you open it. A good quality cooler with solid ice blocks can easily keep things cold for 3-5 days, sometimes longer.
Can I reuse melted ice water?
Yes, if you used purified water and the melted water hasn’t been contaminated by food or drinks in the cooler. You can refreeze it or use it for cooking if it’s clean.
What’s the best container for making ice blocks?
Food-grade plastic buckets (like 2-5 gallon size) or large, sturdy plastic food storage bins are great for big blocks. For smaller blocks that fit easily, 1-gallon milk jugs or sturdy water bottles work well.
Why is my ice cloudy?
Cloudy ice is usually caused by air bubbles trapped in the water or impurities in the water itself. Using distilled or filtered water and freezing slowly can help make clearer ice.
How do I get the ice block out of the container without breaking it?
Run a little warm water over the outside of the container for a minute, or let it sit at room temperature for a bit. Then, carefully invert it. For rigid containers, a gentle wiggle or a plastic spatula around the edges can help.
Should I put ice blocks on top or bottom?
Always put your largest ice blocks at the bottom of the cooler. Cold air sinks, so this creates the most efficient chilling environment for everything else.
How much ice do I need?
A good rule of thumb is a 2:1 ratio of ice to contents by volume. For a 3-day trip, aim for at least 1-2 large blocks per person, adjusting based on weather and cooler quality.
Can I use regular water bottles as ice blocks?
Absolutely. Freeze full water bottles. They melt slower than ice cubes and provide cold water to drink as they thaw. Just make sure to leave a little room for expansion if you freeze them completely full.
What if I don’t have a big enough freezer?
You can make smaller blocks or use multiple water bottles. You might need to supplement with bagged ice more often, but it’s still better than nothing.
What this page does NOT cover (and where to go next)
- Specific cooler models and their insulation ratings.
- Advanced techniques for dry ice or gel packs.
- Detailed recipes for food that requires strict temperature control.
- How to build a custom, high-performance cooler.
Consider looking into reviews of different cooler brands, exploring methods for packing your cooler efficiently, or researching food safety guidelines for camping.
Camping Bob has spent over 20 years camping across the US — from BLM dispersed sites in the Southwest to KOA campgrounds in the Pacific Northwest. He writes practical, no-nonsense guides to help fellow campers get outdoors with confidence.