
DIY Wax Fire Starters for Camping
Quick answer
- Gather cotton balls, dryer lint, or sawdust.
- Melt old candle stubs or paraffin wax.
- Dip your material into the melted wax.
- Let them cool and harden completely.
- Store in a waterproof container.
- They’re ready to grab and go for instant fire.
What to check first (do this before you drive out)
Before you head out with your homemade fire starters, a little prep goes a long way. Think of it as your pre-flight check for a smooth camping trip.
- Land manager / legality: Who’s in charge of the land you’re visiting? Is it National Forest, BLM land, a State Park, or private property? Each has its own set of rules, especially concerning fires. A quick look at the managing agency’s website is usually all it takes. Don’t assume anything.
- Access/road conditions: Can your rig actually get there? Some dirt roads are fine for sedans, others need 4WD and high clearance. Check recent conditions if possible – mud, snow, or washouts can stop you dead. I learned that the hard way last spring.
- Fire restrictions + weather + wind: This is critical. Fire bans are no joke, and ignoring them can lead to big fines or worse. Check the local fire danger levels and any specific burn bans. Also, look at the weather forecast and wind speed. High winds are a recipe for disaster, even with a legal fire.
- Water plan + waste plan (Leave No Trace): Have a plan for water. If you’re not near a reliable source, bring enough for drinking, cooking, and putting out your fire. And remember LNT: pack out everything you pack in, including food scraps and trash. Don’t bury it.
- Safety (wildlife, distance to help, comms): Know what critters are in the area and how to store your food safely. How far is the nearest ranger station or town? Do you have cell service? A satellite communicator is a smart move for remote spots.
Step-by-step (field workflow)
Making your own wax fire starters is a straightforward process. It’s a great way to use up old candle scraps and ensure you always have a reliable way to get a fire going.
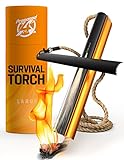
While making your own is rewarding, for convenience, consider a pre-made camping fire starter kit. They often include everything you need to get a fire going quickly.
1. Gather your fuel material: Collect cotton balls, dryer lint (from the trap, not the whole dryer!), or fine sawdust. These are your main fuel sources.
- Good looks like: A clean, dry pile of your chosen material. Lint is fluffy and catches easily.
- Common mistake: Using damp or dirty materials. They won’t absorb wax well and will be hard to light. Keep it clean and dry.
2. Prepare your wax: Get some old candle stubs, paraffin wax, or even old crayons (they add color and burn well). You’ll need a heat-safe container for melting.
- Good looks like: Wax chunks ready to go into a double boiler or a can set in a pot of water.
- Common mistake: Melting wax directly over a high flame. This is a fire hazard. Always use a double boiler method or a controlled heat source.
3. Melt the wax: Gently melt the wax over low to medium heat. Patience is key here.
- Good looks like: Smooth, liquid wax with no scorching.
- Common mistake: Rushing the process and overheating the wax. It can ignite. Keep the heat low and steady.
4. Dip your fuel material: Once the wax is fully melted, carefully dip your cotton balls, lint, or sawdust into the liquid wax. Make sure it’s fully saturated.
- Good looks like: Each piece is thoroughly coated in wax, soaking it up like a sponge.
- Common mistake: Not saturating enough. If the core isn’t waxed, it won’t burn as long or as effectively. Give it a good soak.
5. Remove excess wax: Lift the saturated material out and let the excess wax drip back into the pot for a few seconds.
- Good looks like: A well-coated piece that isn’t dripping excessively.
- Common mistake: Not letting it drip. Too much excess wax can make them messy and less efficient.
6. Cool and harden: Place the waxed items on parchment paper or foil to cool and harden completely. This usually takes just a few minutes.
- Good looks like: Solid, firm fire starters that hold their shape.
- Common mistake: Trying to store them before they’re fully hardened. They’ll stick together and be a gooey mess.
7. Repeat for more starters: Continue dipping and cooling until you have as many as you need. This is a good activity for a rainy afternoon.
- Good looks like: A nice pile of ready-to-go fire starters.
- Common mistake: Making too few. You’ll regret it when you’re trying to get a fire going in damp conditions.
8. Store them properly: Once hardened, store your wax fire starters in an airtight, waterproof container like a small plastic bin or a sturdy zip-top bag.
- Good looks like: A clean, dry container filled with reliable fire starters.
- Common mistake: Leaving them exposed. Moisture is the enemy of fire starters. Keep them dry!
For an all-in-one solution that’s ready for adventure, a camping fire starter kit can be a great addition to your gear. It often comes with waterproof containers and multiple ignition sources.
Common mistakes (and what happens if you ignore them)
| Mistake | What it causes | Fix |
|---|---|---|
| Not checking fire restrictions | Fines, environmental damage, wildfires | Always check local fire danger levels and burn bans before going. |
| Using damp fuel material for starters | Poor ignition, weak flame, frustration | Ensure cotton balls, lint, or sawdust are completely dry. |
| Melting wax directly over high heat | Fire hazard, potential wax fire | Use a double boiler or a can in a pot of water for safe melting. |
| Insufficient wax saturation | Starters don’t burn long or reliably | Dip material thoroughly until saturated; allow for good absorption. |
| Storing starters before they’re hardened | Sticky mess, difficult to handle, wasted material | Let starters cool and harden completely on parchment or foil. |
| Not storing starters in a waterproof case | Moisture absorption, reduced effectiveness | Use airtight plastic containers or sturdy zip-top bags. |
| Relying solely on one fire-starting method | Lack of backup if your primary method fails | Carry multiple ignition sources (lighter, matches, ferro rod). |
| Improper food storage in bear country | Attracts wildlife, potential dangerous encounters | Use bear canisters or hang food properly; follow local guidelines. |
| Ignoring road conditions | Getting stuck, vehicle damage, missed campsite | Check recent road reports and know your vehicle’s capabilities. |
| Not having a water source for fire | Inability to extinguish fire completely, safety risk | Always have a water bucket or shovel ready to douse fires. |
Decision rules (simple if/then)
- If fire restrictions are in place, then do not have an open flame because it’s illegal and dangerous.
- If the wind is gusting over 15-20 mph, then reconsider having a campfire because it can spread quickly.
- If your vehicle is not AWD/4WD with good clearance, then do not attempt roads marked as such because you might get stuck.
- If you are in bear country, then store food in bear-resistant containers because it protects you and the bears.
- If you are unsure about the legality of dispersed camping, then err on the side of caution and find a designated campground because rules can be complex.
- If your destination is remote, then bring a satellite communication device because cell service is unreliable.
- If you are using DIY fire starters in damp conditions, then be patient and give them time to catch because they might take a moment longer.
- If you are unsure about water quality, then treat or filter all water because untreated water can make you sick.
- If you are packing out trash, then double-bag anything smelly because it prevents leaks and odor.
- If you are camping near water, then camp at least 200 feet away from the shoreline because it protects riparian areas.
- If you are leaving your campsite, then ensure your fire is completely out and cold to the touch because embers can reignite.
FAQ
How long do these DIY wax fire starters last?
Stored properly in a dry, airtight container, they can last for years. The wax protects the fuel material from moisture.
Can I use paraffin wax or soy wax?
Yes, both work well. Paraffin is common and burns hot. Soy wax is a bit softer but still effective. Old candle wax is a great way to recycle.
What’s the best material to use for the core?
Cotton balls and dryer lint are top choices. They soak up wax easily and create a good flame. Sawdust works too but can be a bit more challenging to saturate fully.
Are these safe to make indoors?
Yes, as long as you use a proper double boiler or a safe melting setup and good ventilation. Never leave melting wax unattended.
How many starters should I make?
It depends on how long your trips are and how often you build fires. It’s always better to have too many than too few. A dozen or two is a good starting point for a weekend trip.
Can I add anything to the wax for extra burn time?
Some people add a bit of powdered charcoal or even small pieces of a firecracker fuse for a longer burn, but it’s generally not necessary for basic camping needs. Keep it simple.
What if my fire starter doesn’t light?
Ensure it’s fully saturated with wax. If it still struggles, try a bit more tinder or a different ignition source. Sometimes, extreme dampness requires a bit more coaxing.
If you find yourself consistently struggling, a reliable camping fire starter kit can provide a robust and easy-to-use alternative. These kits are designed for consistent performance in various conditions.
Do these work in wet conditions?
Yes, that’s their main advantage! The wax coating protects the fuel from moisture, making them quite reliable even in damp or drizzly weather.
What this page does NOT cover (and where to go next)
- Detailed instructions on building different types of campfires.
- Specific regulations for individual national parks or forests.
- Advanced fire-starting techniques for extreme survival situations.
- Reviews of commercial fire-starting products.
- Information on foraging for natural tinder.

Camping Bob has spent over 20 years camping across the US — from BLM dispersed sites in the Southwest to KOA campgrounds in the Pacific Northwest. He writes practical, no-nonsense guides to help fellow campers get outdoors with confidence.