Brewing Camp Coffee: How to Use Your Percolator Effectively
Quick answer
- Clean is king: Always start with a clean percolator. Grime bakes in flavor you don’t want.
- Water ratio matters: Get the water and coffee grounds balanced for a good cup. Too much water and it’s weak, too little and it’s sludge.
- Medium heat is your friend: Don’t blast it. Gentle heat brews best.
- Watch the perking: Listen and look for that steady bubble. It tells you when it’s ready.
- Cool it down: Let it sit a few minutes before pouring. Avoid scalding yourself or your coffee.
- Clean up ASAP: Wash it right after you use it. It’s way easier than scrubbing dried-on grounds.
What to check first (do this before you drive out)
Before you even think about that first sip of camp coffee, let’s get the basics squared away. It’s not rocket science, but a little prep goes a long way.
- Land manager / legality: Who’s in charge here? Is it National Forest, BLM land, a State Park, or private? Each has its own set of rules, especially for campfires and dispersed camping. Always check the official website for the specific area you’re headed to. That’s your first stop.
- Access/road conditions: Can your rig actually get there? Some spots are paved all the way. Others are rough dirt tracks that demand 4WD and high clearance. Mud, snow, or washouts can turn a planned trip into a U-turn. A quick look at recent trip reports or the land manager’s site is smart.
- Fire restrictions + weather + wind: This is huge. Fire bans are common, especially in dry seasons. Know the rules. Check the weather forecast, but also look at wind. High winds can make fires dangerous and ruin your coffee-making vibe. Always have a backup plan if fires are out or conditions are dicey.
- Water plan + waste plan (Leave No Trace): Where’s your water coming from? If you’re not at a developed campground with spigots, you need to pack it in or filter it. And what about trash? Pack it all out. That includes coffee grounds. Leave it better than you found it, plain and simple.
- Safety (wildlife, distance to help, comms): Are there bears? What about snakes? Know what critters share the space and how to store food properly. How far is the nearest town or ranger station? Cell service is often spotty, so tell someone where you’re going and when you’ll be back. Don’t rely on your phone for emergencies.
Step-by-step (field workflow)
Alright, you’ve got your gear, you’ve checked your ducks, and you’re at camp. Time to make that magic happen.
1. Gather your gear: You’ll need your percolator, fresh coffee grounds (medium grind is best), water, a heat source (stove or campfire coals), and something to stir with.
- Good looks like: Everything is within easy reach, clean, and ready to go.
- Common mistake: Forgetting one crucial item, like the lid or the coffee scoop. Double-check your kit before you leave home.
2. Disassemble and clean: Take your percolator apart. Make sure the basket, tube, and lid are clean. Old coffee oils can make your fresh brew taste bitter.
- Good looks like: Shiny metal, no residue in the nooks and crannies.
- Common mistake: Rushing this step and leaving old grounds or oils behind. This is the quickest way to ruin a good cup.
3. Add water: Fill the main pot with cold water. Don’t fill it past the valve or the fill line if it has one.
- Good looks like: Water level is clear and easy to see.
- Common mistake: Overfilling. This can lead to a messy boil-over and wasted coffee.
4. Add coffee grounds: Place the coffee basket on top of the tube and fill it with medium-ground coffee. Don’t pack it down. A good rule of thumb is one heaping tablespoon per cup of water, but adjust to your taste.
- Good looks like: Grounds are loose and evenly distributed in the basket.
- Common mistake: Tamping the grounds. This restricts water flow and can lead to weak coffee or a clogged percolator.
5. Assemble the percolator: Place the basket assembly into the pot. Put the lid on securely. Make sure the steam vent is clear.
- Good looks like: Everything fits snugly, no gaps.
- Common mistake: Not seating the basket properly. It can shift during brewing, causing grounds to get into the coffee.
6. Place on heat: Put the percolator on your stove or directly over medium-hot campfire coals. Aim for steady, medium heat.
- Good looks like: The percolator is stable and not wobbly. Heat is consistent.
- Common mistake: Using too high heat. This can scorch the coffee and make the metal too hot to handle.
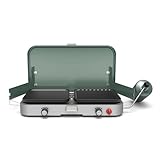
When placing your percolator on heat, a reliable portable camping stove like this one (ASIN B0784VYVL1) provides consistent, controllable heat, crucial for a perfect brew.
7. Watch and listen: As the water heats, it will rise through the tube and bubble out the top, perking into the basket. Listen for that rhythmic “perk, perk, perk.”
- Good looks like: A steady, consistent bubbling sound and visual.
- Common mistake: Forgetting about it. Too long and it boils dry; too short and it’s weak.
8. Perk time: Let it perk for about 5-10 minutes, depending on your heat source and desired strength. You’ll see the coffee circulating.
- Good looks like: A consistent flow of dark liquid coming from the spout and returning to the pot.
- Common mistake: Over-perking. This can make the coffee bitter and extract unpleasant flavors.
9. Remove from heat: Once it looks good and smells great, carefully remove the percolator from the heat.
- Good looks like: You’re using a pot holder or oven mitt and moving it safely.
- Common mistake: Leaving it on the heat too long. It’ll keep perking and can get too hot.
10. Let it settle: Let the percolator sit for 2-5 minutes off the heat. This allows the grounds to settle to the bottom of the basket and the coffee to cool slightly.
- Good looks like: The bubbling has stopped, and the coffee is still.
- Common mistake: Pouring immediately. You’ll get grounds in your cup and a mouthful of scalding liquid.
11. Pour and enjoy: Carefully pour the coffee into your mug. Sip and savor that hard-earned brew.
- Good looks like: A clean pour with minimal grounds.
- Common mistake: Pouring too fast or tilting the pot too much. This can stir up settled grounds.
12. Clean up: Empty the grounds (pack them out!), rinse the percolator thoroughly, and dry it. It’s much easier now than later.
- Good looks like: A clean, dry percolator ready for its next adventure.
- Common mistake: Leaving it dirty until you get home. Dried-on coffee is a pain to scrub.
Common mistakes (and what happens if you ignore them)
| Mistake | What it causes | Fix |
|---|---|---|
| Using a dirty percolator | Bitter, stale-tasting coffee | Always clean thoroughly before and after each use. |
| Packing coffee grounds too tightly | Weak coffee, clogged percolator | Use a medium grind and don’t press down the grounds. |
| Using too high heat | Scorched coffee, burnt taste, dangerous handling | Use medium heat; watch for consistent perking, not a rolling boil. |
| Over-perking | Bitter, over-extracted coffee | Perk for 5-10 minutes; remove from heat when it smells right. |
| Not letting it settle before pouring | Grounds in your cup, scalding hot coffee | Let it rest 2-5 minutes off the heat. |
| Not securing the basket assembly | Grounds in the coffee, messy brewing | Ensure the basket and tube are seated correctly before perking. |
| Using too fine a coffee grind | Grounds in the coffee, muddy taste | Stick to a medium grind; fine grinds can pass through the basket. |
| Forgetting to pack out coffee grounds | Unsanitary campsite, attracts critters | Dispose of grounds in trash bags and pack them out with your waste. |
| Rushing the disassembly/cleaning | Lingering stale flavors | Take your time to get all the nooks and crannies clean. |
| Not checking fire restrictions | Fines, fire hazard, ruined camping trip | Always verify current fire regulations before you go. |
| Ignoring road conditions to campsite | Getting stuck, vehicle damage, missed campsite | Research road conditions and your vehicle’s capabilities beforehand. |
Decision rules (simple if/then)
- If fire restrictions are in place, then use a camp stove for brewing because campfires may be prohibited.
- If you have a fine coffee grind, then use less of it or consider a different brewing method because it will likely end up in your cup.
- If the wind is high, then find a sheltered spot for your stove or consider waiting to brew because wind can make cooking unsafe and blow out your flame.
- If your percolator is new or hasn’t been used in a while, then run a test batch with just water to check for leaks and proper function because you don’t want surprises at dawn.
- If the water source is questionable, then boil it thoroughly or use a filter before adding it to the percolator because safe drinking water is paramount.
- If you’re at a developed campground with amenities, then check for potable water spigots because you won’t need to haul as much water.
- If you’re dispersed camping, then plan to pack in all your water or have a reliable filtration system because you’ll be self-sufficient.
- If you hear sputtering and gurgling that’s too rapid, then reduce the heat because you’re likely boiling too hard and over-extracting.
- If you’re unsure about the exact water-to-coffee ratio, then start with the general rule (1 tbsp per cup) and adjust on subsequent brews because personal preference varies.
- If you want to avoid grounds in your cup, then be extra careful when pouring and don’t disturb the settled grounds at the bottom because patience is key.
- If you see the coffee bubbling vigorously and spitting, then it’s perking well and you should monitor it closely because you’re getting close to done.
- If you’re running late in the morning and need coffee fast, then have your water measured and grounds ready the night before because efficiency saves time.
If fire restrictions are in place, then using a portable camping stove (ASIN B0784VYVL1) for brewing is essential, as campfires may be prohibited.
FAQ
How much coffee grounds should I use?
A good starting point is one heaping tablespoon of medium-ground coffee for every cup of water your percolator holds. Adjust this to your personal taste – more for a stronger brew, less for weaker.
What kind of coffee grind is best for a percolator?
A medium grind is generally recommended. Too fine, and the grounds can pass through the basket into your coffee. Too coarse, and the extraction might be weak.
How do I know when the coffee is ready?
Listen for a steady, rhythmic “perk, perk, perk” sound as the water cycles through the tube. Visually, you’ll see dark liquid bubbling from the spout. It usually takes about 5-10 minutes of perking.
Can I use pre-ground coffee?
Yes, but make sure it’s a medium grind. If you’re buying pre-ground coffee specifically for camping, look for one labeled for percolators or French press, as these are often suitable.
What if my percolator starts sputtering violently?
That means the heat is too high. Reduce the heat source immediately. You want a steady bubble, not a rolling boil, to avoid scorching the coffee and making it bitter.
Is it okay to leave coffee grounds in the percolator overnight?
No, absolutely not. Empty and clean the percolator as soon as possible after use. Leaving grounds will make them sticky and hard to remove, and can lead to mold or unpleasant odors.
How do I clean a percolator effectively?
Disassemble it completely. Rinse all parts with hot water. Use a mild soap and a soft brush or sponge to scrub away any residue. Rinse again thoroughly and dry all parts completely before storing.
Can I make iced coffee with a percolator?
Yes! Brew your coffee strong as usual, let it cool slightly, then pour over ice. You can also brew it directly over ice in a separate container to rapidly chill it without diluting it.
What if I don’t have a specific camp stove?
You can use the coals of a campfire. Just be sure to manage the heat carefully. Place the percolator on a stable grate or directly on a bed of glowing coals, moving it around to control the temperature.
If you don’t have a specific camp stove, consider investing in a portable camping stove (ASIN B0784VYVL1) for more controlled and versatile brewing, especially when campfires aren’t an option.
What this page does NOT cover (and where to go next)
This guide focuses on the mechanics of using your percolator. For a truly complete camp coffee experience, consider these next steps:
- Choosing the right camp coffee gear: Beyond the percolator, explore other brewing methods like pour-over, Aeropress, or French press, and what makes them suitable for different camping styles.
- Water purification and filtration: Learn advanced techniques for sourcing and treating water in the backcountry for safe drinking and cooking.
- Campfire cooking and safety: Deepen your knowledge of building, managing, and extinguishing campfires responsibly and safely, especially in varied conditions.
- Leave No Trace principles in depth: Understand the seven principles of LNT and how to apply them to all aspects of your outdoor adventures, beyond just waste disposal.
- Campground etiquette and regulations: Familiarize yourself with the unwritten rules of camp and the specific regulations of different land management agencies to be a good camper.
Camping Bob has spent over 20 years camping across the US — from BLM dispersed sites in the Southwest to KOA campgrounds in the Pacific Northwest. He writes practical, no-nonsense guides to help fellow campers get outdoors with confidence.