
Tips to Make Ice Last Longer in Your Cooler
Quick answer
- Pre-chill your cooler and everything going into it.
- Use block ice or larger frozen water bottles.
- Pack your cooler tightly, minimizing air space.
- Keep your cooler out of direct sunlight.
- Open your cooler as little as possible.
- Consider a high-quality, insulated cooler.
- Drain meltwater only if absolutely necessary.
What to check first (do this before you drive out)
Before you even think about packing, a few key checks will save you a world of headache and warm beverages.
- Land manager / legality: Know who’s in charge of where you’re going. Is it National Forest, BLM land, a State Park, or private? Each has its own set of rules. For example, some areas might have specific fire bans or permit requirements. Always check the official website for the specific land management agency.
- Access/road conditions: Is the road to your campsite a smooth cruise or a bone-jarring crawl? A standard sedan might be fine for some spots, while others demand 4WD and good clearance. Mud, snow, or washouts can make a planned trip impossible if you don’t check conditions.
- Fire restrictions + weather + wind: This is non-negotiable. Fire restrictions can change by the day. Check the local ranger district or park service for current bans. Likewise, know the weather forecast. High winds can make campfires dangerous and impact your cooler’s efficiency.
- Water plan + waste plan (Leave No Trace): Have a solid plan for potable water and how you’ll handle waste. Bring enough water or a reliable purification method. Pack out everything you pack in, including food scraps. Leave it better than you found it. That’s the mantra.
- Safety (wildlife, distance to help, comms): Be aware of local wildlife. Store food properly to avoid unwanted visitors. Know how far the nearest town or ranger station is. Cell service can be spotty, so consider a satellite communicator for remote areas.
Step-by-step (field workflow)
Here’s how to set up your cooler for maximum ice retention, from prep to pack-out.
1. Choose the right cooler: Start with a good cooler. A cheap one will sweat more and melt ice faster. Think about insulation.
- Good: A high-quality, roto-molded cooler or a well-insulated electric cooler.
- Mistake: Grabbing the flimsy, cheap cooler from the big box store. It’s like bringing a paper umbrella to a hurricane.
For the best ice retention, consider investing in a high-quality insulated cooler like this one. It makes a significant difference compared to cheaper alternatives.
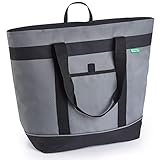
2. Pre-chill the cooler: This is huge. Bring your cooler inside and fill it with ice packs or sacrificial ice for at least 12-24 hours before you pack it.
- Good: The inside of the cooler feels cold to the touch before you even open it.
- Mistake: Packing a warm cooler. You’re essentially asking your ice to do double duty: cool itself and cool the cooler.
To pre-chill your cooler effectively and save on ice, reusable ice packs are a fantastic option. They can also be used to supplement your ice supply.

3. Prepare your ice: Block ice melts way slower than cubed ice. Freeze water in large containers or use frozen water bottles.
- Good: Big, solid blocks of ice or frozen gallon jugs that will last for days.
- Mistake: Using only small cubes. They have more surface area and melt out fast. I learned this the hard way on a sweltering desert trip.
Instead of just cubed ice, use freezable water bottles. They act as block ice, melt slower, and provide refreshing cold water as they thaw.

4. Chill all contents: Everything going into the cooler should be cold before it goes in. This includes drinks, food, and even condiments.
- Good: Cold drinks straight from the fridge. Cold meat for grilling.
- Mistake: Throwing room-temperature soda cans into the cooler. That’s a lot of heat energy your ice has to absorb.
5. Pack it tight: Fill all the air pockets. Air is the enemy of ice. Use smaller bags of ice, crumpled newspaper, or towels to fill gaps.
- Good: A dense, packed cooler where items don’t shift easily.
- Mistake: Leaving large empty spaces. Those pockets of air will accelerate melting.
6. Layer strategically: Put items you’ll use last at the bottom, and frequently accessed items on top. Keep raw meats at the bottom to prevent cross-contamination.
- Good: Drinks and snacks on top, frozen meats and bulk items at the bottom.
- Mistake: Burying the milk jug and then having to dig through everything to get to it. Annoying.
7. Keep it closed: Every time you open the cooler, warm air rushes in. Be decisive when you need something.
- Good: A quick, efficient grab and close.
- Mistake: Leaving the lid open while you ponder your next snack.
8. Keep it in the shade: Direct sunlight is a killer for ice. Keep your cooler under a tarp, in the car (if not too hot), or under a picnic table.
- Good: The cooler is always in shadow, even on a sunny day.
- Mistake: Leaving the cooler sitting out in the blazing sun all afternoon.
9. Drain meltwater (conditionally): This is debated. Some say drain it to prevent items from getting soggy. Others say leave it, as the cold water helps insulate the remaining ice. If you drain, do it sparingly.
- Good: Draining only a little bit of water if items are getting too wet, or if you need the space.
- Mistake: Draining all the water immediately. You’re discarding valuable cold mass.
10. Consider a second cooler: If you need constant access to drinks, use a separate cooler for them. Keep your food cooler closed as much as possible.
- Good: One cooler for drinks, one for food.
- Mistake: Using one cooler for everything and opening it constantly for a beer.
Common mistakes (and what happens if you ignore them)
| Mistake | What it causes | Fix |
|---|---|---|
| Packing a warm cooler | Rapid ice melt, warm food, potential spoilage. | Pre-chill cooler for 24 hours with ice packs or sacrificial ice. |
| Using only cubed ice | Ice melts quickly due to high surface area. | Use block ice or frozen water bottles; supplement with cubes if needed. |
| Leaving air space in the cooler | Air is an insulator; it accelerates ice melt. | Pack cooler tightly with items, towels, or crumpled paper to fill gaps. |
| Opening the cooler frequently | Warm air enters, cold air escapes, speeding up ice melt. | Be decisive when opening; plan ahead for what you need. Consider a separate drink cooler. |
| Leaving the cooler in direct sunlight | Sun’s heat directly melts the ice and warms contents. | Keep cooler in shade, under cover, or inside a vehicle (if safe and not too hot). |
| Putting warm items in the cooler | The ice has to cool down the items first, melting faster. | Ensure all food and drinks are thoroughly chilled before packing. |
| Draining all meltwater immediately | The cold meltwater helps insulate remaining ice. | Drain sparingly, only if items are getting too soggy or space is critical. |
| Not securing the lid properly | Lid can pop open slightly, letting in warm air and potentially spilling contents. | Ensure the lid latches securely; check it periodically. |
| Using a cheap, poorly insulated cooler | Significant heat transfer through the walls and lid. | Invest in a quality cooler with thick insulation for better performance. |
| Packing raw meat on top of other items | Potential cross-contamination if leaks occur. | Always place raw meats at the bottom of the cooler, preferably double-bagged. |
| Forgetting about ambient temperature | Hotter weather means faster ice melt. | Adjust ice quantities and cooler placement based on expected temperatures. |
| Not planning for meltwater disposal (if draining) | Leaving melted ice water everywhere, potentially attracting pests. | Have a plan for where to dispose of meltwater responsibly, away from water sources. |
Decision rules (simple if/then)
- If you’re going for more than 3 days, then use block ice because it melts much slower than cubes.
- If the forecast calls for extreme heat, then pack extra ice or consider a cooler with superior insulation because heat significantly accelerates melt rates.
- If you’re car camping and have space, then bring a second cooler for drinks because it minimizes opening the food cooler.
- If you’re on a long hike and weight is an issue, then freeze water bottles and drink them as they melt because they serve as both hydration and ice packs.
- If you notice your cooler is sweating heavily, then check the lid seal because a poor seal lets warm air in.
- If you’re camping in bear country, then keep your cooler secured in your vehicle or a bear-proof container because bears are attracted to food smells.
- If you’re planning a short overnight trip, then pre-chilled drinks and a few ice packs might be sufficient because you won’t need ice to last for days.
- If you want to maximize ice life, then avoid putting ice cream or frozen meals in your main cooler unless you plan to eat them on day one because they require extremely low temperatures.
- If you’re using a soft-sided cooler, then pack it very tightly because they generally have less robust insulation than hard-sided models.
- If you are camping near a water source, then consider how you will dispose of meltwater responsibly to avoid polluting it.
- If you are going to be moving your cooler a lot, then consider a cooler with sturdy wheels and handles because you’ll be grateful when it’s full and heavy.
FAQ
How much ice do I need?
It depends on the cooler size, ambient temperature, and duration of your trip. A general rule of thumb is 1-2 pounds of ice per gallon of cooler capacity for a weekend trip. For longer trips or hotter weather, pack more.
Should I put ice directly in the cooler or use bags?
Using large blocks or frozen water bottles is best for longevity. If using cubes, keep them in sealed bags to prevent them from melting into your food and making a mess.
What’s the deal with draining meltwater?
Leaving cold meltwater can help insulate remaining ice, but it can also make your food soggy. Drain a little if necessary, but don’t empty it all unless you have to.
How can I make my cooler last longer in the car?
If the car isn’t too hot, parking it in the shade and keeping the windows cracked can help. However, a cooler inside a hot car will still melt ice faster than one kept in the shade outdoors.
Can I use dry ice?
Yes, but with caution. Dry ice is extremely cold and can freeze food you want to keep chilled. It also sublimates, releasing CO2 gas, so ensure good ventilation if using it inside a vehicle or tent.
My cooler is old, can I still make ice last?
An older cooler might not hold ice as long as a new one, but you can still improve performance by following the pre-chilling and packing tips. Consider adding extra insulation if you’re handy.
What if I run out of ice?
This is where a good water filter or purification tablets become essential. For food, you might have to get creative or plan meals that don’t require refrigeration.
How do I keep raw meat from spoiling?
Keep it at the bottom of the cooler, double-bagged, and ensure it stays submerged in ice or meltwater. Use it early in your trip if possible.
What this page does NOT cover (and where to go next)
- Specific cooler brands and their performance metrics. (Next: Read independent cooler reviews.)
- Advanced food preservation techniques beyond basic refrigeration. (Next: Research food dehydration or canning.)
- Detailed bear-proofing strategies for food storage. (Next: Consult your local wildlife agency’s guidelines.)
- Recipes for camping meals that require minimal refrigeration. (Next: Search for “no-cook camping meals” or “campfire cooking recipes.”)
- Emergency preparedness beyond basic safety. (Next: Look into wilderness first aid or survival courses.)

Camping Bob has spent over 20 years camping across the US — from BLM dispersed sites in the Southwest to KOA campgrounds in the Pacific Northwest. He writes practical, no-nonsense guides to help fellow campers get outdoors with confidence.