
Step-by-Step Guide to Setting Up a Pop-Up Tent
Quick answer
- Unpack the tent bag.
- Lay the tent flat on your chosen spot.
- Identify the main poles and their connection points.
- Extend the poles until they click or lock into place.
- Lift the tent and secure the base with stakes.
- Attach guy lines for added stability.
- Double-check all connections and tension.
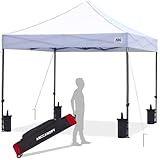
For a hassle-free setup, consider a highly-rated pop-up tent that simplifies your outdoor experience.
What to check first (do this before you drive out)
Before you even think about packing the car, a few things need to be squared away. This isn’t rocket science, but it saves a ton of hassle.
- Land manager / legality: Who’s in charge of the land where you plan to pitch your pop-up? Is it National Forest, BLM, State Park, or private? Each has its own rules. A quick check on their official website or a call can prevent unwelcome surprises. I learned this the hard way on a BLM road once. Ended up having to move.
- Access/road conditions: Pop-up tents are generally easy to set up, but getting to the spot can be the challenge. Is the road paved, gravel, or just a suggestion? Do you need 4WD or high clearance? A slick mud patch or a deep rut can ruin your day before you even unfold the tent.
- Fire restrictions + weather + wind: Check the current fire restrictions for the area. Seriously. Nobody wants to be that person. Also, look at the forecast. A pop-up tent isn’t built for a gale. Wind is the enemy of easy setups.
- Water plan + waste plan (Leave No Trace): Where will you get water if you need it? And what’s your plan for packing out all your trash, including food scraps? Leave No Trace principles are key. Pack it in, pack it out. It’s not just a suggestion.
- Safety (wildlife, distance to help, comms): Are there any local wildlife concerns? Bears, snakes, whatever. Know what to do. How far are you from the nearest town or ranger station? And critically, do you have cell service or a way to communicate in an emergency?
Step-by-step (field workflow)
Alright, you’ve done your homework. Now let’s get this tent up.
If you’re looking for a reliable option, check out this popular pop-up tent, known for its quick assembly.
1. Unpack the tent bag:
- What to do: Pull the tent out of its carrying bag. Let it unfurl a bit.
- What “good” looks like: The tent is mostly spread out, revealing its shape and components.
- Common mistake: Rushing and yanking the tent out, potentially snagging it on something. Take your time, give it space.
2. Lay the tent flat:
- What to do: Spread the tent out on your chosen campsite. Make sure the floor is oriented correctly, usually with the door facing a desirable direction.
- What “good” looks like: The tent lies flat and smooth, without major wrinkles or twists.
- Common mistake: Pitching on uneven ground or over sharp rocks. This stresses the tent floor and makes sleeping uncomfortable. Scout your spot first.
3. Identify main poles:
- What to do: Locate the primary poles that give the tent its structure. These are often color-coded or have distinct connection points.
- What “good” looks like: You can clearly see the poles and how they’re meant to interact with the tent fabric.
- Common mistake: Not understanding the pole system. Some pop-ups have integrated poles, others have separate sections. Know what you’re working with.
4. Extend the poles:
- What to do: Carefully extend each pole. Most pop-up tents have shock-corded poles that snap into place or have locking mechanisms.
- What “good” looks like: Poles are fully extended and securely locked, forming the tent’s frame. You’ll often hear a click.
- Common mistake: Forcing poles that aren’t fully extended or locked. This can bend or break them. Always ensure they click or lock.
5. Lift and secure the base:
- What to do: With the poles in place, lift the tent structure. Then, begin staking down the base of the tent. Start with the corners.
- What “good” looks like: The tent is standing upright, and the floor is taut and securely anchored to the ground.
- Common mistake: Not staking down all points. A loose corner can flap in the wind and let in bugs or rain.
6. Attach guy lines:
- What to do: Connect the guy lines (ropes) to the designated loops on the tent body and stake them out away from the tent.
- What “good” looks like: Guy lines are taut and angled to provide maximum stability against wind.
- Common mistake: Skipping guy lines. They are crucial for wind resistance, even on a seemingly calm day.
7. Secure the rainfly (if applicable):
- What to do: Drape the rainfly over the tent and secure it according to the manufacturer’s instructions. This usually involves clips or straps.
- What “good” looks like: The rainfly is properly fitted, with no sagging, and is securely attached.
- Common mistake: Not orienting the rainfly correctly. It’s designed to shed water in a specific direction.
8. Tension check:
- What to do: Walk around the tent, checking all stakes and guy lines. Ensure everything is taut but not overstretched.
- What “good” looks like: The tent feels solid and secure, with no flapping fabric.
- Common mistake: Leaving anything loose. A slack guy line can unravel your whole setup in a gust of wind.
9. Stake internal points (if any):
- What to do: Some tents have internal tie-downs or loops to further secure the fabric to the poles or ground.
- What “good” looks like: The tent’s interior fabric is pulled snug, creating more usable space and better structure.
- Common mistake: Forgetting these. They add a surprising amount of stability and internal volume.
10. Final inspection:
- What to do: Take a step back. Look for any obvious issues – wrinkles, loose stakes, misaligned rainfly.
- What “good” looks like: A neat, stable tent ready for occupancy.
- Common mistake: Calling it done too early. A quick final look catches minor errors before they become big problems.
Common mistakes (and what happens if you ignore them)
| Mistake | What it causes | Fix |
|---|---|---|
| Not checking the weather | Tent gets destroyed by wind/rain; you get soaked and miserable. | Always check the forecast. If it’s bad, consider a different trip or a sturdier shelter. |
| Pitching on uneven/rocky ground | Uncomfortable sleep; damage to tent floor; tripping hazard. | Scout your spot carefully for a flat, clear area. |
| Forcing poles | Bent or broken poles; damaged tent fabric; inability to set up. | Ensure poles are fully extended and locked before applying pressure. |
| Not staking down all points | Tent flaps in wind, lets in bugs/rain, can blow away. | Stake every single loop and guy line. |
| Ignoring guy lines | Tent is unstable in wind; fabric can rip; structure can collapse. | Always use guy lines, especially in windy conditions. |
| Improperly oriented rainfly | Rain can get inside; condensation builds up. | Ensure the rainfly is correctly positioned for optimal water and ventilation. |
| Not checking land manager rules | Fines, eviction from campsite, bad reputation for campers. | Verify legality and rules <em>before</em> you go. |
| Not packing out all waste | Environmental damage; attracts wildlife; ruins the experience for others. | Pack it in, pack it out. Leave the site cleaner than you found it. |
| Assuming cell service | No way to call for help in an emergency. | Carry a satellite communicator or inform someone of your itinerary. |
| Not reading the tent’s instructions | Confusion, incorrect setup, potential damage to the tent. | Even for pop-ups, a quick read of the manual saves headaches. |
Decision rules (simple if/then)
- If the wind is gusting over 20 mph, then deploy all guy lines and consider an alternative campsite or trip.
- If you see sharp rocks or roots, then find a different spot or use a footprint/tarp.
- If the ground is soft and sandy, then use longer stakes or bury rocks under the stakes for better hold.
- If it’s expected to rain, then ensure the rainfly is taut and properly sealed.
- If you are in bear country, then store food properly and keep the tent clear of smells.
- If you can’t get a pole to lock, then don’t force it; check for obstructions or damage.
- If the tent floor is sagging, then adjust the stakes and guy lines for better tension.
- If you have a campsite reservation, then confirm the specific site is suitable for tent camping.
- If you are setting up near water, then be aware of potential flash floods and camp on higher ground.
- If you are unsure about local regulations, then err on the side of caution and check official sources.
FAQ
How long does it typically take to set up a pop-up tent?
Most pop-up tents can be set up in under five minutes once you get the hang of it. It’s their main selling point!
Many campers love how quickly a good pop-up tent can be set up, often in just a few minutes.
Can I use a pop-up tent in the rain?
Yes, but only if it has a proper rainfly and is staked down securely. Always check the tent’s water resistance rating.
What if my pop-up tent poles get stuck?
Don’t force them. Gently twist and pull, or check for any debris or kinks in the pole sections.
Is a footprint or ground tarp necessary for a pop-up tent?
It’s highly recommended. It protects the tent floor from abrasion and moisture, extending its lifespan.
How do I pack a pop-up tent back into its bag?
This is often the trickiest part! It usually involves folding it into thirds or quarters and then collapsing the poles. Practice makes perfect.
Are pop-up tents durable enough for backcountry camping?
Generally, no. They are best suited for car camping or short trips where weight and extreme durability aren’t primary concerns.
What’s the best way to deal with condensation inside a pop-up tent?
Ensure good ventilation by opening windows and vents. Also, make sure the rainfly isn’t touching the tent body.
Can I leave my pop-up tent set up overnight?
Yes, as long as it’s securely staked and you’re not in an area with strict time limits for camping setups.
What this page does NOT cover (and where to go next)
- Detailed repair techniques for damaged tent fabric or poles.
- Specific campsite reservation systems or booking platforms.
- Advanced weather forecasting and interpretation for extreme conditions.
- Regulations for specific national parks or wilderness areas.
- Choosing the right size or type of tent for your specific needs.

Camping Bob has spent over 20 years camping across the US — from BLM dispersed sites in the Southwest to KOA campgrounds in the Pacific Northwest. He writes practical, no-nonsense guides to help fellow campers get outdoors with confidence.