
Maximizing Cooler Bag Effectiveness For Food Storage
Quick answer
- Pre-chill your cooler. It’s the foundation.
- Use quality ice packs or blocks. They last longer.
- Pack smart: frozen items in bottom, then perishables.
- Keep it closed! Every opening loses cold air.
- Use a separate cooler for drinks if you can.
- Defrost and dry it out after each trip.
What to check first (do this before you drive out)
Before you even think about packing the cooler, do a quick gear check. This saves you headaches later.
- Land manager / legality: Who’s in charge? Is it National Forest, BLM, a state park, or private land? Different agencies have different rules about fires, camping duration, and even what you can bring. Check their website or call their local office. It’s usually pretty straightforward.
- Access/road conditions: How are the roads looking? A sturdy 2WD might be fine for some spots, but others demand AWD or high clearance. Mud, snow, or washouts can turn a fun trip into a struggle. Get the latest intel on road status.
- Fire restrictions + weather + wind: This is crucial. Are campfires allowed? What about cooking stoves? Check the local fire restrictions before you go. Also, look at the weather forecast. Extreme heat means your cooler works harder. High winds can make camp miserable and affect fire safety.
- Water plan + waste plan (Leave No Trace): How will you get potable water? Are there sources, or are you packing it all? And where does your trash go? Pack it in, pack it out. That’s the golden rule. Plan for gray water disposal too, away from water sources.
- Safety (wildlife, distance to help, comms): What wildlife is common in the area? Bears? Raccoons? Secure your food accordingly. How far is the nearest ranger station or town? Do you have cell service, or will you need a satellite messenger? Know your limits and be prepared.
Step-by-step (how to use cooler bag)
To truly maximize your food storage, consider investing in a high-quality insulated cooler bag. This will be your primary tool for keeping food fresh and safe.
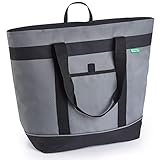
Alright, let’s get this cooler dialed in. It’s not rocket science, but a little care goes a long way.
1. Pre-chill your cooler.
- What to do: Bring your cooler inside the night before. Fill it with ice packs, frozen water bottles, or even bags of ice.
- What “good” looks like: The inside walls and bottom of the cooler feel cold to the touch.
- Common mistake: Packing warm food into a warm cooler. This melts your ice way too fast. Avoid it by chilling the cooler itself first.
For optimal cooling, use reliable reusable ice packs or frozen water bottles instead of just loose ice. They help maintain a consistent cold temperature without creating a watery mess.

2. Pack the heaviest, most frozen items first.
- What to do: Place your frozen meats, pre-made frozen meals, or frozen water bottles at the very bottom.
- What “good” looks like: A solid layer of frozen goods forming the base of your cooler.
- Common mistake: Putting delicate items or things you’ll need soon at the bottom. You’ll have to dig through everything, warming up the rest. Keep frequently accessed items on top.
3. Layer in your perishables.
- What to do: Place items that need to stay cold but aren’t frozen (dairy, cooked foods, veggies) on top of the frozen layer.
- What “good” looks like: Items are packed snugly, with minimal air gaps.
- Common mistake: Leaving too much empty space. Air is the enemy of cold. Fill gaps with more ice packs, towels, or even crumpled newspaper if you must.
4. Add your ice packs/blocks.
- What to do: Fill any remaining space with ice packs, frozen water bottles, or block ice. Aim for a 2:1 ice-to-food ratio if you can.
- What “good” looks like: The cooler is packed as full as possible with a good balance of food and ice.
- Common mistake: Using only cubes. Cubes melt faster than blocks. Block ice or large frozen water bottles provide sustained cooling.
5. Top with items you’ll need first.
- What to do: Put things like drinks, snacks, or ingredients for your first meal on the very top.
- What “good” looks like: Easy access to items without disturbing the main cold mass.
- Common mistake: Burying your first-day needs. You’ll end up opening the cooler more than necessary, letting cold air escape.
6. Close the lid securely.
- What to do: Make sure the lid is latched or sealed properly.
- What “good” looks like: A tight seal all the way around.
- Common mistake: Leaving the lid ajar. Even a small gap lets precious cold air out and warm air in. It’s a huge energy drain for your ice.
7. Keep it out of direct sun.
- What to do: Store your cooler in the shade. Under a picnic table, under a tarp, or in the car (if it’s not too hot inside).
- What “good” looks like: The cooler’s exterior is cool to the touch.
- Common mistake: Leaving the cooler sitting on the hot ground or in direct sunlight. It’s like trying to keep ice in an oven.
8. Limit opening the cooler.
- What to do: Think before you open it. Grab everything you need at once.
- What “good” looks like: The lid is only opened a few times a day, and for short durations.
- Common mistake: Constantly popping the lid for a quick drink or snack. Each opening significantly reduces the internal temperature.
9. Consider a separate drink cooler.
- What to do: If you have the space, use one cooler for food and another for drinks.
- What “good” looks like: Your food cooler stays closed most of the time, while the drink cooler gets more frequent access.
- Common mistake: Mixing drinks and food in one cooler. Drinks get accessed far more often, chilling your food unnecessarily.
10. Drain meltwater (sometimes).
- What to do: For longer trips, you might need to drain some meltwater to make room for more ice.
- What “good” looks like: You’ve managed to keep the inside as cold as possible, even with some water.
- Common mistake: Leaving all the meltwater in. While water is cold, it’s not as effective as solid ice or ice packs. Plus, soggy food isn’t great.
11. Pack out and clean.
- What to do: Once you’re home, empty the cooler, wash it thoroughly with soap and water, and let it air dry completely.
- What “good” looks like: A clean, dry cooler ready for its next adventure.
- Common mistake: Storing a wet, dirty cooler. This leads to mildew, smells, and potential bacteria growth.
Common mistakes (and what happens if you ignore them)
| Mistake | What it causes | Fix |
|---|---|---|
| Packing a warm cooler | Ice melts rapidly, food spoils quickly. | Pre-chill the cooler with ice packs or frozen water bottles overnight. |
| Leaving empty space | Warm air circulates, melting ice faster. | Fill gaps with extra ice packs, towels, or frozen water bottles. Aim for a full cooler. |
| Frequent or long lid openings | Cold air escapes, warm air enters. | Plan what you need before opening. Consider a separate drink cooler. |
| Storing cooler in direct sunlight | Cooler exterior heats up, melting ice faster. | Keep the cooler in the shade, under a tarp, or in a shaded vehicle. |
| Using only ice cubes | Cubes melt faster than blocks or large packs. | Use block ice or large frozen water bottles for sustained cooling. |
| Not securing the lid properly | Cold air leaks out, warm air seeps in. | Ensure the lid is latched or sealed tightly every time. |
| Packing warm food/drinks into the cooler | Your ice has to work overtime to cool them down. | Freeze or refrigerate all food and drinks before packing them into the cooler. |
| Not draining meltwater (on long trips) | Meltwater is less effective than solid ice. | Carefully drain some meltwater to make room for more ice if needed. |
| Storing a wet or dirty cooler | Mildew, odors, and potential bacteria growth. | Wash and thoroughly dry the cooler after each use before storing it. |
| Overpacking the cooler, preventing closure | The seal isn’t tight, letting air escape. | Don’t overstuff. Pack efficiently and ensure the lid can close and seal properly. |
| Not using a cooler bag at all (for picnics) | Food and drinks warm up quickly. | Even a basic insulated bag makes a huge difference for short trips. |
Even for short trips, using a good insulated cooler bag makes a significant difference in keeping your food and drinks cool. It’s a simple upgrade that prevents food from warming up too quickly.
Decision rules (simple if/then)
- If the trip is longer than two days, then use block ice because it melts slower and lasts longer.
- If you’re going to be in extreme heat, then pack extra ice and consider a cooler with better insulation because heat is the enemy of cold.
- If you plan on frequent snacking, then use a separate cooler for drinks because it minimizes opening the main food cooler.
- If you can’t pre-chill your cooler, then use more ice than you think you’ll need because it has to cool down first.
- If you have a hard-sided cooler, then use it instead of a soft-sided one for longer trips because hard-sided coolers generally offer better insulation.
- If you’re camping in bear country, then ensure your cooler is bear-resistant or stored properly in a bear box or vehicle because food attracts unwanted wildlife.
- If you are using a cooler for food storage, then always pack it as full as possible because empty space allows for air circulation, which melts ice.
- If you are packing raw meats, then place them at the bottom of the cooler, ideally in a sealed container, because this prevents any potential leaks from contaminating other foods.
- If you are using frozen water bottles as ice, then consider leaving a few out to drink as they melt because it’s a two-in-one solution.
- If you notice your ice is melting faster than expected, then check the cooler seal and its location for shade because these are common culprits.
- If you are packing for a short day trip, then a basic insulated bag with a couple of ice packs will likely suffice because you won’t need sustained cold.
FAQ
How long does food typically stay cold in a cooler?
This varies a lot, but a good cooler with plenty of ice can keep food cold for 2-4 days, sometimes longer. It depends on the cooler’s quality, how much ice you use, and how often you open it.
Should I drain the water from my cooler as the ice melts?
For shorter trips (1-2 days), it’s usually fine to leave the meltwater in, as it helps keep things cold. For longer trips, you might want to drain some to make space for more ice.
What’s the best type of ice to use?
Block ice or large frozen water bottles last the longest. Ice cubes melt quickly. A mix of blocks and cubes can be effective, with blocks forming the base.
When it comes to the best type of ice, reusable ice packs or large frozen water bottles are superior to ice cubes for sustained cooling. They melt slower and keep your items colder for longer.
Can I put raw meat directly in the cooler with other food?
It’s best to avoid this. Always store raw meat in leak-proof containers or bags to prevent juices from contaminating other items. Pack them at the bottom.
How do I prevent my cooler from smelling bad?
Clean it thoroughly with soap and water after each trip and let it air dry completely before storing it. Baking soda can also help absorb odors.
Does the color of the cooler matter?
Yes, lighter-colored coolers absorb less heat than darker ones, which can help them stay colder for longer.
How much ice should I use?
A good rule of thumb is a 2:1 ratio of ice to food by volume. For longer trips or hotter weather, you might need even more.
What’s the deal with pre-chilling? Why is it so important?
Pre-chilling means your cooler is already cold before you put your food in. If you put warm food into a warm cooler, the ice has to work twice as hard, melting much faster.
What this page does NOT cover (and where to go next)
- Specific bear-resistant cooler certifications and testing. (Look for official ratings from organizations like the IGBC).
- Detailed recipes for camping meals. (Search for “camp cooking recipes” or “backpacking meals”).
- Advanced insulation techniques for DIY coolers. (Explore online forums dedicated to outdoor gear modification).
- The science of thermodynamics and heat transfer in insulated containers. (Consult physics or engineering resources).
- Regulations regarding food storage in specific national parks or wilderness areas. (Check the official park or forest service websites).

Camping Bob has spent over 20 years camping across the US — from BLM dispersed sites in the Southwest to KOA campgrounds in the Pacific Northwest. He writes practical, no-nonsense guides to help fellow campers get outdoors with confidence.