
Mastering the Guy Line: Essential Tying Techniques
Quick answer
- Learn a few basic knots: bowline, taut-line hitch, and trucker’s hitch.
- Practice them before you hit the trail. Seriously.
- Always tie guy lines to a secure anchor point.
- Keep tension even for stability.
- Understand your tent’s design for optimal guy line placement.
- Weather dictates tension: looser in wind, tighter in rain.
What to check first (do this before you drive out)
Before you even think about setting up camp, a few things need your attention. It’s all about being prepared and avoiding headaches later.
- Land manager / legality: Who’s in charge here? Is it the National Forest, BLM, a state park, or private land? This determines rules about fires, camping duration, and where you can pitch your tent. A quick check on their website or a call can save you trouble. I learned this the hard way once when I camped on land that required a permit I didn’t have. Oops.
- Access/road conditions: Can your rig actually get there? Is it a paved road, a gravel track, or a muddy mess? Know your vehicle’s capabilities – 2WD, AWD, 4×4, and ground clearance. A scenic overlook might be gorgeous, but not if you’re scraping your oil pan on the way in.
- Fire restrictions + weather + wind: This is a big one. Are campfires allowed? Are there burn bans? Check the local fire danger level. Also, look at the forecast. High winds can make setting up a tent a wrestling match and can stress your guy lines to their breaking point. Rain? You’ll want everything snug.
- Water plan + waste plan (Leave No Trace): Where’s your water source, and how will you treat it? And what about trash and human waste? Pack it in, pack it out. Digging catholes properly is key if facilities aren’t available. Leave No Trace principles are your best friend out there.
- Safety (wildlife, distance to help, comms): What animals call this place home? Know what to do if you encounter them. How far is the nearest town or ranger station? Do you have cell service? A satellite communicator is a smart backup for remote areas.
Step-by-step (field workflow)
Setting up your tent and getting those guy lines just right is a skill that gets easier with practice. Here’s the flow.
1. Choose your spot: Find a level patch of ground, clear of sharp rocks or roots.
- What “good” looks like: Flat, comfortable, and away from obvious hazards like dead trees (widowmakers!).
- Common mistake: Pitching on a slope. You’ll slide around all night. Find a better spot, even if it means a few extra steps.
2. Lay out the tent body: Unfold it and orient the door where you want it.
- What “good” looks like: Tent body is spread out, facing the right direction.
- Common mistake: Not checking orientation. You might end up with your door facing a rock wall or the prevailing wind.
3. Insert poles and raise the tent: Assemble your poles and slide them into the sleeves or attach them to the clips.
- What “good” looks like: Tent is standing up, supported by the poles, looking like a tent.
- Common mistake: Forcing poles. If they’re not sliding easily, check for snags or misaligned sleeves.
4. Stake down the corners: Secure the main corners of the tent to the ground.
- What “good” looks like: Tent is anchored, not flapping around. Stakes are driven in at an angle.
- Common mistake: Not driving stakes deep enough or at an angle. They can pull out easily. Angle them away from the tent.
5. Locate guy-out points: Find the loops or tabs where your guy lines attach to the tent.
- What “good” looks like: You know where all the attachment points are.
- Common mistake: Missing a guy-out point. This leaves a section of your tent unsupported.
6. Attach guy lines to tent: Clip or tie your guy lines to these points.
- What “good” looks like: Lines are attached, ready to be tensioned.
- Common mistake: Attaching them too tightly before anchoring. You won’t have much slack to work with.
For optimal performance, consider upgrading to high-quality tent guylines with tensioners, as they make adjustments much easier and more secure.

7. Find anchor points: Identify sturdy objects like trees, rocks, or dedicated tent stakes.
- What “good” looks like: Solid, reliable anchors that won’t move.
- Common mistake: Tying to small saplings or loose rocks. They can shift or break.
8. Tie the first knot (bowline or similar): Secure the guy line to the anchor.
- What “good” looks like: A secure knot that won’t slip. The bowline is a classic for a reason.
- Common mistake: Using a knot that can easily come undone under tension, like a simple overhand.
9. Tension the line (taut-line hitch): Use a taut-line hitch or similar adjustable knot to create tension.
- What “good” looks like: The line is snug but not so tight it warps the tent.
- Common mistake: Over-tensioning. This can damage your tent seams or poles.
10. Adjust and repeat: Go around the tent, adjusting each guy line to create even tension.
- What “good” looks like: The tent is taut, stable, and shed water well. No sagging fabric.
- Common mistake: Uneven tension. This can put stress on one side of the tent.
11. Add a mid-line knot (optional, trucker’s hitch): For extra tension or longer lines, a trucker’s hitch can be useful.
- What “good” looks like: A secure, adjustable system for significant tension.
- Common mistake: Not knowing how to tie or untie it easily. Practice this one!
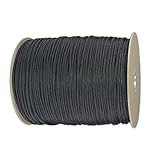
If you need extra length or strength for your guylines, a durable paracord camping cord 550 is an excellent choice for its versatility and reliability.
12. Final check: Walk around the tent. Give the fabric a gentle push. It should feel solid.
- What “good” looks like: A stable shelter ready for whatever the weather throws at you.
- Common mistake: Not doing a final check. You might find a loose line after the wind picks up.
Common mistakes (and what happens if you ignore them)
| Mistake | What it causes | Fix |
|---|---|---|
| Not practicing knots | Inability to set up or adjust lines quickly, especially in bad weather. | Tie them at home. Repeatedly. Until you can do them blindfolded. |
| Using inadequate anchor points | Tent can blow away or collapse in wind. | Tie to thick trees, large rocks, or solid tent stakes driven deep at an angle. |
| Over-tensioning guy lines | Stressed seams, damaged poles, warped tent structure. | Tension until taut, not until the fabric is visibly straining. You should be able to push the fabric slightly. |
| Under-tensioning guy lines | Sagging fabric, poor water runoff, tent is less stable in wind. | Aim for a drum-tight feel without deforming the tent. Adjust as needed. |
| Guy lines crossing each other | Can snag, chafe, or make adjustments difficult. | Route lines so they don’t interfere with each other. |
| Not using all available guy-out points | Uneven stress on the tent, less stability. | Use every loop designed for a guy line. They’re there for a reason. |
| Tying directly to tent stake | Stake can pull out more easily than with a proper knot and loop. | Use a knot like a bowline to create a loop on the guy line, then attach that loop to the stake or anchor. |
| Not adjusting for wind/rain | Tent can be damaged or fail to shed water effectively. | Tighten lines in wind/rain, loosen slightly if fabric is stretching excessively in heat. Always check and adjust. |
| Ignoring slope when pitching | Sleeping uncomfortably, sliding downhill. | Find the flattest spot possible. If minor slope is unavoidable, orient yourself head-uphill. |
| Not clearing the ground properly | Punctured tent floor, discomfort from rocks/roots. | Spend a few minutes clearing your pitch site of debris. Your sleeping pad will thank you. |
| Not checking fire restrictions | Fines, damage to the environment, risk of wildfire. | Always check the official land manager’s website or call the ranger station before you go. |
| Assuming all roads are passable | Getting stuck, vehicle damage, being stranded. | Know your vehicle’s limits and research road conditions beforehand. A high-clearance 4×4 isn’t always optional. |
Decision rules (simple if/then)
- If the wind is strong, then increase guy line tension because it helps the tent resist being blown over.
- If it’s raining, then ensure all guy lines are taut because this helps the tent shed water effectively and prevents pooling.
- If you’re pitching on rocky ground, then use rocks as anchors for your guy lines because stakes might not hold well.
- If you’re using a tarp for shelter, then use a trucker’s hitch for your guy lines because it allows for significant tension and adjustment.
- If you’re in an area with light snow, then use longer stakes or bury your stakes/anchors deep because regular stakes will pull out easily.
- If you’re unsure about an anchor point’s strength, then test it by pulling hard on it before relying on it.
- If your tent fabric feels like it’s stretching too much, then slightly loosen the guy lines because extreme tension can damage the fabric and seams.
- If you’re setting up in the dark, then use a headlamp and go slowly, checking each guy line twice because mistakes are easier to make and harder to fix when you can’t see well.
- If your tent has integrated guy line pockets, then use them to store the lines neatly when not in use because it prevents tangles.
- If you’re pitching in a crowded campground, then ensure your guy lines don’t cross walkways or other tent sites because it’s a tripping hazard and just plain inconsiderate.
- If you’re in an area known for bears, then store food properly and keep your campsite clean, regardless of your guy line technique.
- If you’re using a freestanding tent, then you can pitch it almost anywhere, but guy lines still add crucial stability, especially in wind.
FAQ
What’s the best knot for a guy line?
The bowline is great for attaching to an anchor, and the taut-line hitch is excellent for adjusting tension. A trucker’s hitch is useful for really long lines or when you need maximum tension.
How tight should my guy lines be?
They should be taut enough to eliminate sagging in the tent fabric but not so tight that they warp the tent structure or strain the seams. It should feel firm, like a drum.
Many modern tent guylines with tensioners simplify this process, allowing for quick and precise adjustments to maintain optimal tightness.
What if I don’t have trees or rocks to tie to?
You’ll need to use extra tent stakes. Drive them deep and at an angle, and consider using a “deadman anchor” if the ground is soft or sandy – essentially burying an object to hold the line.
How do I prevent my guy lines from tangling in my gear bag?
Coil them neatly and secure them with a velcro strap or a simple overhand knot. Some tents have built-in pockets or straps for this.
Do I really need to use all the guy lines?
Yes, if you want maximum stability and weather resistance. Each guy line is designed to support a specific part of the tent in wind or rain. Skipping them weakens the whole structure.
What’s the difference between a guy line and a tent stake?
A guy line is the cord that extends from the tent to an anchor point. A tent stake is the peg driven into the ground to secure the tent’s corners or the guy lines themselves.
Can I just tie my guy lines directly to the tent stakes?
You can, but it’s better to tie a loop in the guy line (like with a bowline) and then attach that loop to the stake. This offers more adjustability and reduces stress on the stake.
What if my guy lines are too long or too short?
You can often adjust them with knots. For very long lines, you might need to shorten them by tying a knot. For short lines, you might need to reposition your anchor point or use a different knot.
How do I deal with guy lines in high winds?
You’ll want them extra taut. Consider adding extra stakes or using a trucker’s hitch for more tension. Always check them periodically, as wind can loosen things.
What this page does NOT cover (and where to go next)
- Specific tent pole repair techniques.
- Advanced tarp shelter configurations.
- Detailed campsite selection for extreme weather.
- Choosing the right tent for specific backcountry conditions.
- Leave No Trace principles for human waste disposal.
- How to choose the right camping stove for your trip.

Camping Bob has spent over 20 years camping across the US — from BLM dispersed sites in the Southwest to KOA campgrounds in the Pacific Northwest. He writes practical, no-nonsense guides to help fellow campers get outdoors with confidence.