
Folding Your Pop-Up Pod: A Simple Method
Quick answer
- Practice at home first. Seriously.
- Clear the interior of all gear.
- Release all latches and locks.
- Lower the roof evenly.
- Secure the sides as you go.
- Double-check all seals.
What to check first (do this before you drive out)
Before you even think about folding that pod, run through this quick checklist. It’s the difference between a smooth pack-up and a frustrating struggle.
- Land manager / legality: Who owns this spot? Is it a national forest, BLM land, state park, or private campground? Each has its own vibe and rules. Knowing who to ask if you have a question is key.
- Access/road conditions: How’d you get here? Was the road smooth sailing or a bone-jarring adventure? If it was rough, make sure the pod isn’t leaning or twisted in a way that will make folding a pain. A level spot is always best.
- Fire restrictions + weather + wind: Check the local fire ban status. Seriously, don’t be that guy. Also, keep an eye on the sky. Strong winds can make folding a pod a real challenge, even a dangerous one. If it’s looking gnarly, wait it out if you can.
- Water plan + waste plan (Leave No Trace): Got all your water packed up and secured? Any trash consolidated? The goal is to leave your campsite cleaner than you found it. That means packing out everything, including your water bottles and food scraps.
- Safety (wildlife, distance to help, comms): Did a curious critter investigate your camp while you were out? Make sure everything is stowed. Know how far the nearest ranger station or town is. And do you have cell service? If not, tell someone where you are and when you expect to be back.
Step-by-step (field workflow)
Alright, let’s get this pod tucked in.
1. Clear the interior: Remove everything. Sleeping bags, chairs, coolers, cooking gear. Even small items left behind can get crushed or snagged, making the process harder.
- Good: The interior is completely empty, floor to ceiling.
- Mistake: Leaving a water bottle or a camp mug inside. It’ll get stuck and could damage the canvas or mechanism.
2. Release all latches and locks: Go around the pod and undo every single latch, turnbuckle, or locking mechanism. Don’t leave any holding the roof down.
- Good: All latches are visibly open and disengaged.
- Mistake: Forgetting one side latch. This will prevent the roof from lowering properly and could stress the frame.
3. Lower the main roof (center first): Most pods have a central mechanism or points to start lowering the roof. Apply gentle, even pressure.
- Good: The roof starts to descend smoothly and evenly.
- Mistake: Forcing one side down before the other. This can bind the mechanism.
4. Tuck in the canvas sides: As the roof lowers, the canvas sides will begin to bunch up. Gently guide them inwards, making sure they don’t get caught on anything.
- Good: The canvas folds neatly, creating a tidy stack.
- Mistake: Letting the canvas snag on a tent pole or storage bin. This can rip the fabric.
5. Continue lowering the roof: Keep applying even pressure. You might need to assist the canvas in folding as you go.
- Good: The roof continues its descent without resistance.
- Mistake: Rushing the process. Take your time to ensure the canvas folds correctly.
6. Secure the sides as they fold: Some pods have straps or clips to secure the folded canvas to the base. Use them as you go.
- Good: Canvas is neatly contained and secured.
- Mistake: Not using the securing straps. Loose canvas can flap around and get damaged.
7. Final roof lowering: Once the sides are mostly tucked, lower the roof the rest of the way.
- Good: The roof sits flush on the base.
- Mistake: Not lowering it all the way. This leaves it vulnerable to the elements.
8. Re-engage latches and locks: Secure the roof to the base using all the latches and locks you released earlier.
- Good: All latches are firmly secured, creating a tight seal.
- Mistake: Leaving any latch unlocked. This compromises security and weatherproofing.
9. Check seals and cover: Inspect the seals around the roof and ensure they are properly seated. If your pod has a travel cover, put it on now.
- Good: Seals look good, no gaps. Cover is snug.
- Mistake: Ignoring a small gap in the seal. This can lead to water ingress.
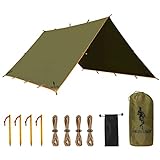
For added protection against the elements, especially if you’re storing your pod outdoors, consider using a waterproof camping tarp. This can provide an extra layer of defense against rain, snow, and UV rays, keeping your pod in top condition.
10. Quick interior sweep: Give the interior a final glance to make sure nothing is left behind.
- Good: The pod is empty and ready for travel.
- Mistake: Realizing you left your favorite camp mug on the counter after you’ve already driven off. Been there.
Common mistakes (and what happens if you ignore them)
| Mistake | What it causes | Fix |
|---|---|---|
| Forgetting to clear the interior | Damaged gear, torn canvas, jammed mechanisms | <strong>Empty it completely.</strong> Make it a habit. |
| Leaving latches engaged | Roof won’t lower, stress on the frame, potential damage | <strong>Visually confirm all latches are open.</strong> Walk around and check. |
| Uneven roof lowering | Binding in the mechanism, bent support poles, canvas tearing | <strong>Apply pressure evenly.</strong> If it feels stuck, stop and investigate. |
| Improper canvas tucking | Snagged canvas, rips, tears, canvas getting caught in the mechanism | <strong>Gently guide the canvas.</strong> Watch for pinch points and obstructions. |
| Forcing a stuck mechanism | Bent metal, broken parts, costly repairs | <strong>Stop and troubleshoot.</strong> Don’t use brute force. |
| Not securing folded canvas | Canvas flapping in the wind, getting dirty, potential damage | <strong>Use all provided straps and clips.</strong> Keep it tidy. |
| Ignoring seal gaps | Water leaks, mold, mildew, damaged interior | <strong>Inspect seals carefully.</strong> Ensure they are seated and not cracked. |
| Rushing the process | All of the above, plus frustration and a poorly secured pod | <strong>Take your time.</strong> It’s better to be slow and right than fast and wrong. |
| Not checking road conditions beforehand | Getting stuck, damaging the pod on rough terrain, making folding difficult | <strong>Assess the approach and departure routes.</strong> Know your vehicle’s limits. |
| Not securing the pod for travel | Pod shifting, damage to the pod or vehicle, safety hazard | <strong>Ensure all travel locks and straps are engaged.</strong> Double-check. |
Decision rules (simple if/then)
- If the wind is gusting hard, then wait to fold if possible because strong winds can make it difficult and potentially dangerous.
- If the ground is significantly sloped, then try to level the pod before folding because a tilted pod can bind the mechanism.
- If you can’t remember the last time you practiced folding, then do a practice run at home because it’s much better to figure it out in your driveway than at the campsite.
- If you see any damage to the canvas or mechanism, then inspect it closely before folding because continuing could worsen the problem.
- If it’s raining hard, then try to find some shelter to fold under if possible because a wet canvas can be heavier and harder to manage.
- If you have a lot of gear inside, then take the time to remove it all because even small items can cause big problems.
- If the latches feel stiff, then apply a little lubricant before you start because they should move freely.
- If you’re unsure about a step, then consult your pod’s manual or the manufacturer’s website because they have specific instructions for your model.
- If you notice the roof isn’t lowering evenly, then stop immediately and check for obstructions or binding because forcing it can cause damage.
- If you have a travel cover, then make sure the pod is completely folded and latched before putting it on because a cover won’t fix a poorly secured pod.
- If you have any doubt about the security of the folded pod, then do an extra check of all latches and straps because a secure pod is a safe pod.
FAQ
How long does it typically take to fold a pop-up pod?
For a seasoned pro, it might take 10-15 minutes. For a beginner, especially in less-than-ideal conditions, budget 20-30 minutes. Practice makes perfect, and faster.
Can I fold my pod if it’s a little wet?
Yes, but it’s not ideal. Try to dry it off as much as possible. Fold it wet if you must, but be sure to air it out thoroughly once you get home to prevent mold and mildew.
What if the canvas gets bunched up weirdly?
Stop. Gently pull the bunched section out and try to guide it back into place as the roof continues to lower. Don’t force it.
Is it okay to leave the pod folded for a long time?
Generally, yes. However, it’s a good idea to unfold it periodically, especially if it’s been stored in a damp environment, to let it air out.
What kind of maintenance is needed for the folding mechanism?
Keep it clean and lubricated. Check for rust or damage. Refer to your owner’s manual for specific recommendations.
Can I fold it by myself?
Most pods are designed to be foldable by one person, but having a second set of hands can make it easier and faster, especially when guiding the canvas.
What’s the biggest mistake people make when folding?
Probably rushing. People get eager to hit the road and end up making mistakes that can cause damage or make the next setup harder. Patience is key.
How do I know if my pod is secured properly for travel?
All latches should be firmly engaged, the roof should sit flush with the base, and any travel straps should be tight. Give it a gentle shake to feel for looseness.
What this page does NOT cover (and where to go next)
- Specific repair guides for damaged mechanisms. (Check manufacturer support or a qualified repair shop.)
- Detailed cleaning instructions for canvas and seals. (Look for product-specific care guides.)
- Advanced setup techniques for challenging terrain. (Explore specialized off-road or backcountry camping resources.)
- Choosing the right pop-up pod for your needs. (Research different models and brands based on your intended use.)
- Legal requirements for towing recreational vehicles. (Consult your state’s Department of Motor Vehicles.)

Camping Bob has spent over 20 years camping across the US — from BLM dispersed sites in the Southwest to KOA campgrounds in the Pacific Northwest. He writes practical, no-nonsense guides to help fellow campers get outdoors with confidence.