
Folding Your Beach Pop-Up Tent Made Easy
Quick answer
- Practice at home before your first trip.
- Lay it flat, push the sides in, and create a circle.
- Twist the circle into a figure-eight shape.
- Fold the figure-eight in half.
- Stuff it into its bag.
- Don’t force it; gentle persuasion usually works.
What to check first (do this before you drive out)
Before you even think about packing the car, a few things need to be squared away. This isn’t about the tent itself, but the whole operation.
- Land manager / legality: Who’s in charge of the beach? Is it state park, county, or even private? Make sure you’re allowed to set up shop and, more importantly, that you’re allowed to leave it there overnight if that’s the plan. Some places have strict rules about temporary structures.
- Access/road conditions: How are you getting to your spot? Is it a paved road, a sandy track, or are you hoofing it from the parking lot? Knowing this saves you a headache, or worse, a stuck vehicle. A beach pop-up tent is light, but getting to the perfect spot can be tricky.
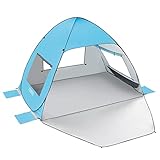
A good beach pop-up tent, like the one we recommend, is designed to be lightweight and portable, making transport to even the trickiest spots much easier.
- Fire restrictions + weather + wind: Beach weather can change fast. Check the forecast for sun, rain, and especially wind. High winds can make setting up and taking down a pop-up a real battle. Also, know the fire rules. Even if you’re not planning a campfire, some areas have burn bans that might affect grills or other things.
- Water plan + waste plan (Leave No Trace): You’ll need water for drinking, rinsing, and maybe cleaning up. How are you getting it? And what about trash? Pack it in, pack it out. This is crucial for keeping beaches beautiful for everyone.
- Safety (wildlife, distance to help, comms): What kind of critters hang out here? Jellyfish? Crabs? Maybe something bigger? Know what to watch for. Also, how far is the nearest ranger station or lifeguard? And can you get a cell signal if you need to call for help?
Step-by-step (field workflow)
This is the actual process of getting that pop-up tent folded. It’s simpler than it looks, I promise.
This guide focuses on the specific folding process for a typical beach pop-up tent, ensuring you can pack up your gear efficiently after a fun day.
1. Find your flat spot: Clear a space on the sand. You need enough room to lay the tent out fully.
- Good looks like: A clean, mostly level area, free of rocks or sharp shells.
- Common mistake: Trying to fold it while it’s still partially up or on uneven ground. This just makes it awkward and harder to manage.
2. Lay it completely flat: Open the tent as much as you can and lay it down. Make sure all the poles are extended and the fabric is spread out.
- Good looks like: The whole tent is visible, like a big, colorful frisbee.
- Common mistake: Leaving one side bunched up. This will prevent you from getting the right shape later.
3. Push the sides inward: Grab the edges of the tent and gently but firmly push them towards the center. You’re aiming to make the structure start to collapse inwards.
- Good looks like: The tent begins to curve, forming a rounded shape.
- Common mistake: Pulling instead of pushing. You want to encourage it to fold, not fight it.
4. Form a large circle: Continue pushing and guiding the sides until the tent forms a large, flat circle. The poles should be nested inside each other.
- Good looks like: A perfect, flat hoop of tent fabric.
- Common mistake: Stopping too soon and ending up with a lumpy oval. Be patient and keep working it into a circle.
5. Twist into a figure-eight: This is the key step. Grab the circle with both hands, one on each side, and twist. Imagine you’re wringing out a towel, but horizontally. You’re creating two connected loops.
- Good looks like: The circle collapses and bends into a distinct figure-eight shape.
- Common mistake: Twisting too hard or in the wrong direction, which can stress the fabric or poles. A smooth, controlled twist is best.
6. Fold the figure-eight in half: Once you have your figure-eight, bring the two loops together. One loop will naturally overlap the other.
- Good looks like: A compact, layered bundle of fabric.
- Common mistake: Trying to fold it in half before you have a clear figure-eight. This leads to a tangled mess.
7. Secure and stuff: The tent should now be a compact shape that’s ready to go into its carrying bag. Sometimes the tent comes with straps; use them if you have them.
- Good looks like: The folded tent slides easily into its original bag.
- Common mistake: Forcing a poorly folded tent into the bag. This can damage the tent or the bag.
8. Store it properly: Once bagged, keep it somewhere dry and out of direct sunlight.
- Good looks like: The bag stands up on its own, ready for the next adventure.
- Common mistake: Leaving it crammed in a corner of the garage or shed, where it can get crushed or damaged.
Common mistakes (and what happens if you ignore them)
| Mistake | What it causes | Fix |
|---|---|---|
| Not practicing at home | Frustration, damaged tent, wasted time at the beach. | Do a dry run in your living room or backyard before your trip. |
| Trying to fold it while wet or sandy | Fabric sticks, makes it harder to fold, can lead to mold if stored wet. | Let it dry thoroughly before folding. Brush off as much sand as possible. |
| Forcing the fabric or poles | Ripped seams, bent poles, shortened tent lifespan. | Be gentle. The tent is designed to fold; it just needs the correct manipulation. |
| Not creating a perfect circle first | Difficulty forming the figure-eight, uneven folding, makes it bulky. | Take the extra minute to get that circle shape right before twisting. |
| Twisting too aggressively | Straining the fabric, potentially damaging the integrated poles. | Use a steady, controlled twisting motion. It’s about technique, not brute force. |
| Stuffing it into the bag forcefully | Ripped bag, bent poles, makes it hard to get out next time. | Gently guide it in. If it’s not fitting, it’s probably not folded correctly. |
| Leaving it folded in damp conditions | Mold and mildew growth, unpleasant smells, damaged fabric. | Always ensure the tent is completely dry before folding and storing. |
| Not clearing the folding area | Tent gets snagged on debris, can cause tears or damage to the poles. | Choose a clean, flat spot free of sharp objects. |
| Trying to fold a partially collapsed tent | Awkward angles, increased resistance, potential for damage. | Ensure the tent is fully laid out and expanded before starting the folding process. |
| Not checking for damage before folding | Small tears or loose seams get worse during folding, leading to bigger problems. | Give the tent a quick once-over for any damage before you start the folding process. |
Decision rules (simple if/then)
- If the wind is gusting over 20 mph, then consider not setting up the pop-up tent, because it can become a kite and damage itself or surrounding property.
- If the tent is still damp from water or dew, then do not fold it immediately, because folding it wet can lead to mold and mildew.
- If you’re struggling to get the figure-eight shape, then check that the initial circle was perfectly flat, because an uneven circle won’t twist correctly.
- If the tent bag feels too tight, then stop and refold, because forcing it will damage the bag and potentially the tent.
- If you’re at a designated campsite with a tent pad, then try to fold it on the pad, because this ensures a clean, flat surface.
- If you’re on a busy beach, then find a less crowded spot to fold, because you’ll have more room and fewer onlookers.
- If you hear a ripping sound, then stop immediately and inspect the fabric, because you’ve likely found a tear that needs repair.
- If you’re doing this for the first time, then watch a video tutorial beforehand, because visual aids can make the process much clearer.
- If the tent is new, then don’t worry if it feels a little stiff, because it will loosen up with a few folds.
- If you have kids or pets around, then keep them a safe distance away, because they can accidentally interfere with the folding process.
- If you’re packing up at dusk, then ensure you have good light, because it’s easy to miss steps or damage the tent in low visibility.
FAQ
How long does it usually take to fold a beach pop-up tent?
Once you get the hang of it, folding a pop-up tent should take about 30 seconds to a minute. The first few times might take a bit longer.
Can I fold my pop-up tent if it’s a little sandy?
It’s best to brush off as much sand as possible. While a little sand won’t ruin it, excessive sand can abrade the fabric over time and make folding more difficult.
What if my tent doesn’t fit back in the bag?
This usually means it’s not folded correctly. Try refolding it, ensuring you have a clean circle and a proper figure-eight before the final fold. Don’t force it.
Are pop-up tents durable?
Generally, yes. They’re designed for ease of use. However, they’re not indestructible. Treat them with care, especially the poles and seams, and they’ll last a good while.
Our recommended beach pop-up tent is built with durable materials, ensuring it can withstand regular use and proper folding techniques.
Do I need to dry my tent completely?
Absolutely. Folding a damp tent is a recipe for mold and mildew, which can damage the fabric and create a musty smell that’s hard to get rid of.
What’s the trick to the figure-eight twist?
It’s like folding a large circular object. You’re collapsing it onto itself. Imagine bringing opposite sides of the circle together and then twisting the resulting loops.
Can I leave my pop-up tent set up overnight?
Check the rules for the specific beach or park. Some allow it, but it’s often discouraged due to wind, tides, and potential theft or vandalism.
What this page does NOT cover (and where to go next)
- Detailed repair instructions for rips or broken poles.
- Specific campsite booking procedures or fees.
- Advanced tent setup techniques for extreme weather.
- Legal regulations for camping on public lands.
- Choosing the right type of tent for different outdoor activities.

Camping Bob has spent over 20 years camping across the US — from BLM dispersed sites in the Southwest to KOA campgrounds in the Pacific Northwest. He writes practical, no-nonsense guides to help fellow campers get outdoors with confidence.