Brewing Coffee with a Campfire Percolator: A Guide
Quick answer
- Get a good quality percolator. Stainless steel or enamel-coated are solid choices.
- Use coarse-ground coffee. Fine grounds will clog the filter.
- Start with cold water. It heats more evenly.
- Keep the heat moderate. Don’t blast it.
- Listen for the gurgle. That’s your signal.
- Let it sit a minute after brewing. Coffee tastes better when it settles.
For a durable and classic option, consider a high-quality stainless steel percolator. It’s a solid choice for campfire brewing.
![COLETTI Bozeman Percolator Coffee Pot â?NO Aluminum or Plastic [9 cup]](https://m.media-amazon.com/images/I/31Wxzktrx5L._SL160_.jpg)
What to check first (do this before you drive out)
Before you even think about that first delicious sip, there are a few crucial things to get sorted. This isn’t just about coffee; it’s about being prepared.
- Land manager / legality: Who’s in charge out there? Is it the US Forest Service, Bureau of Land Management (BLM), a National Park, or a state park? Each has its own rules. Sometimes you’re on private land, too. Always check the specific land management agency’s website or call their local office. Ignorance isn’t a valid defense, and you don’t want to get fined.
- Access/road conditions: Can your rig actually get to where you want to camp? A Subaru Outback is great, but it won’t handle a serious rut or boulder field. Check recent reports for road conditions. Mud, snow, or washouts can turn a simple drive into a recovery mission. Know your vehicle’s limits.
- Fire restrictions + weather + wind: This is a big one. Campfires are amazing, but they can be dangerous if misused. Check for current fire bans. Even if fires are allowed, consider the wind. A gust can send embers flying. Always have water and a shovel ready, no matter what. Check the forecast for rain, extreme heat, or cold.
- Water plan + waste plan (Leave No Trace): Where are you getting your water? Bring enough or know where to safely filter/purify it. And what about trash? Pack it in, pack it out. That includes coffee grounds and used filters. Leave your campsite cleaner than you found it. It’s not just a suggestion; it’s the way we keep these places wild.
- Safety (wildlife, distance to help, comms): What critters are in the area? Know how to store food properly to avoid unwanted visitors. How far is the nearest town or ranger station? Cell service is often spotty or non-existent. Have a plan for emergencies, whether it’s a satellite communicator or just letting someone know your itinerary.
Step-by-step (field workflow)
Alright, let’s get that coffee brewing. It’s a simple process, but doing it right makes all the difference.
1. Gather your gear.
- What to do: Get your percolator, coffee grounds, water, heat source (fire or stove), and mug ready.
- What “good” looks like: Everything is within easy reach, and you’re not scrambling around.
- Common mistake: Forgetting the coffee. Yep, it happens. Double-check your pack.
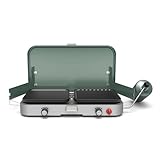
If a campfire isn’t an option, a reliable portable camping stove is an excellent alternative for heating your percolator.
2. Add water.
- What to do: Pour cold, fresh water into the percolator’s base. Fill it up to the little spout or the marked fill line, but not higher.
- What “good” looks like: Water is clean and at the correct level.
- Common mistake: Overfilling. This can cause the coffee to brew too weak or overflow.
3. Insert the coffee basket.
- What to do: Place the basket with the stem into the percolator. Make sure the stem reaches the bottom.
- What “good” looks like: The basket sits securely and the stem is properly seated.
- Common mistake: Not seating the stem properly. It needs to connect to the bottom to draw water up.
4. Add coffee grounds.
- What to do: Spoon coarse-ground coffee into the basket. A good starting point is about 1-2 tablespoons per cup of water.
- What “good” looks like: Grounds are evenly distributed and the basket isn’t packed too tight.
- Common mistake: Using fine grounds. They’ll blow right through the filter and make muddy coffee. Coarse is key.
5. Put on the lid and pump.
- What to do: Place the lid securely on the percolator. If it has a glass knob, you’ll use that to watch the brewing.
- What “good” looks like: The lid is snug, and the glass knob is clear.
- Common mistake: Forgetting the lid. Your coffee will boil away, and heat will escape.
6. Place on heat source.
- What to do: Set the percolator over your campfire coals or stove. Aim for medium heat.
- What “good” looks like: The percolator is stable and heating evenly.
- Common mistake: Blasting it with high heat. This can scorch the coffee and make it bitter. Patience, grasshopper.
7. Watch and listen.
- What to do: Keep an eye on the glass knob. You’ll see coffee start to bubble up and cycle through. Listen for a gentle gurgling sound.
- What “good” looks like: A steady, rhythmic gurgle and visible coffee cycling.
- Common mistake: Walking away and forgetting it. Over-brewing makes coffee taste awful.
8. Brew to your liking.
- What to do: Let it percolate for about 5-10 minutes, depending on your desired strength. You’ll see the coffee get darker.
- What “good” looks like: The coffee is a rich, inviting color.
- Common mistake: Brewing too long. This extracts bitter compounds.
9. Remove from heat and let it rest.
- What to do: Carefully take the percolator off the heat. Let it sit for 2-3 minutes. This lets the grounds settle.
- What “good” looks like: The bubbling stops, and the coffee looks clearer.
- Common mistake: Pouring immediately. You’ll get grounds in your cup.
10. Pour and enjoy.
- What to do: Gently pour your fresh, hot coffee into your mug.
- What “good” looks like: A steaming cup of delicious campfire coffee.
- Common mistake: Pouring too aggressively. This can stir up settled grounds.
Common mistakes (and what happens if you ignore them)
| Mistake | What it causes | Fix |
|---|---|---|
| Using fine coffee grounds | Muddy coffee, clogged filter, bitter taste | Use coarse-ground coffee. |
| Overfilling with water | Weak coffee, messy overflow | Fill to the designated line or spout. |
| Not seating the stem correctly | Water won’t circulate, coffee won’t brew | Ensure the stem is fully seated in the bottom of the percolator. |
| Forgetting the lid | Water boils off, inefficient brewing, mess | Always put the lid on securely. |
| Using excessive heat | Scorched coffee, bitter taste, potential damage | Use medium heat; watch and listen for the brewing process. |
| Over-brewing | Extremely bitter, unpleasant taste | Brew for 5-10 minutes, depending on strength preference. |
| Pouring too soon after brewing | Grounds in your cup, gritty coffee | Let the percolator rest for 2-3 minutes after removing from heat. |
| Not cleaning the percolator | Stale taste, potential corrosion (depending on material) | Clean thoroughly after each use. |
| Using dirty water | Unpleasant taste, potential illness | Use clean water; filter or purify if necessary. |
| Improperly storing grounds | Stale or clumpy coffee | Keep coffee in an airtight container. |
Decision rules (simple if/then)
- If the fire danger level is HIGH or EXTREME, then do not use a campfire for brewing; use a camp stove instead because open flames are too risky.
- If the wind is gusting significantly, then reconsider brewing over an open fire; a stove is safer because it’s more contained.
- If you’re unsure about water purity, then boil it first or use a filter/purifier before adding it to the percolator because safe drinking water is paramount.
- If you only have fine-ground coffee, then consider using a French press or pour-over method instead of a percolator because fine grounds will ruin percolator coffee.
- If the coffee starts sputtering violently and making loud noises, then reduce the heat immediately because it’s likely boiling too hard and will become bitter.
- If the coffee looks very dark and the percolating has been going on for over 15 minutes, then remove it from the heat now to prevent it from becoming overly bitter.
- If your percolator has a painted enamel coating, then be gentle when cleaning to avoid chipping the enamel because chipped enamel can rust.
- If you’re camping in bear country, then store your coffee grounds and used coffee grounds securely with your food to avoid attracting wildlife.
- If you’re new to using a percolator, then start with a slightly lower coffee-to-water ratio and adjust on subsequent brews because you can always add more coffee, but you can’t take it away.
- If you notice any leaks in your percolator, then do not use it; repair or replace it before your next trip because leaks can be dangerous and make brewing impossible.
If your current percolator is showing signs of wear or leaks, it might be time to invest in a new, sturdy model for safe and effective brewing.
FAQ
Q: What kind of coffee grounds should I use?
A: Always use coarse-ground coffee. Fine grounds will slip through the filter and make your coffee taste muddy and bitter. Think sea salt consistency.
Q: How much coffee do I use?
A: A good starting point is 1 to 2 tablespoons of coffee per 6 ounces of water. You can adjust this based on your preference for strength.
Q: My coffee tastes bitter. What did I do wrong?
A: Usually, this means it brewed too long or at too high a heat. Try reducing the heat and brewing for a shorter time. Letting it rest after brewing also helps.
Q: Can I use pre-ground coffee from the store?
A: You can, but it’s best if it’s a “percolator grind” or a coarse grind. If it’s a standard drip grind, it might not work well.
Q: How do I clean my campfire percolator?
A: After it cools, empty the grounds and basket. Wash the percolator with warm, soapy water, rinse thoroughly, and dry completely before storing. Avoid abrasive scrubbers on enamel.
Q: What if I don’t have a campfire? Can I use a camp stove?
A: Absolutely. A camp stove works great. Just aim for medium heat, just like you would with coals.
Don’t have a campfire? A portable camping stove works perfectly for brewing your coffee, offering consistent heat control.
Q: How do I know when the coffee is ready?
A: You’ll hear a gentle gurgling sound, and you’ll see coffee bubbling up and cycling through the glass knob on the lid. That’s your signal it’s brewing.
Q: Is it okay to leave the percolator on the heat for a long time?
A: No, definitely not. Over-brewing extracts bitter compounds from the coffee. Aim for 5-10 minutes of active percolating.
What this page does NOT cover (and where to go next)
- Specific campsite reservations or fees. Check the relevant land management agency’s website.
- Detailed bear-proofing techniques. Research local wildlife safety guidelines.
- Advanced coffee brewing methods. Explore specialty coffee resources.
- Water purification methods. Look into water filter and treatment guides.