
A Step-by-Step Guide to Lighting Your Wood Burner
Quick answer
- Gather dry tinder, kindling, and larger fuel wood.
- Build a small, stable structure with your tinder and kindling.
- Light the tinder from the bottom or side.
- Gently add kindling as flames catch.
- Gradually introduce larger fuel wood as the fire grows.
- Ensure good airflow for a strong burn.
- Always have a fire extinguisher or water nearby.
What to check first (do this before you drive out)
Before you even think about striking a match, there are a few critical things to get straight. This isn’t just about comfort; it’s about safety and legality.
- Land manager / legality: Who owns this patch of dirt? Is it National Forest, BLM land, a state park, or private? Different agencies have different rules about fires. Some might have designated fire rings only, others might allow dispersed fires in certain areas. Get this info before you go. It’s usually on the agency’s website or a quick call.
- Access/road conditions: Can your rig actually get there? A gravel road might be fine in summer, but a muddy mess after rain. Check recent conditions if you can. If it’s a high-clearance or 4WD road, make sure you’ve got the right vehicle and the skills to match. Don’t be the guy stuck miles from anywhere.
- Fire restrictions + weather + wind: This is HUGE. Droughts mean fire bans. Always, always, always check current fire restrictions. A quick look at the weather forecast is also smart. High winds and dry conditions are a recipe for disaster. If it’s looking dicey, postpone the fire. Seriously.
- Water plan + waste plan (Leave No Trace): Have a plan for putting your fire out completely. This means water and a shovel. Know how to properly dispose of ashes too – scattering them away from water sources is key. Pack out what you pack in, including food scraps.
- Safety (wildlife, distance to help, comms): Be aware of your surroundings. Know what wildlife is common in the area and how to store food properly. How far are you from the nearest ranger station or town? Do you have cell service? Consider a satellite communicator for remote trips.
Step-by-step (field workflow)
Getting a fire going is an art, but it’s a learnable one. Follow these steps and you’ll be toasting marshmallows in no time.
1. Scout the location: Find a safe spot.
- What “good” looks like: A clear area, at least 10 feet from trees, bushes, and overhanging branches. Ideally, use an existing fire ring. If not, clear a patch down to bare dirt.
- Common mistake: Setting up too close to flammable stuff. This can lead to a wildfire. Always err on the side of caution.
2. Gather materials: Get your fuel ready.
- What “good” looks like: A pile of tinder (dry grass, bark shavings, cotton balls with Vaseline), a good armful of dry kindling (pencil-thick twigs), and a stack of progressively larger fuel wood (finger-thick up to wrist-thick). Everything should be bone dry.
- Common mistake: Using damp wood. It smolders, smokes like crazy, and won’t catch well. If it snaps easily, it’s good. If it bends, it’s probably too wet.
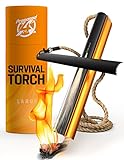
For reliable ignition, consider carrying a dedicated camping fire starter kit. These kits often include waterproof tinder and robust igniters, making fire-starting easier in various conditions.
3. Prepare the fire pit: Set up your base.
- What “good” looks like: A small mound of tinder in the center, with kindling leaned over it, creating a small teepee or criss-cross structure. Leave gaps for air.
- Common mistake: Packing the kindling too tightly. Fire needs oxygen to breathe. Airflow is critical from the start.
4. Light the tinder: Get the spark.
- What “good” looks like: Light the tinder from the bottom or side with a match or lighter. You want to see a nice, steady flame.
- Common mistake: Lighting it from the top. The flame will just burn upwards and out, leaving the main fuel unlit.
5. Feed the kindling: Build the flame.
- What “good” looks like: As the tinder burns, the kindling will start to catch. Gently add more small pieces of kindling, being careful not to smother the flames. The goal is to build a small, hot fire.
- Common mistake: Adding too much too soon. You can overwhelm the young flame. Let it grow naturally.
6. Introduce small fuel wood: Establish the fire.
- What “good” looks like: Once the kindling is burning well, start adding finger-thick pieces of wood, leaning them against the burning kindling. Continue to ensure airflow.
- Common mistake: Using logs that are too big at this stage. They’ll just sit there and smoke if the fire isn’t hot enough to ignite them.
7. Add larger fuel wood: Build a lasting fire.
- What “good” looks like: As the smaller pieces burn strongly, you can start adding wrist-thick or larger pieces. Arrange them so they can breathe and catch easily from the existing flames.
- Common mistake: Piling on too much wood at once. This can cause the fire to die down or produce excessive smoke.
8. Manage airflow: Keep it burning.
- What “good” looks like: Keep an eye on the fire. If it starts to die down, gently rearrange the logs to improve airflow or add a small piece of kindling. A good fire has bright flames, not just glowing embers.
- Common mistake: Letting the fire become a dense, smoky pile. This indicates poor airflow and inefficient burning.
9. Maintain the fire: Keep it going safely.
- What “good” looks like: Add logs as needed to maintain your desired flame. Don’t overload the fire. Keep the area around the fire clear.
- Common mistake: Leaving the fire unattended. Even a small spark can cause big problems.
10. Extinguish properly: Douse and stir.
- What “good” looks like: Pour plenty of water on the fire, stirring the ashes and embers with a shovel. Repeat until there’s no heat and no steam. Everything should be cool to the touch.
- Common mistake: Thinking it’s out when it’s just smoldering. This is a leading cause of wildfires.
Common mistakes (and what happens if you ignore them)
| Mistake | What it causes | Fix |
|---|---|---|
| Using damp or green wood | Excessive smoke, poor flame, won’t catch properly | Use only dry, seasoned wood. Test by snapping a twig. |
| Overcrowding the fire pit | Poor airflow, smoldering, smoke, inefficient burn | Arrange wood with gaps for air circulation. |
| Building fire too close to flammables | Wildfire, property damage, serious legal trouble | Clear a 10-foot radius to bare dirt. Use existing fire rings. |
| Lighting tinder from the top | Flame burns out before catching kindling | Light tinder from the bottom or side. |
| Adding large logs too early | Fire dies down, smoldering, needs more effort | Build up with tinder and kindling first, then add progressively larger wood. |
| Leaving fire unattended | Uncontrolled spread, wildfire, potential fines | Never leave a fire burning. Always have someone watching it. |
| Not having water/shovel nearby | Inability to extinguish quickly, wildfire risk | Always have extinguishing supplies readily accessible. |
| Improperly extinguishing the fire | Embers reignite, wildfire risk, environmental damage | Douse thoroughly with water, stir ashes, ensure it’s cool to touch. |
| Ignoring fire restrictions | Fines, jail time, causing a wildfire | Always check current fire bans and restrictions before lighting. |
| Not clearing the area around the fire | Sparks can ignite surrounding vegetation | Clear a minimum 10-foot radius of all flammable material. |
Decision rules (simple if/then)
- If fire restrictions are in place, then do not light a fire because it’s illegal and dangerous.
- If the wind is gusting over 15-20 mph, then reconsider lighting a fire because sparks can travel far.
- If your wood feels damp or bends instead of snapping, then do not use it for your fire because it will smoke excessively.
- If you are not on land designated for campfires (e.g., a picnic area or a developed campsite with rings), then do not build a fire because you might be trespassing or violating rules.
- If you have less than 10 feet of clear space around your intended fire pit, then find a different spot or clear more space because of wildfire risk.
- If you cannot easily access water or have no shovel to extinguish the fire, then do not light a fire because you won’t be able to put it out safely.
- If you see smoke or sparks escaping your cleared area, then immediately take action to extinguish them because they can quickly spread.
- If your tinder is not catching flame, then try adding more tinder or adjusting the airflow because the initial flame needs to be robust.
- If your fire is producing excessive smoke, then check for airflow and wood dryness because smoke usually means incomplete combustion.
- If you are in doubt about any aspect of fire safety or legality, then err on the side of caution and postpone your fire or seek expert advice because safety is paramount.
- If you are camping in a new area, then check with the local land management agency about specific fire regulations and best practices because rules can vary.
- If you are packing out your trash, then also plan to pack out your cooled ashes if required by local regulations because Leave No Trace principles apply.
FAQ
Q: What’s the best way to store firewood for camping?
A: Keep it dry and off the ground if possible. A tarp can help protect it from rain and dew. Avoid bringing wood from home unless you know it’s allowed, as it can spread invasive insects. Buy it locally.
Q: How much wood do I need for a campfire?
A: It depends on how long you want it to burn and the type of wood. Generally, gather more than you think you’ll need, focusing on dry tinder, kindling, and fuel wood in increasing sizes.
Q: Can I use accelerants like lighter fluid to start my fire?
A: While effective, accelerants can be dangerous and are often prohibited in many camping areas. They can also alter the taste of food cooked over the fire. Stick to tinder and kindling for a safer, more natural approach.
Q: What if I accidentally start a fire that gets out of control?
A: Your priority is to get yourself to safety and call for help immediately. Dial 911. Report the fire to the nearest ranger station or emergency service as soon as possible.
Q: How do I know if my fire is completely out?
A: It’s out when it’s cool to the touch. Pour water on it, stir the ashes and embers, and repeat until there’s no heat or steam rising. Feel the ashes with the back of your hand.
Q: Are there specific types of wood that burn better?
A: Hardwoods like oak, maple, and hickory tend to burn longer and hotter than softwoods like pine or fir. However, any dry wood will burn if you start it correctly.
Q: What’s the difference between tinder and kindling?
A: Tinder is the material that catches the initial spark or flame (like dry grass or bark). Kindling is the small, dry twigs and branches that catch fire from the tinder and help build the flame.
Q: Can I burn trash in my campfire?
A: Generally, no. Burning trash can release toxic fumes and leave behind non-combustible waste. Pack out all your trash. Some biodegradable materials might be okay if they burn completely, but it’s best to check local rules.
What this page does NOT cover (and where to go next)
- Specific regulations for individual national parks, forests, or BLM districts.
- Detailed instructions on building advanced fire structures for cooking or warmth.
- Identifying poisonous plants or dangerous wildlife in your specific camping location.
- Advanced wilderness survival techniques that go beyond basic firecraft.
- Information on portable wood-burning stoves or camp stoves.
- Permitting requirements for campfires in specific areas.

Camping Bob has spent over 20 years camping across the US — from BLM dispersed sites in the Southwest to KOA campgrounds in the Pacific Northwest. He writes practical, no-nonsense guides to help fellow campers get outdoors with confidence.